Skip to content
Material Design 3
Main Navigation
v3
v2
v1

English

简体中文
繁體中文
Español
Français
Русский
Português – Brasil
Deutsch
日本語
한국어
Italiano
Polski
Türkçe
čeština
magyar

English

简体中文
繁體中文
Español
Français
Русский
Português – Brasil
Deutsch
日本語
한국어
Italiano
Polski
Türkçe
čeština
magyar

Appearance

Sidebar Navigation

Foundations

Accessibility

Overview: Principles

Overview: Assistive technology

Designing: Overview

Designing: Color contrast

Designing: Structure

Designing: Flow

Designing: Elements

Writing and text: Best practices

Writing and text: Text truncation

Writing and text: Text resizing

Building for all: User needs

Building for all: Co-design

Content design

Overview

Alt text

Global writing: Overview

Global writing: Word choice

Notifications

Style guide: UX writing best practices

Style guide: Word choice

Style guide: Grammar and punctuation

Customizing Material

Devices

Watches: Overview

Watches: Foundations

Watches: Styles

Watches: Layout

XR

Design: Overview

Design: Interaction

Design: Layout

Design: Accessibility

Components: Overview

Components: App bars

Components: Dialogs

Components: Nav bar

Components: Nav rail

Components: Toolbars

Design tokens: Overview

Design tokens: How to use tokens

Interaction

Gestures

Inputs

Selection

States: Overview

States: State layers

States: Applying states

Layout

Overview: Overview

Overview: Parts of layout

Overview: Adaptive design

Scaffold: Overview

Scaffold: Bars

Scaffold: Rails

Scaffold: Panes

Grids & spacing: Overview

Grids & spacing: Grids

Grids & spacing: Spacing

Grids & spacing: Density

Breakpoints: Overview

Breakpoints: Compact

Breakpoints: Medium

Breakpoints: Expanded

Breakpoints: Large & extra-large

Bidirectionality & RTL

Canonical examples: Overview

Canonical examples: Feed

Canonical examples: List-detail

Canonical examples: Supporting pane

Usability: Overview

Usability: Applying M3 Expressive

Material A-Z

Styles

Color

Color system: Overview

Color system: How the system works

Color roles

Color schemes

Choosing a scheme

Static: Baseline

Static: Custom brand

Dynamic: Choosing a source

Dynamic: User-generated source

Dynamic: Content-based source

Advanced: Overview

Advanced: Apply colors

Advanced: Define new colors

Advanced: Adjust existing colors

Color resources

Elevation: Overview

Elevation: Applying elevation

Elevation: Tokens

Icons: Overview

Icons: Designing icons

Icons: Applying icons

Motion

Motion physics system: How it works

Motion physics system: Specs

Easing and duration: Applying easing and duration

Easing and duration: Tokens & specs

Transitions: Transition patterns

Transitions: Applying transitions

Shape: Overview & principles

Shape: Corner radius scale

Shape: Shape morph

Spacing: Overview

Spacing: Applying spacing

Spacing: Tokens

Typography: Overview

Typography: Fonts

Typography: Type scale & tokens

Typography: Applying type

Typography: Editorial treatments

Components

App bars: Overview

App bars: Specs

App bars: Guidelines

App bars: Accessibility

Badges: Overview

Badges: Specs

Badges: Guidelines

Badges: Accessibility

Buttons

All buttons

Button groups: Overview

Button groups: Specs

Button groups: Guidelines

Button groups: Accessibility

Buttons: Overview

Buttons: Specs

Buttons: Guidelines

Buttons: Accessibility

Extended FABs: Overview

Extended FABs: Specs

Extended FABs: Guidelines

Extended FABs: Accessibility

FAB menu: Overview

FAB menu: Specs

FAB menu: Guidelines

FAB menu: Accessibility

FABs: Overview

FABs: Specs

FABs: Guidelines

FABs: Accessibility

Icon buttons: Overview

Icon buttons: Specs

Icon buttons: Guidelines

Icon buttons: Accessibility

Segmented buttons: Overview

Segmented buttons: Specs

Segmented buttons: Guidelines

Segmented buttons: Accessibility

Split button: Overview

Split button: Specs

Split button: Guidelines

Split button: Accessibility

Cards: Overview

Cards: Specs

Cards: Guidelines

Cards: Accessibility

Carousel: Overview

Carousel: Specs

Carousel: Guidelines

Carousel: Accessibility

Checkbox: Overview

Checkbox: Specs

Checkbox: Guidelines

Checkbox: Accessibility

Chips: Overview

Chips: Specs

Chips: Guidelines

Chips: Accessibility

Date & time pickers

Date pickers: Overview

Date pickers: Specs

Date pickers: Guidelines

Date pickers: Accessibility

Time pickers: Overview

Time pickers: Specs

Time pickers: Guidelines

Time pickers: Accessibility

Dialogs: Overview

Dialogs: Specs

Dialogs: Guidelines

Dialogs: Accessibility

Divider: Overview

Divider: Specs

Divider: Guidelines

Divider: Accessibility

Lists: Overview

Lists: Specs

Lists: Guidelines

Lists: Accessibility

Loading & progress

Loading indicator: Overview

Loading indicator: Specs

Loading indicator: Guidelines

Loading indicator: Accessibility

Progress indicators: Overview

Progress indicators: Specs

Progress indicators: Guidelines

Progress indicators: Accessibility

Menus: Overview

Menus: Specs

Menus: Guidelines

Menus: Accessibility

Navigation

Navigation bar: Overview

Navigation bar: Specs

Navigation bar: Guidelines

Navigation bar: Accessibility

Navigation drawer: Overview

Navigation drawer: Specs

Navigation drawer: Guidelines

Navigation drawer: Accessibility

Navigation rail: Overview

Navigation rail: Specs

Navigation rail: Guidelines

Navigation rail: Accessibility

Radio button: Overview

Radio button: Specs

Radio button: Guidelines

Radio button: Accessibility

Search: Overview

Search: Specs

Search: Guidelines

Search: Accessibility

Sheets

Bottom sheets: Overview

Bottom sheets: Specs

Bottom sheets: Guidelines

Bottom sheets: Accessibility

Side sheets: Overview

Side sheets: Specs

Side sheets: Guidelines

Side sheets: Accessibility

Sliders: Overview

Sliders: Specs

Sliders: Guidelines

Sliders: Accessibility

Snackbar: Overview

Snackbar: Specs

Snackbar: Guidelines

Snackbar: Accessibility

Switch: Overview

Switch: Specs

Switch: Guidelines

Switch: Accessibility

Tabs: Overview

Tabs: Specs

Tabs: Guidelines

Tabs: Accessibility

Text fields: Overview

Text fields: Specs

Text fields: Guidelines

Text fields: Accessibility

Toolbars: Overview

Toolbars: Specs

Toolbars: Guidelines

Toolbars: Accessibility

Tooltips: Overview

Tooltips: Specs

Tooltips: Guidelines

Tooltips: Accessibility

On this page

Grids & spacing: Density ​

Grids and spacing organize content and actions for any layout


  • Information density is the consideration of the amount of information visible on the screen
  • The default target size should be at least 48x48 CSS pixels
  • People can change density as long as the density controls are accessible
  • Apply density thoughtfully; not every layout needs it
  • Layout and component scaling (component adaptation or component density) can allow people to scan, view, or compare more information at once
Information density can change based on context and preference
Consider whether components should scale

Information density

  • Information density can be achieved through layout and design decisions without using component scaling
  • Some people may not benefit from increased density

Component scaling

  • Components can adapt and change dimensions to help people scan, view, or compare different amounts of information
  • Don't apply component scaling by default if it would result in a target below 48x48 CSS pixels
Information density and component scaling can be used together to provide more information and additional user control

Information density ​

Information density refers to the amount of content (such as text, images, or videos) in a given space.

A layout’s spacing dimensions, including margins, spacers, and padding, can change to increase or decrease its information density. High density layouts are useful when people need to scan, view, or compare a lot of information, such as in a data table. Increasing the layout density of lists, tables, and long forms makes more content available on-screen.

Consider density settings in the context of a device. Although a person may prefer a denser layout for desktop, they may not for mobile. Density shouldn’t automatically change across breakpointsBreakpoints are opinionated window sizes where a layout changes to match available space, device conventions, and ergonomics (previously window size classes).More on breakpoints or orientation unless a person changes it.
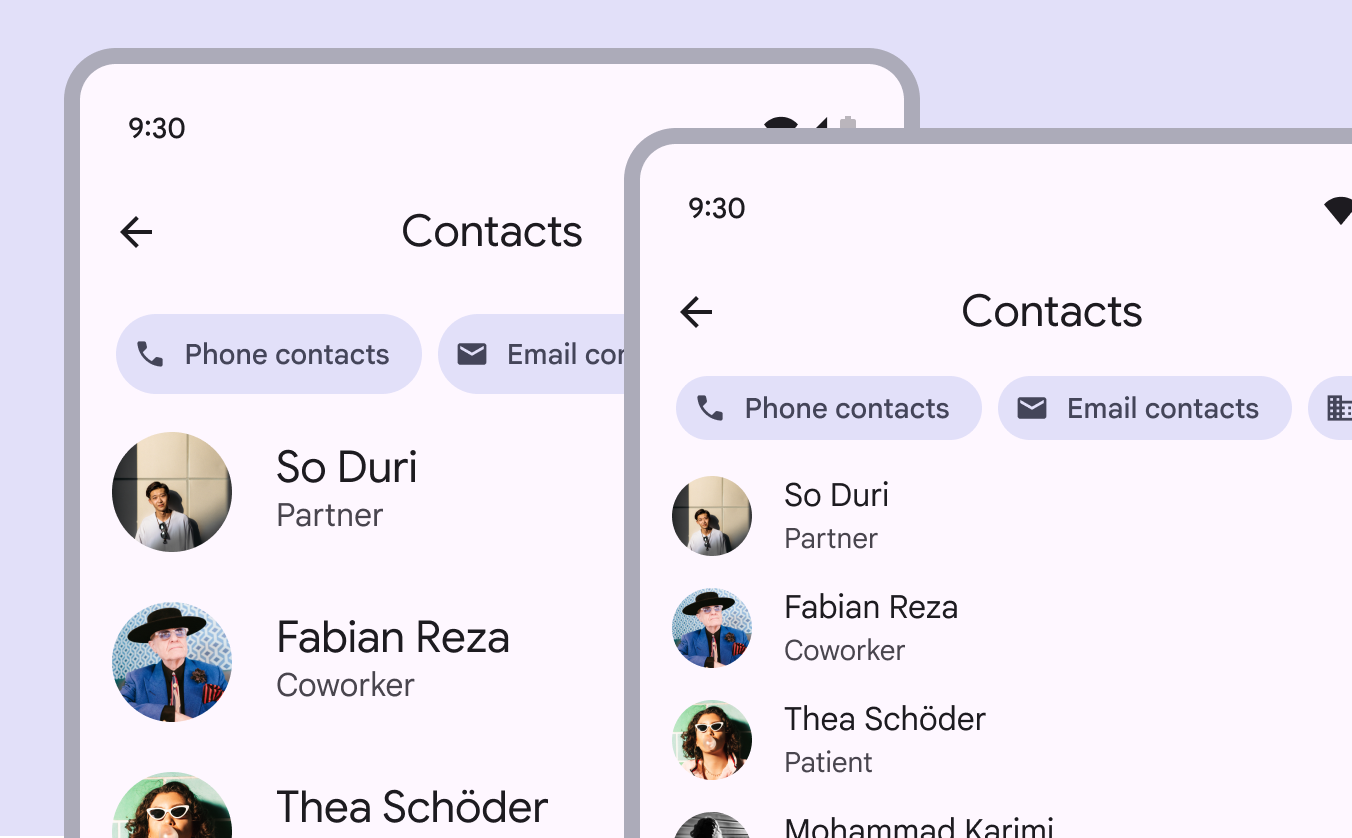
2 layouts: 1 with low density and 1 with high density.
Do Consider using higher density information design when people need to scan lots of information
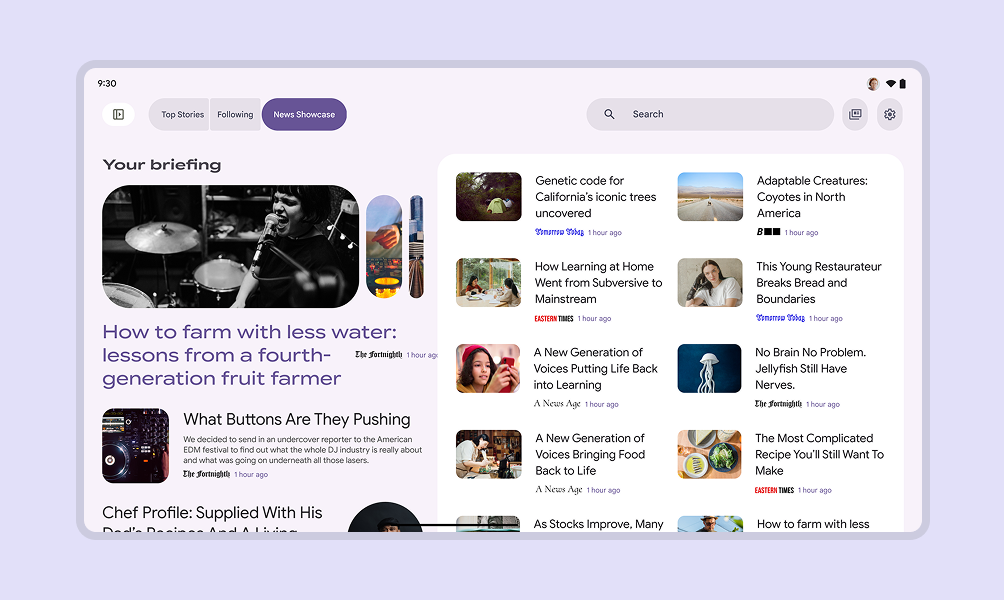
News website on desktop displaying a high information density.
Consider the amount and priority of information on-screen. Higher density can be useful for data-rich products where people expect to scan lots of information quickly. Examples: News, financial portals, dashboards
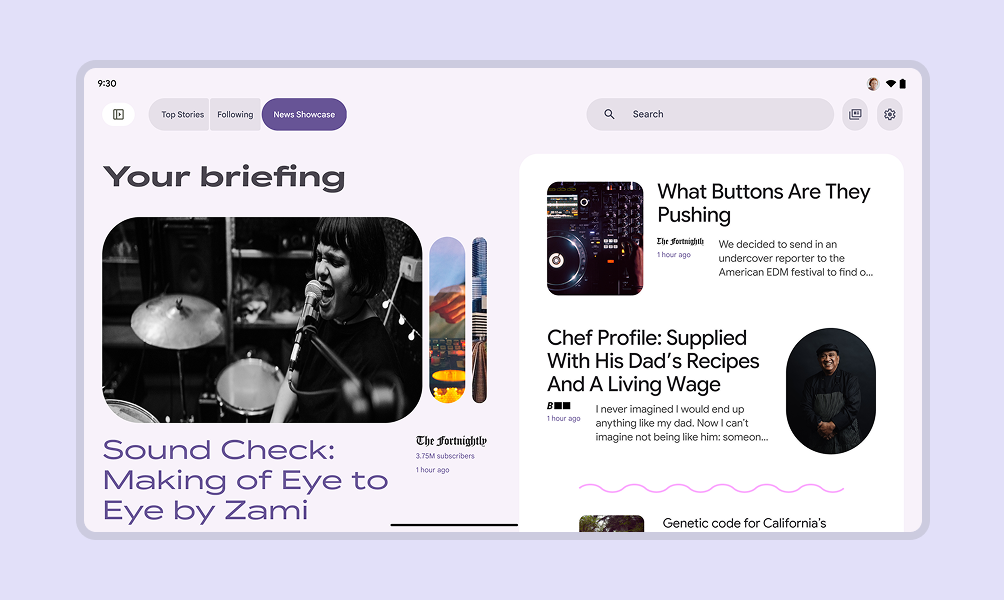
News website on desktop displaying a low information density.
Lower density can be better for sites prioritizing aesthetics, a focused message, less information, or easier navigation

Component scaling ​

The component density scale controls the internal spacing of individual components.

The density scale is numbered, starting at 0 for a component’s default density. The scale moves to negative numbers (-1, -2, -3) as space decreases, creating higher density.

Higher density is typically applied by decreasing the top and bottom padding or overall height by 4dp.
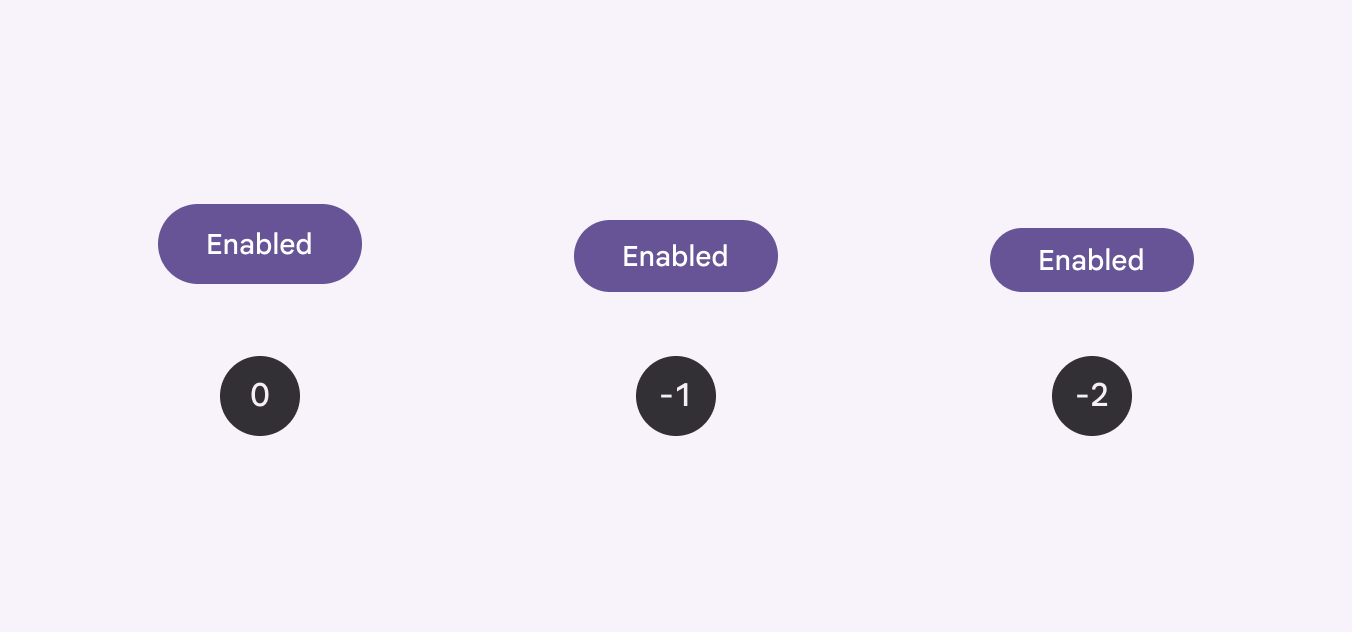
3 buttons with densities of 0, -1, -2.
Apply component density based on the needs and layout of a design

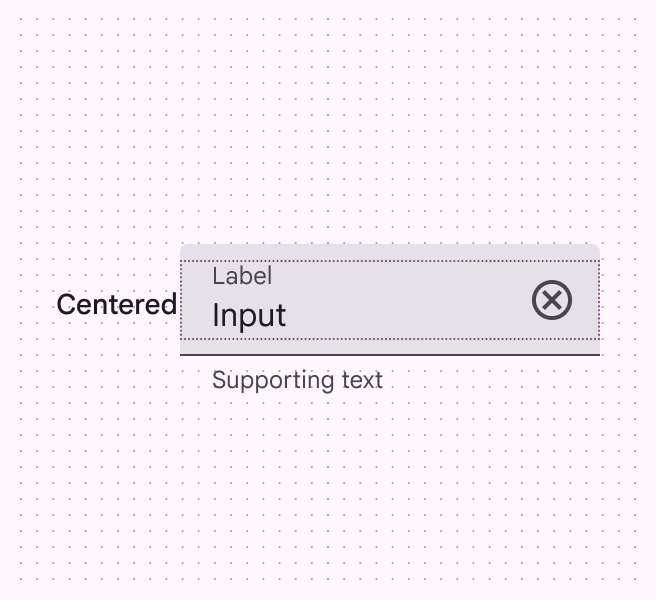
Center the grouped element within the component container.

Text size shouldn’t change as the container size scales.
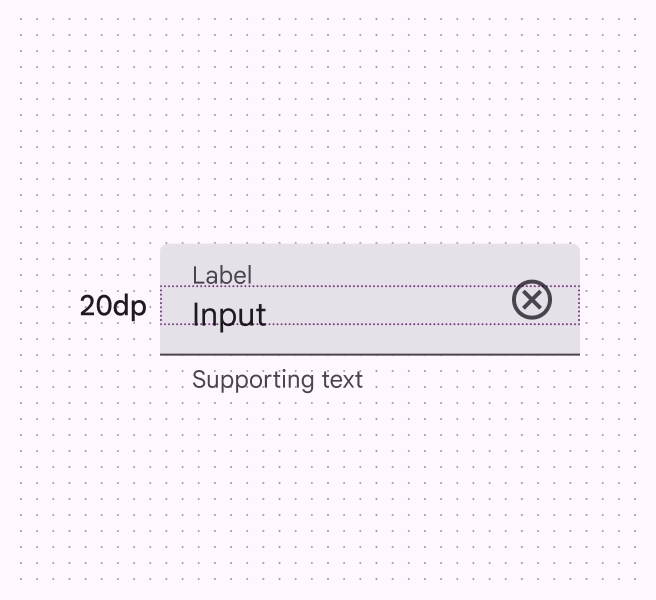
Text field showing 20dp between label and input.
The measurement between the label and input is 20dp
Parent container showing label above input.
The label and input are centered within their parent container
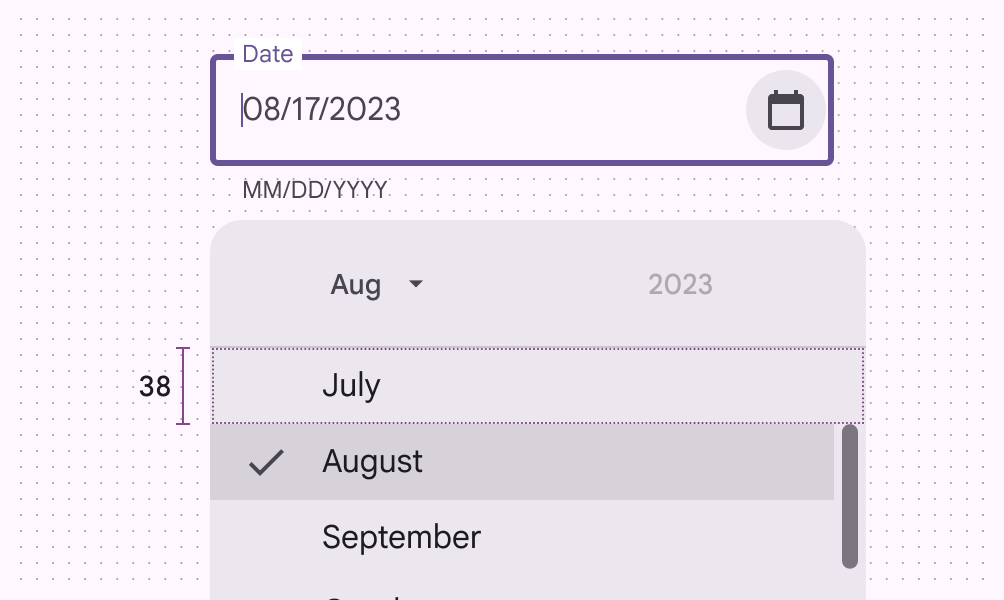
Dropdown menu with high density items and selectable space height of 38dp.
Don’t Increase density in UIs that involve focused tasks, such as selecting from a menu. It reduces usability by limiting selectable space.
Single-line snackbar with high density.
Don’t Increase the density in components that alert a person of changes, such as snackbars or dialogs

Avoid applying component scaling by default ​

People should be able to opt in to dense layouts and components.

To ensure density settings can be easily reverted, settings interactions must use default target sizes (48x48 CSS pixels).

Don't scale layouts below 48x48dp by default.

People can opt in to dense layouts in settings

Targets ​

Dense components can be less accessible because interactive elements are smaller, so use caution when increasing information density.
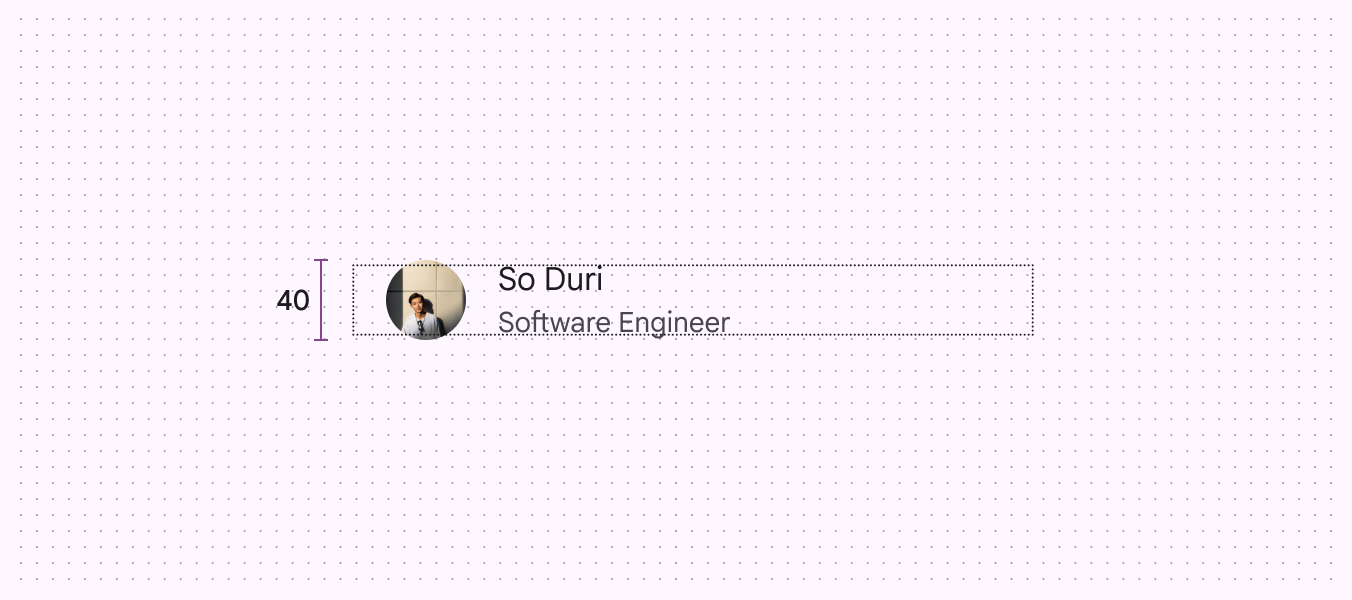
Selectable target of only 40dp.
Caution Use caution when applying component scaling where selectable targets will be reduced to less than 48x48dp. Only apply density where it provides a better experience.

Use caution when applying density to interaction targets. Accessible targets should retain a minimum of 48x48dp, even if the visual element, such as an icon, is smaller.
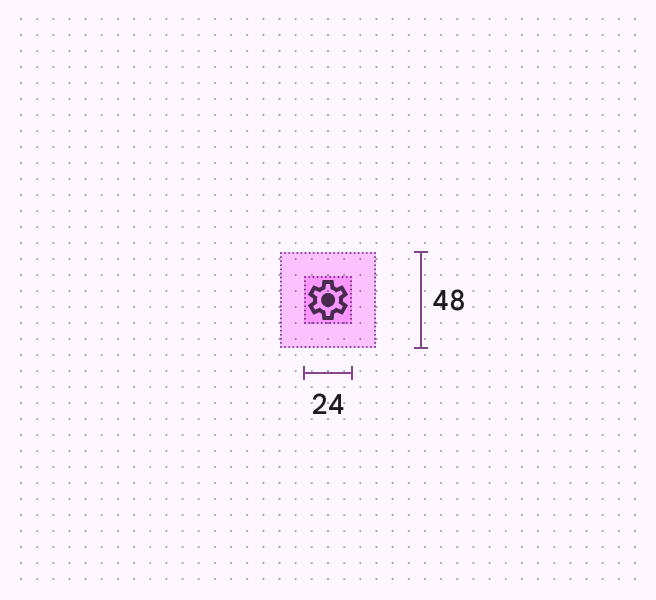
Settings button icon is 24x24dp, but has interaction target of 48x48dp.
The target should remain 48x48dp, even if the icon is smaller
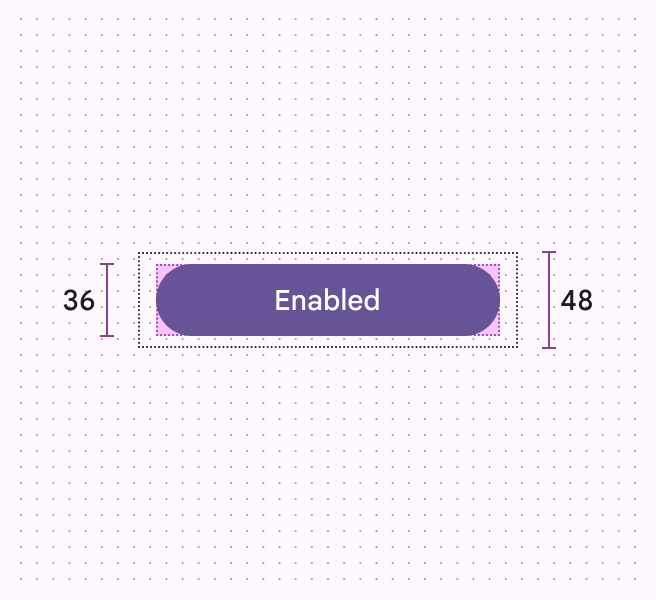
Button with height of 36dp and interaction target of 48dp.
The interaction target of a common button can be larger, as long as it meets the 48x48dp minimum size

Pixel density ​

Pixel density is the number of pixels per inch. High-density screens have more pixels per inch than low-density ones. Elements with the same pixel dimensions appear larger on low-density screens and smaller on high-density screens.

To calculate pixel density:

Pixel density = Screen width (or height) in pixels / Screen width (or height) in inches
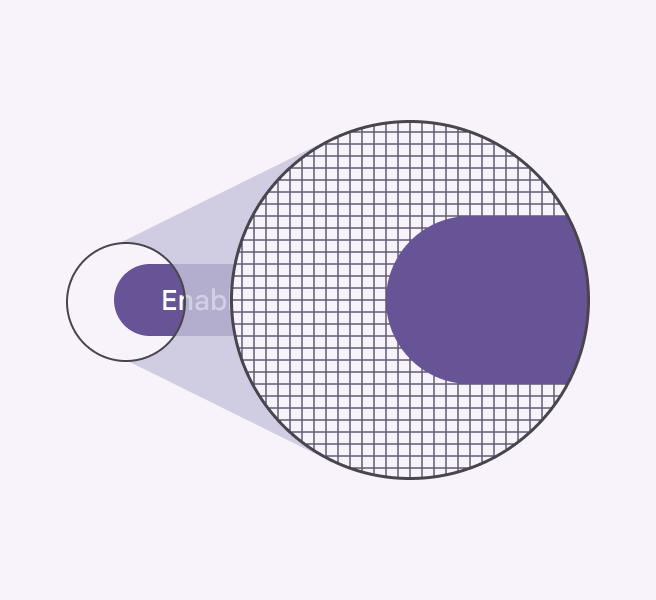
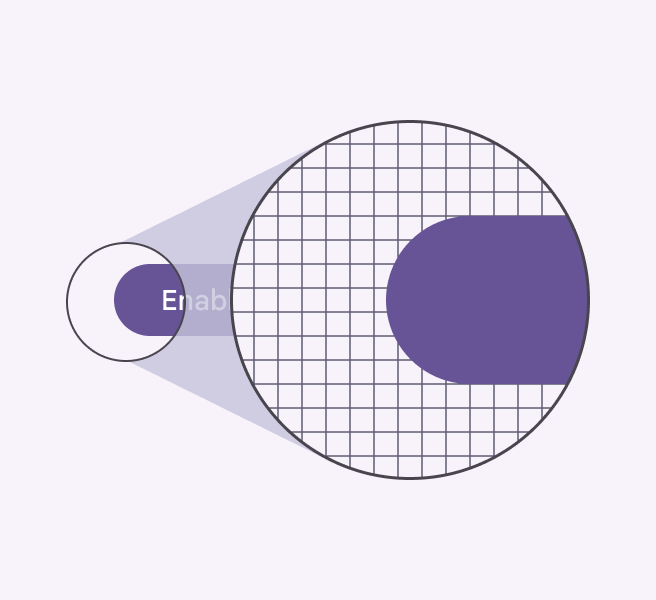
Magnified UI element showing a high number of pixels in the focus area.
High-density elements have more pixels per inch
Magnified UI element showing a low number of pixels in the focus area.
Low-density elements have fewer pixels per inch

Density-independent pixels

Density-independent pixels, written as dp, are flexible units that scale to have uniform dimensions on any screen. They provide a flexible way to accommodate a design across devices. The Material design system uses density-independent pixels to display elements consistently on screens with different densities.

A dp is equal to one physical pixel on a screen with a density of 160.

To calculate dp:
dp = (width in pixels * 160) / screen density
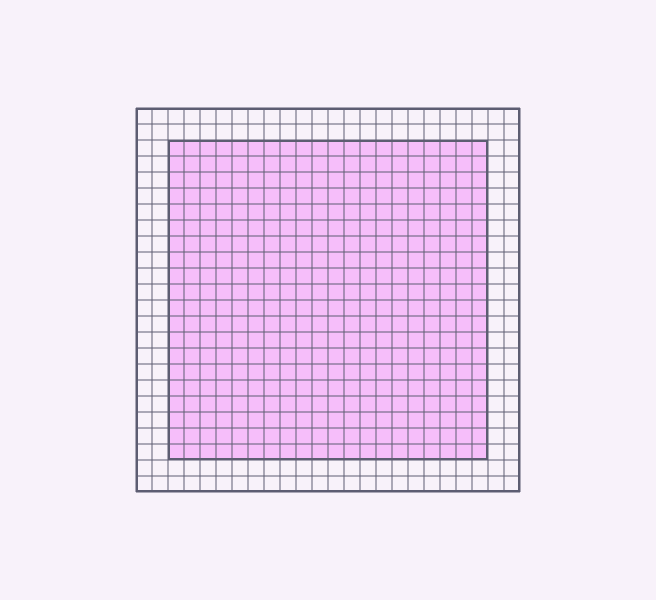
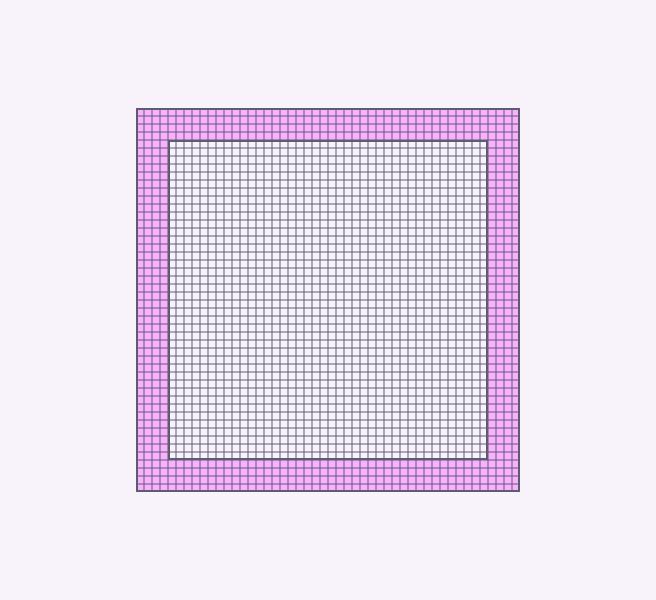
Screen with grid representing a low number of pixels.
Low-density screen displayed with density independence
Screen with grid representing a high number of pixels.
High-density screen displayed with density independence
Screen physical widthScreen densityScreen width in pixelsScreen width in dps
1.5 in120180 px240dp
1.5 in160240 px
1.5 in240360 px
Pager
Previous pageGrids & spacing: Spacing
Next pageBreakpoints: Overview

Released under the Apache 2.0 or CC BY 4.0

Copyright © 2018-Present Google

https://m3.material.io/foundations/layout/grids-spacing/density

Released under the Apache 2.0 or CC BY 4.0

Copyright © 2018-Present Google