Skip to content
Material Design 3
Main Navigation
v3
v2
v1

English

简体中文
繁體中文
Español
Français
Русский
Português – Brasil
Deutsch
日本語
한국어
Italiano
Polski
Türkçe
čeština
magyar

English

简体中文
繁體中文
Español
Français
Русский
Português – Brasil
Deutsch
日本語
한국어
Italiano
Polski
Türkçe
čeština
magyar

Appearance

Sidebar Navigation

Foundations

Accessibility

Overview: Principles

Overview: Assistive technology

Designing: Overview

Designing: Color contrast

Designing: Structure

Designing: Flow

Designing: Elements

Writing and text: Best practices

Writing and text: Text truncation

Writing and text: Text resizing

Building for all: User needs

Building for all: Co-design

Content design

Overview

Alt text

Global writing: Overview

Global writing: Word choice

Notifications

Style guide: UX writing best practices

Style guide: Word choice

Style guide: Grammar and punctuation

Customizing Material

Devices

Watches: Overview

Watches: Foundations

Watches: Styles

Watches: Layout

XR

Design: Overview

Design: Interaction

Design: Layout

Design: Accessibility

Components: Overview

Components: App bars

Components: Dialogs

Components: Nav bar

Components: Nav rail

Components: Toolbars

Design tokens: Overview

Design tokens: How to use tokens

Interaction

Gestures

Inputs

Selection

States: Overview

States: State layers

States: Applying states

Layout

Overview: Overview

Overview: Parts of layout

Overview: Adaptive design

Scaffold: Overview

Scaffold: Bars

Scaffold: Rails

Scaffold: Panes

Grids & spacing: Overview

Grids & spacing: Grids

Grids & spacing: Spacing

Grids & spacing: Density

Breakpoints: Overview

Breakpoints: Compact

Breakpoints: Medium

Breakpoints: Expanded

Breakpoints: Large & extra-large

Bidirectionality & RTL

Canonical examples: Overview

Canonical examples: Feed

Canonical examples: List-detail

Canonical examples: Supporting pane

Usability: Overview

Usability: Applying M3 Expressive

Material A-Z

Styles

Color

Color system: Overview

Color system: How the system works

Color roles

Color schemes

Choosing a scheme

Static: Baseline

Static: Custom brand

Dynamic: Choosing a source

Dynamic: User-generated source

Dynamic: Content-based source

Advanced: Overview

Advanced: Apply colors

Advanced: Define new colors

Advanced: Adjust existing colors

Color resources

Elevation: Overview

Elevation: Applying elevation

Elevation: Tokens

Icons: Overview

Icons: Designing icons

Icons: Applying icons

Motion

Motion physics system: How it works

Motion physics system: Specs

Easing and duration: Applying easing and duration

Easing and duration: Tokens & specs

Transitions: Transition patterns

Transitions: Applying transitions

Shape: Overview & principles

Shape: Corner radius scale

Shape: Shape morph

Spacing: Overview

Spacing: Applying spacing

Spacing: Tokens

Typography: Overview

Typography: Fonts

Typography: Type scale & tokens

Typography: Applying type

Typography: Editorial treatments

Components

App bars: Overview

App bars: Specs

App bars: Guidelines

App bars: Accessibility

Badges: Overview

Badges: Specs

Badges: Guidelines

Badges: Accessibility

Buttons

All buttons

Button groups: Overview

Button groups: Specs

Button groups: Guidelines

Button groups: Accessibility

Buttons: Overview

Buttons: Specs

Buttons: Guidelines

Buttons: Accessibility

Extended FABs: Overview

Extended FABs: Specs

Extended FABs: Guidelines

Extended FABs: Accessibility

FAB menu: Overview

FAB menu: Specs

FAB menu: Guidelines

FAB menu: Accessibility

FABs: Overview

FABs: Specs

FABs: Guidelines

FABs: Accessibility

Icon buttons: Overview

Icon buttons: Specs

Icon buttons: Guidelines

Icon buttons: Accessibility

Segmented buttons: Overview

Segmented buttons: Specs

Segmented buttons: Guidelines

Segmented buttons: Accessibility

Split button: Overview

Split button: Specs

Split button: Guidelines

Split button: Accessibility

Cards: Overview

Cards: Specs

Cards: Guidelines

Cards: Accessibility

Carousel: Overview

Carousel: Specs

Carousel: Guidelines

Carousel: Accessibility

Checkbox: Overview

Checkbox: Specs

Checkbox: Guidelines

Checkbox: Accessibility

Chips: Overview

Chips: Specs

Chips: Guidelines

Chips: Accessibility

Date & time pickers

Date pickers: Overview

Date pickers: Specs

Date pickers: Guidelines

Date pickers: Accessibility

Time pickers: Overview

Time pickers: Specs

Time pickers: Guidelines

Time pickers: Accessibility

Dialogs: Overview

Dialogs: Specs

Dialogs: Guidelines

Dialogs: Accessibility

Divider: Overview

Divider: Specs

Divider: Guidelines

Divider: Accessibility

Lists: Overview

Lists: Specs

Lists: Guidelines

Lists: Accessibility

Loading & progress

Loading indicator: Overview

Loading indicator: Specs

Loading indicator: Guidelines

Loading indicator: Accessibility

Progress indicators: Overview

Progress indicators: Specs

Progress indicators: Guidelines

Progress indicators: Accessibility

Menus: Overview

Menus: Specs

Menus: Guidelines

Menus: Accessibility

Navigation

Navigation bar: Overview

Navigation bar: Specs

Navigation bar: Guidelines

Navigation bar: Accessibility

Navigation drawer: Overview

Navigation drawer: Specs

Navigation drawer: Guidelines

Navigation drawer: Accessibility

Navigation rail: Overview

Navigation rail: Specs

Navigation rail: Guidelines

Navigation rail: Accessibility

Radio button: Overview

Radio button: Specs

Radio button: Guidelines

Radio button: Accessibility

Search: Overview

Search: Specs

Search: Guidelines

Search: Accessibility

Sheets

Bottom sheets: Overview

Bottom sheets: Specs

Bottom sheets: Guidelines

Bottom sheets: Accessibility

Side sheets: Overview

Side sheets: Specs

Side sheets: Guidelines

Side sheets: Accessibility

Sliders: Overview

Sliders: Specs

Sliders: Guidelines

Sliders: Accessibility

Snackbar: Overview

Snackbar: Specs

Snackbar: Guidelines

Snackbar: Accessibility

Switch: Overview

Switch: Specs

Switch: Guidelines

Switch: Accessibility

Tabs: Overview

Tabs: Specs

Tabs: Guidelines

Tabs: Accessibility

Text fields: Overview

Text fields: Specs

Text fields: Guidelines

Text fields: Accessibility

Toolbars: Overview

Toolbars: Specs

Toolbars: Guidelines

Toolbars: Accessibility

Tooltips: Overview

Tooltips: Specs

Tooltips: Guidelines

Tooltips: Accessibility

On this page

Breakpoints: Overview ​

Breakpoints ensure layouts work across a wide range of devices


Material uses breakpoints to create adaptive designs that work across devices:

  • There are five main breakpointsBreakpoints are opinionated window sizes where a layout changes to match available space, device conventions, and ergonomics (previously window size classes).More on breakpoints: compact, medium, expanded, large, and extra-large
  • Layouts typically transition from a single pane to two or three panes as window size increases
  • When moving across breakpoints, decide which elements to reveal, divide, resize, reposition, or swap

Breakpoints overview ​

A breakpoint (previously window size class) is the window size at which a layout needs to change to match available space, device conventions, and ergonomics. These apply to Android and web.

All devices fall into one of five Material breakpoints:

  • Compact
  • Medium
  • Expanded
  • Large
  • Extra-large

Rather than designing for an ever-increasing number of display states, focusing on breakpoints ensures layouts work across a wide range of devices.
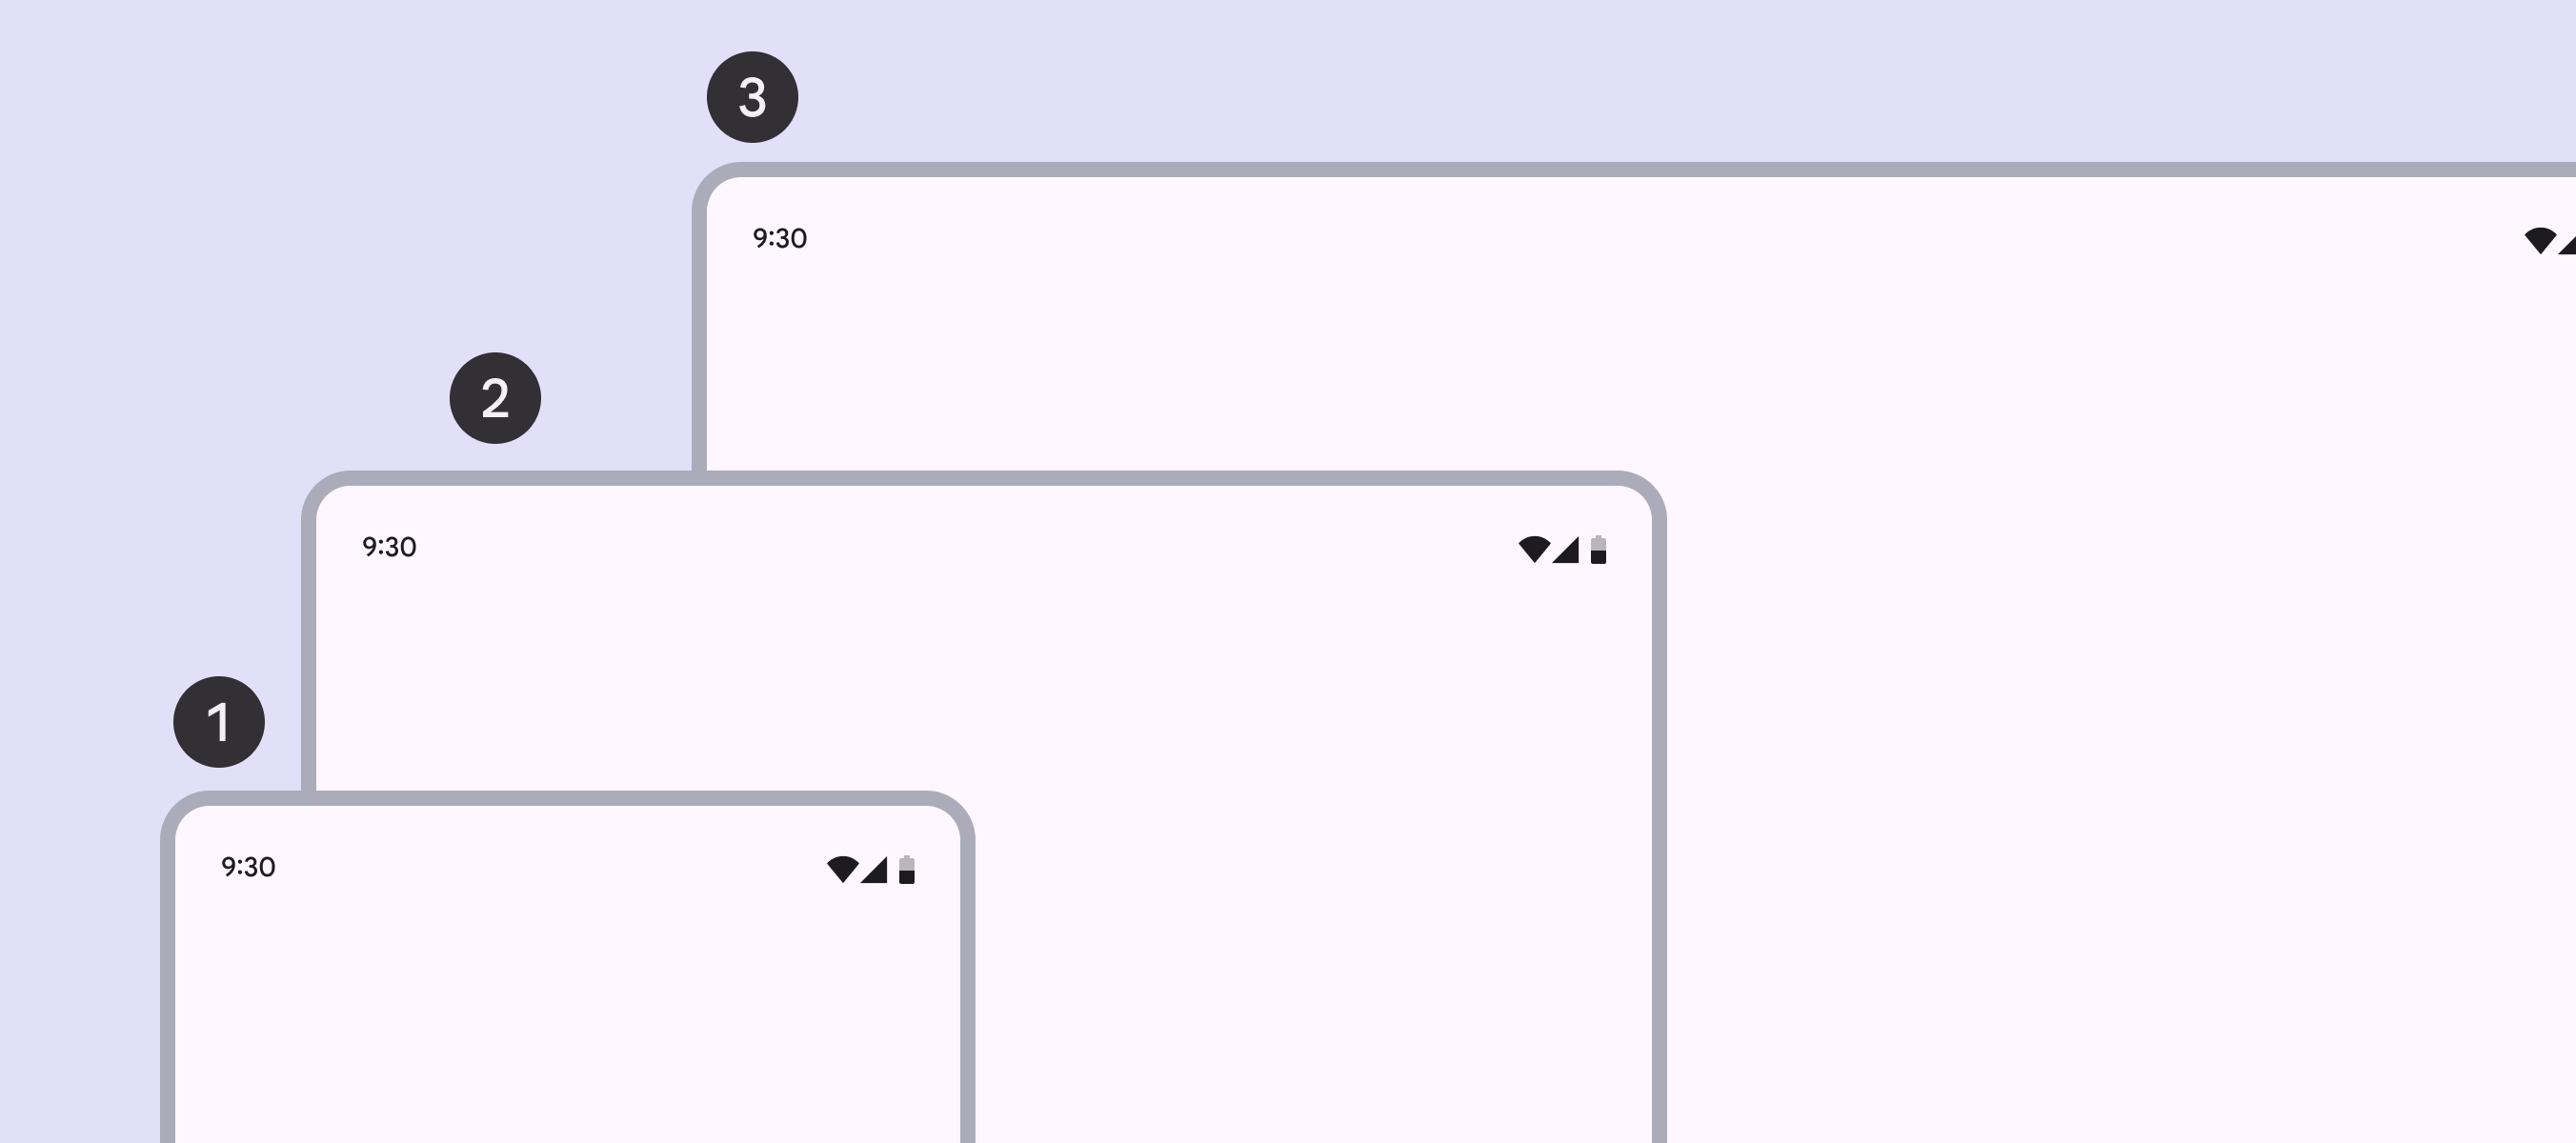
3 breakpoints from small to expanded.
  1. Compact
  2. Medium
  3. Expanded

Large and extra-large breakpoints are used on devices like laptops, desktops, and external monitors.
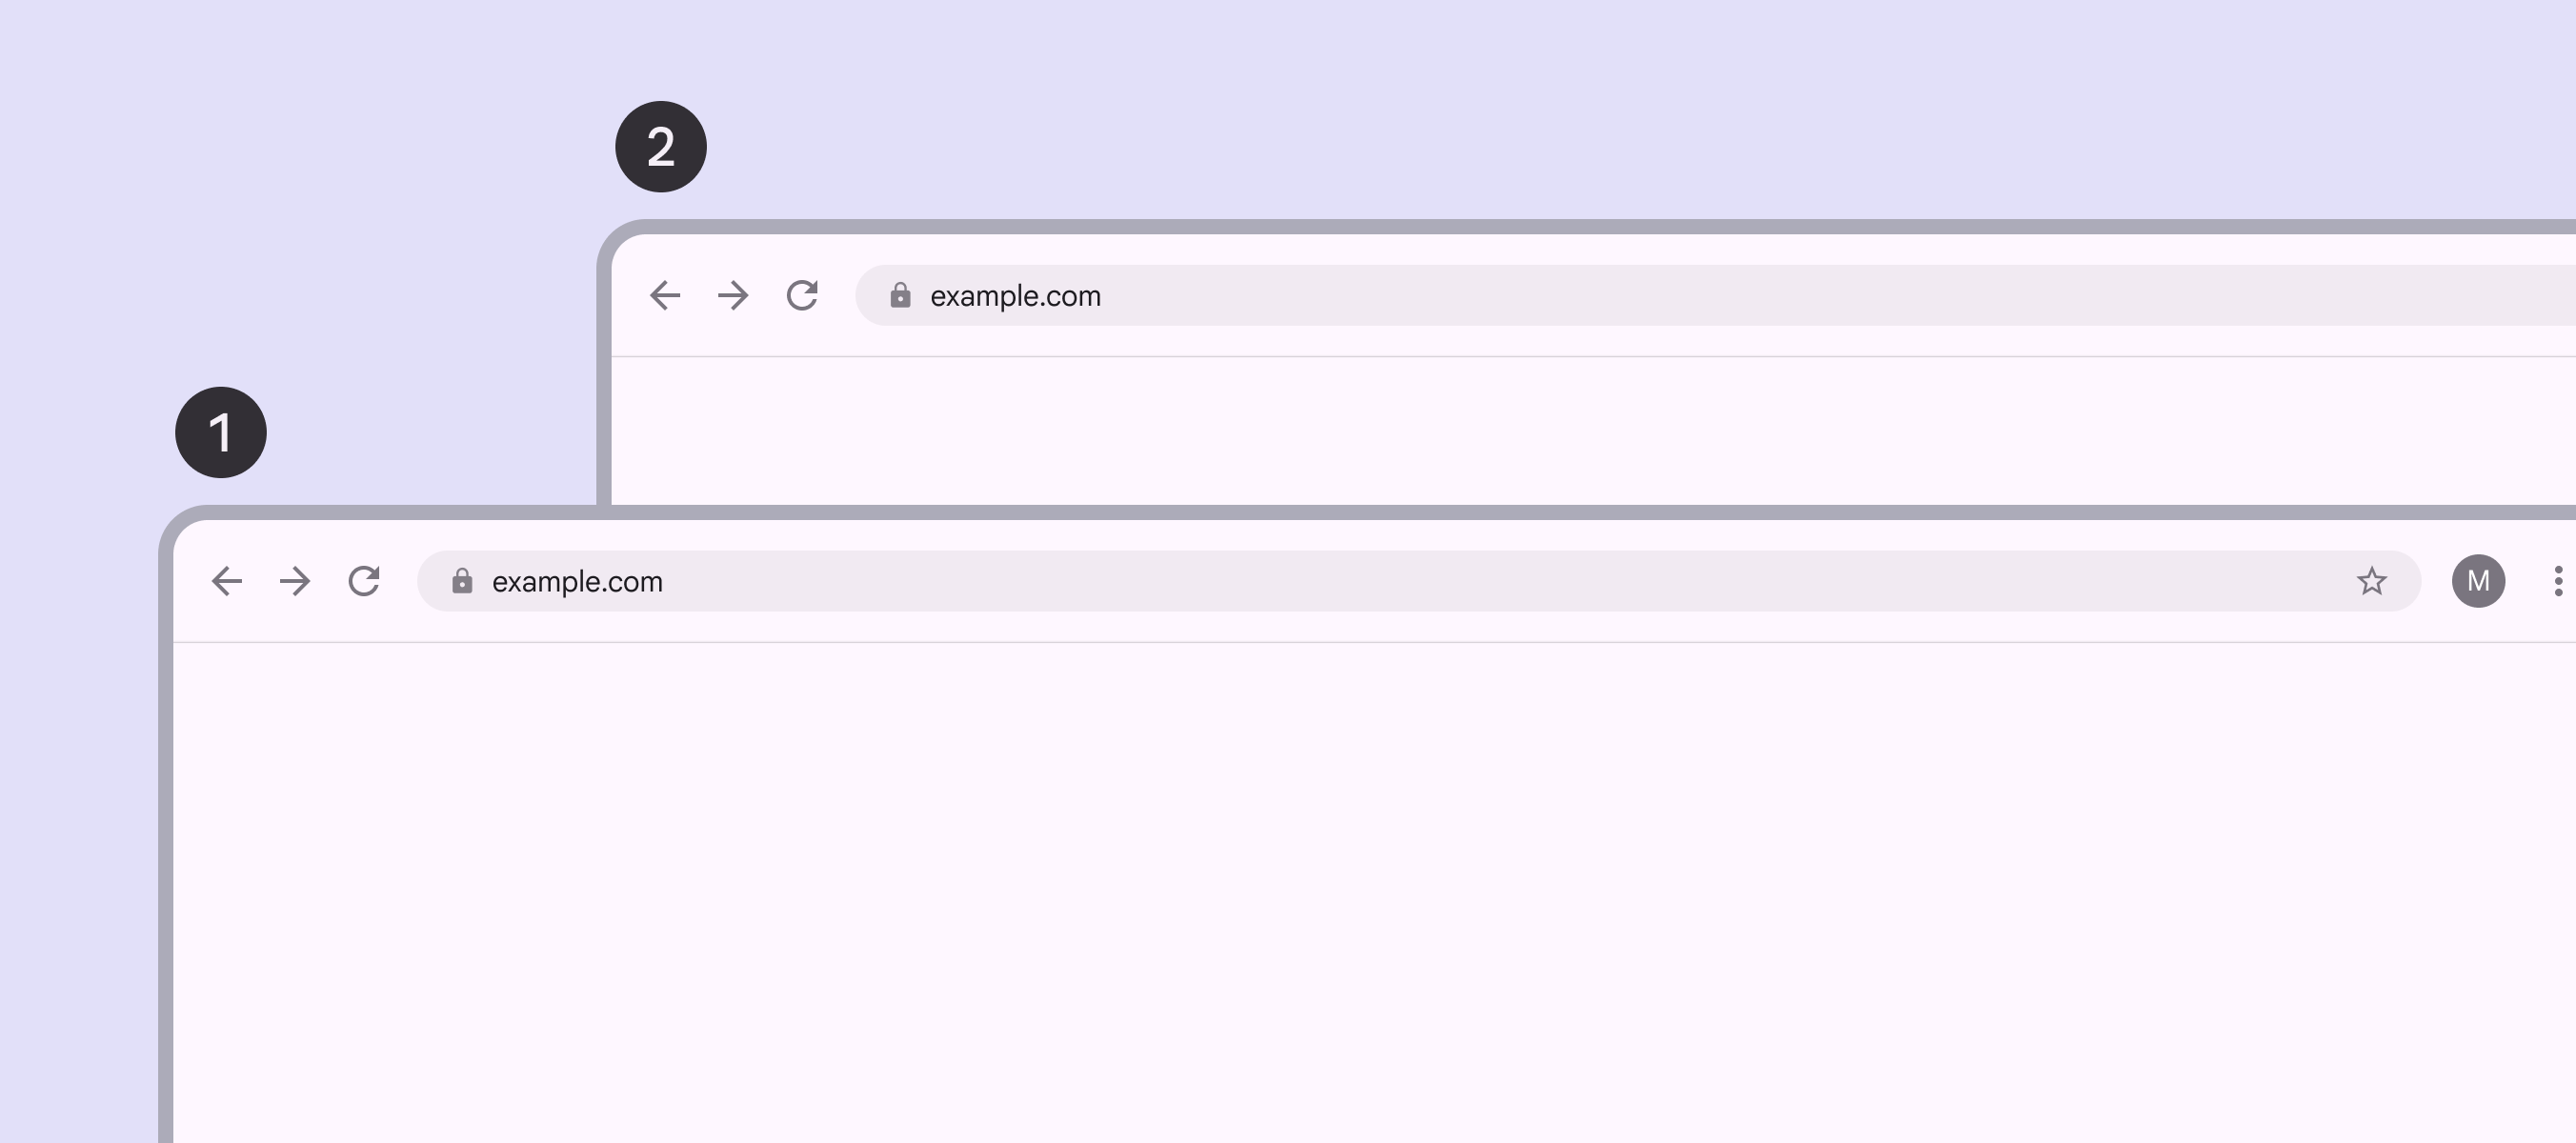
2 devices with large and extra-large breakpoints.
  1. Large
  2. Extra-large

Design for breakpoints instead of specific devices because:

  • The amount of available window space is dynamic and changes based on user behavior, such as multi-window modes or unfolding a foldable device
  • Devices fall into different breakpoints based on orientation
BreakpointWidth (dp)Common devices
CompactUnder 600dpPhone in portrait
Medium600–839dpTablet in portrait
Foldable in portrait (unfolded)
Expanded840–1199dpPhone in landscape
Tablet in landscape
Foldable in landscape (unfolded)
Desktop
Large1200–1599dpDesktop
Extra-large1600dp+Desktop
Ultra-wide monitors

Height breakpoints ​

On Android, compact, medium, and expanded breakpoints are also available for height. These can be used to adjust the layout when available vertical space is unusually small or large. However, since most layouts contain vertically scrolling content, it's rare that layouts need to adjust to available height.

Designing across breakpoints ​
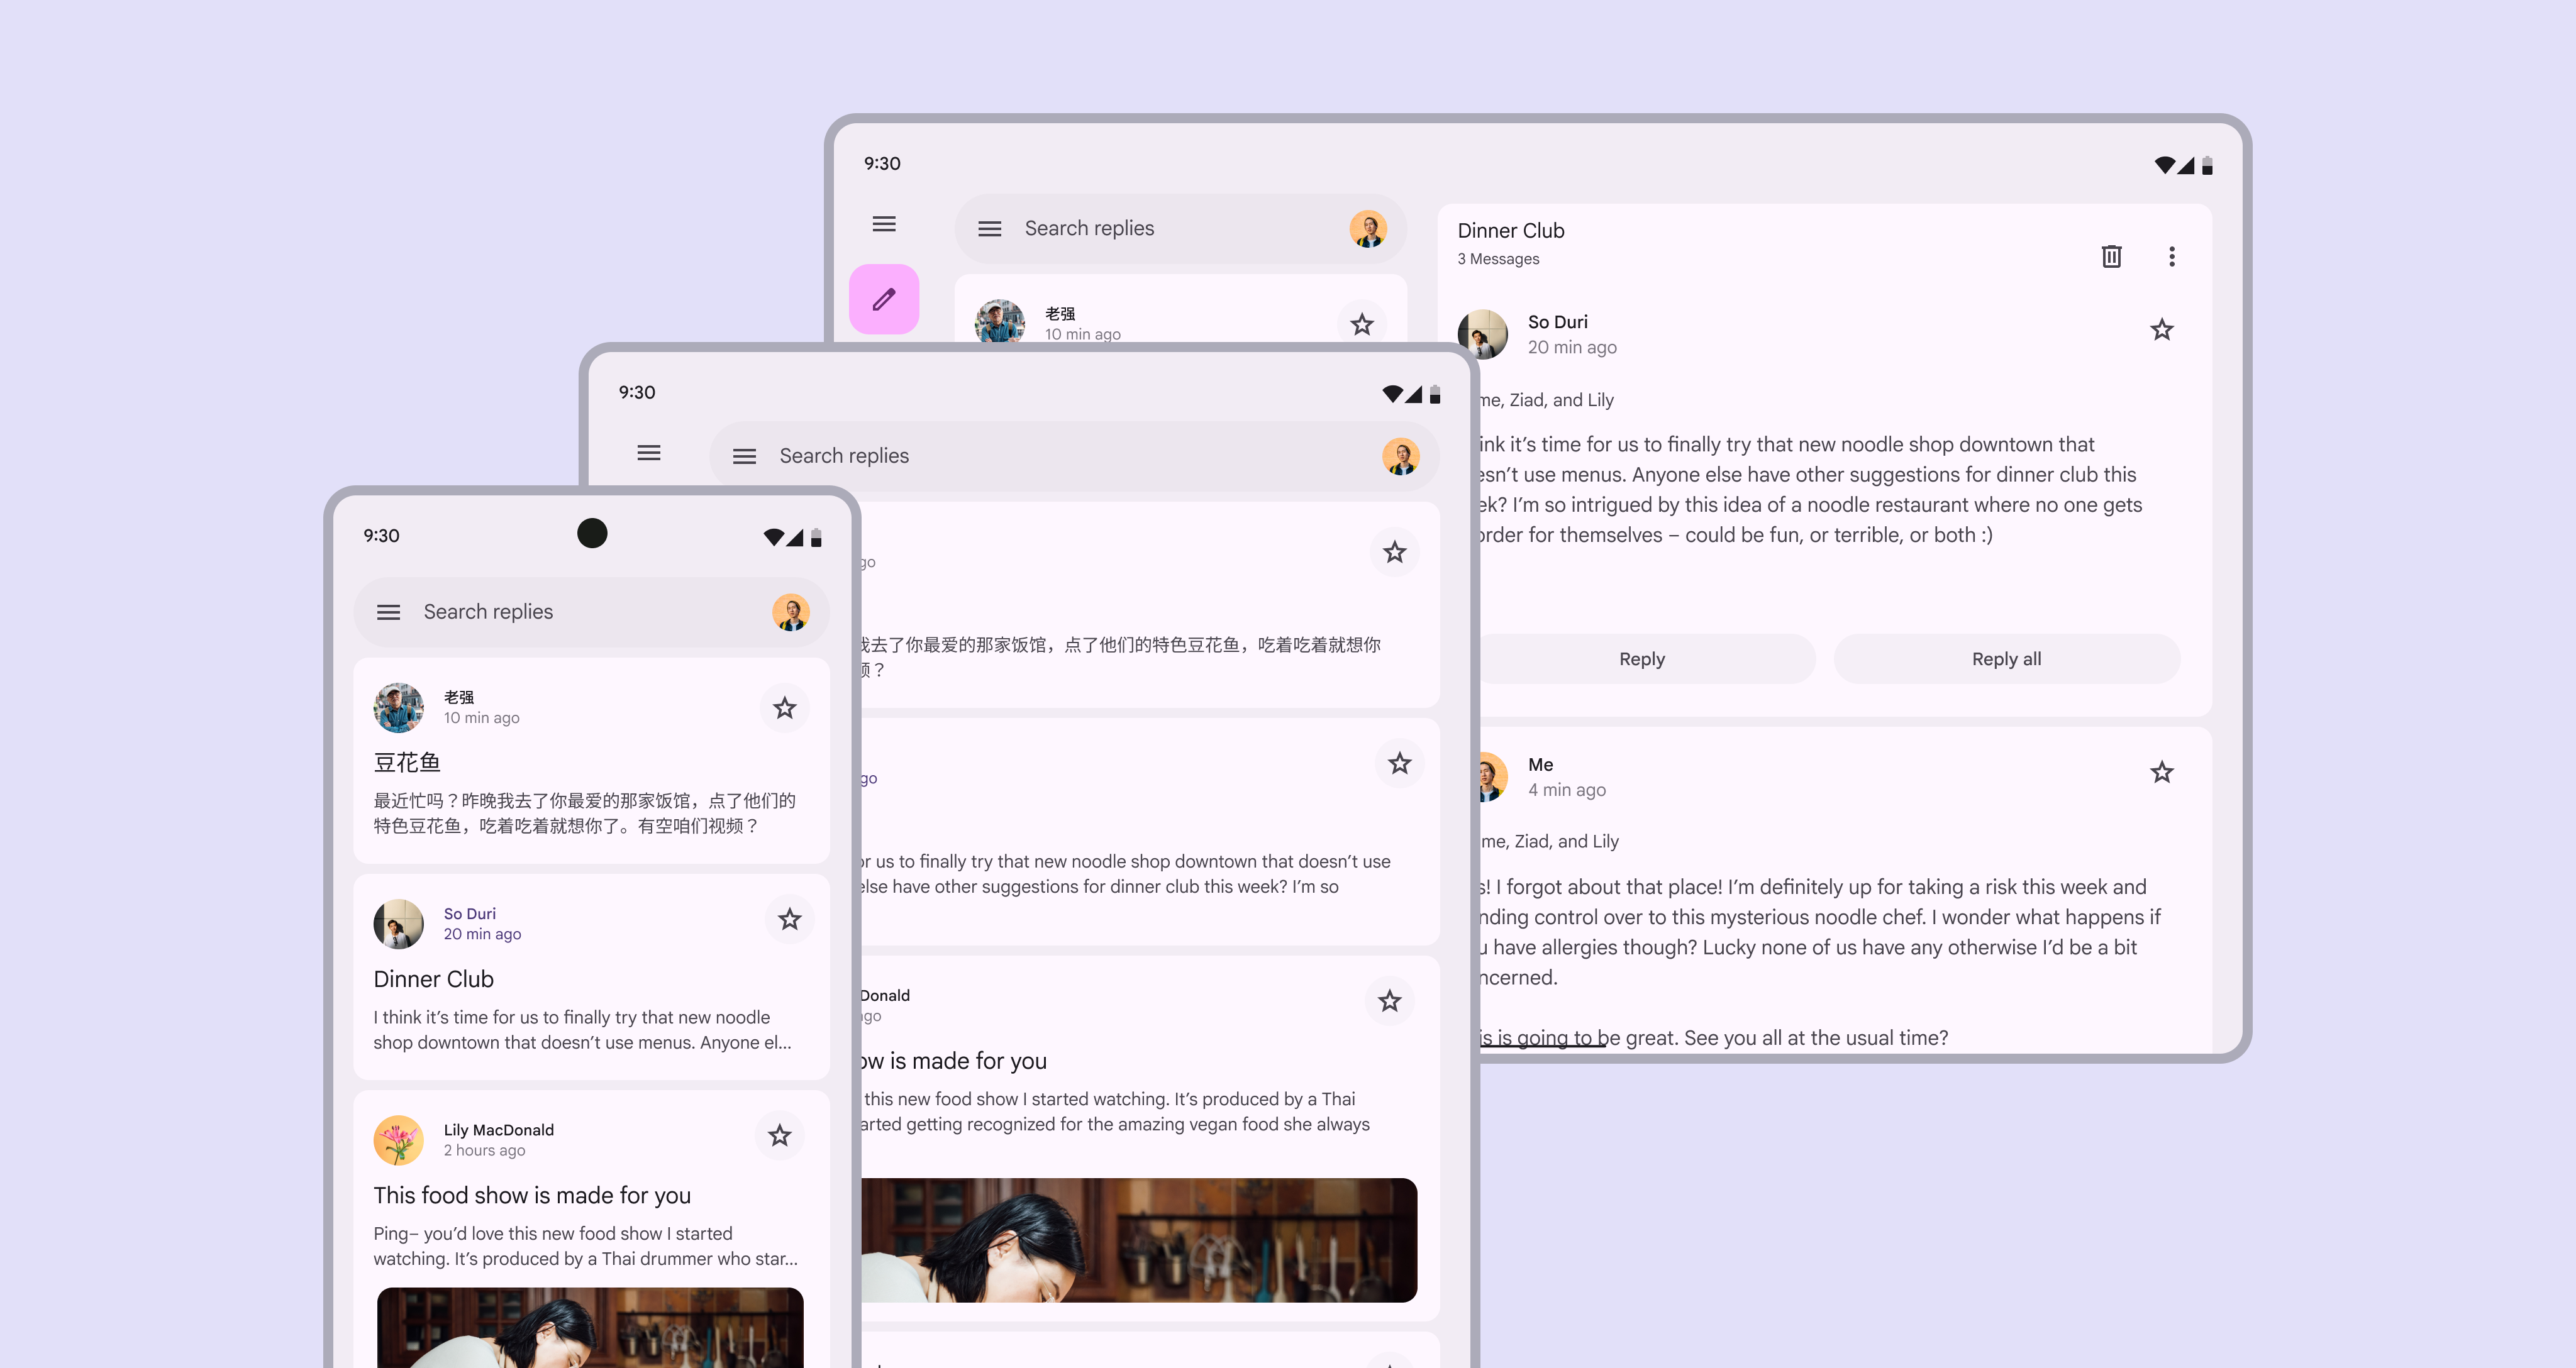

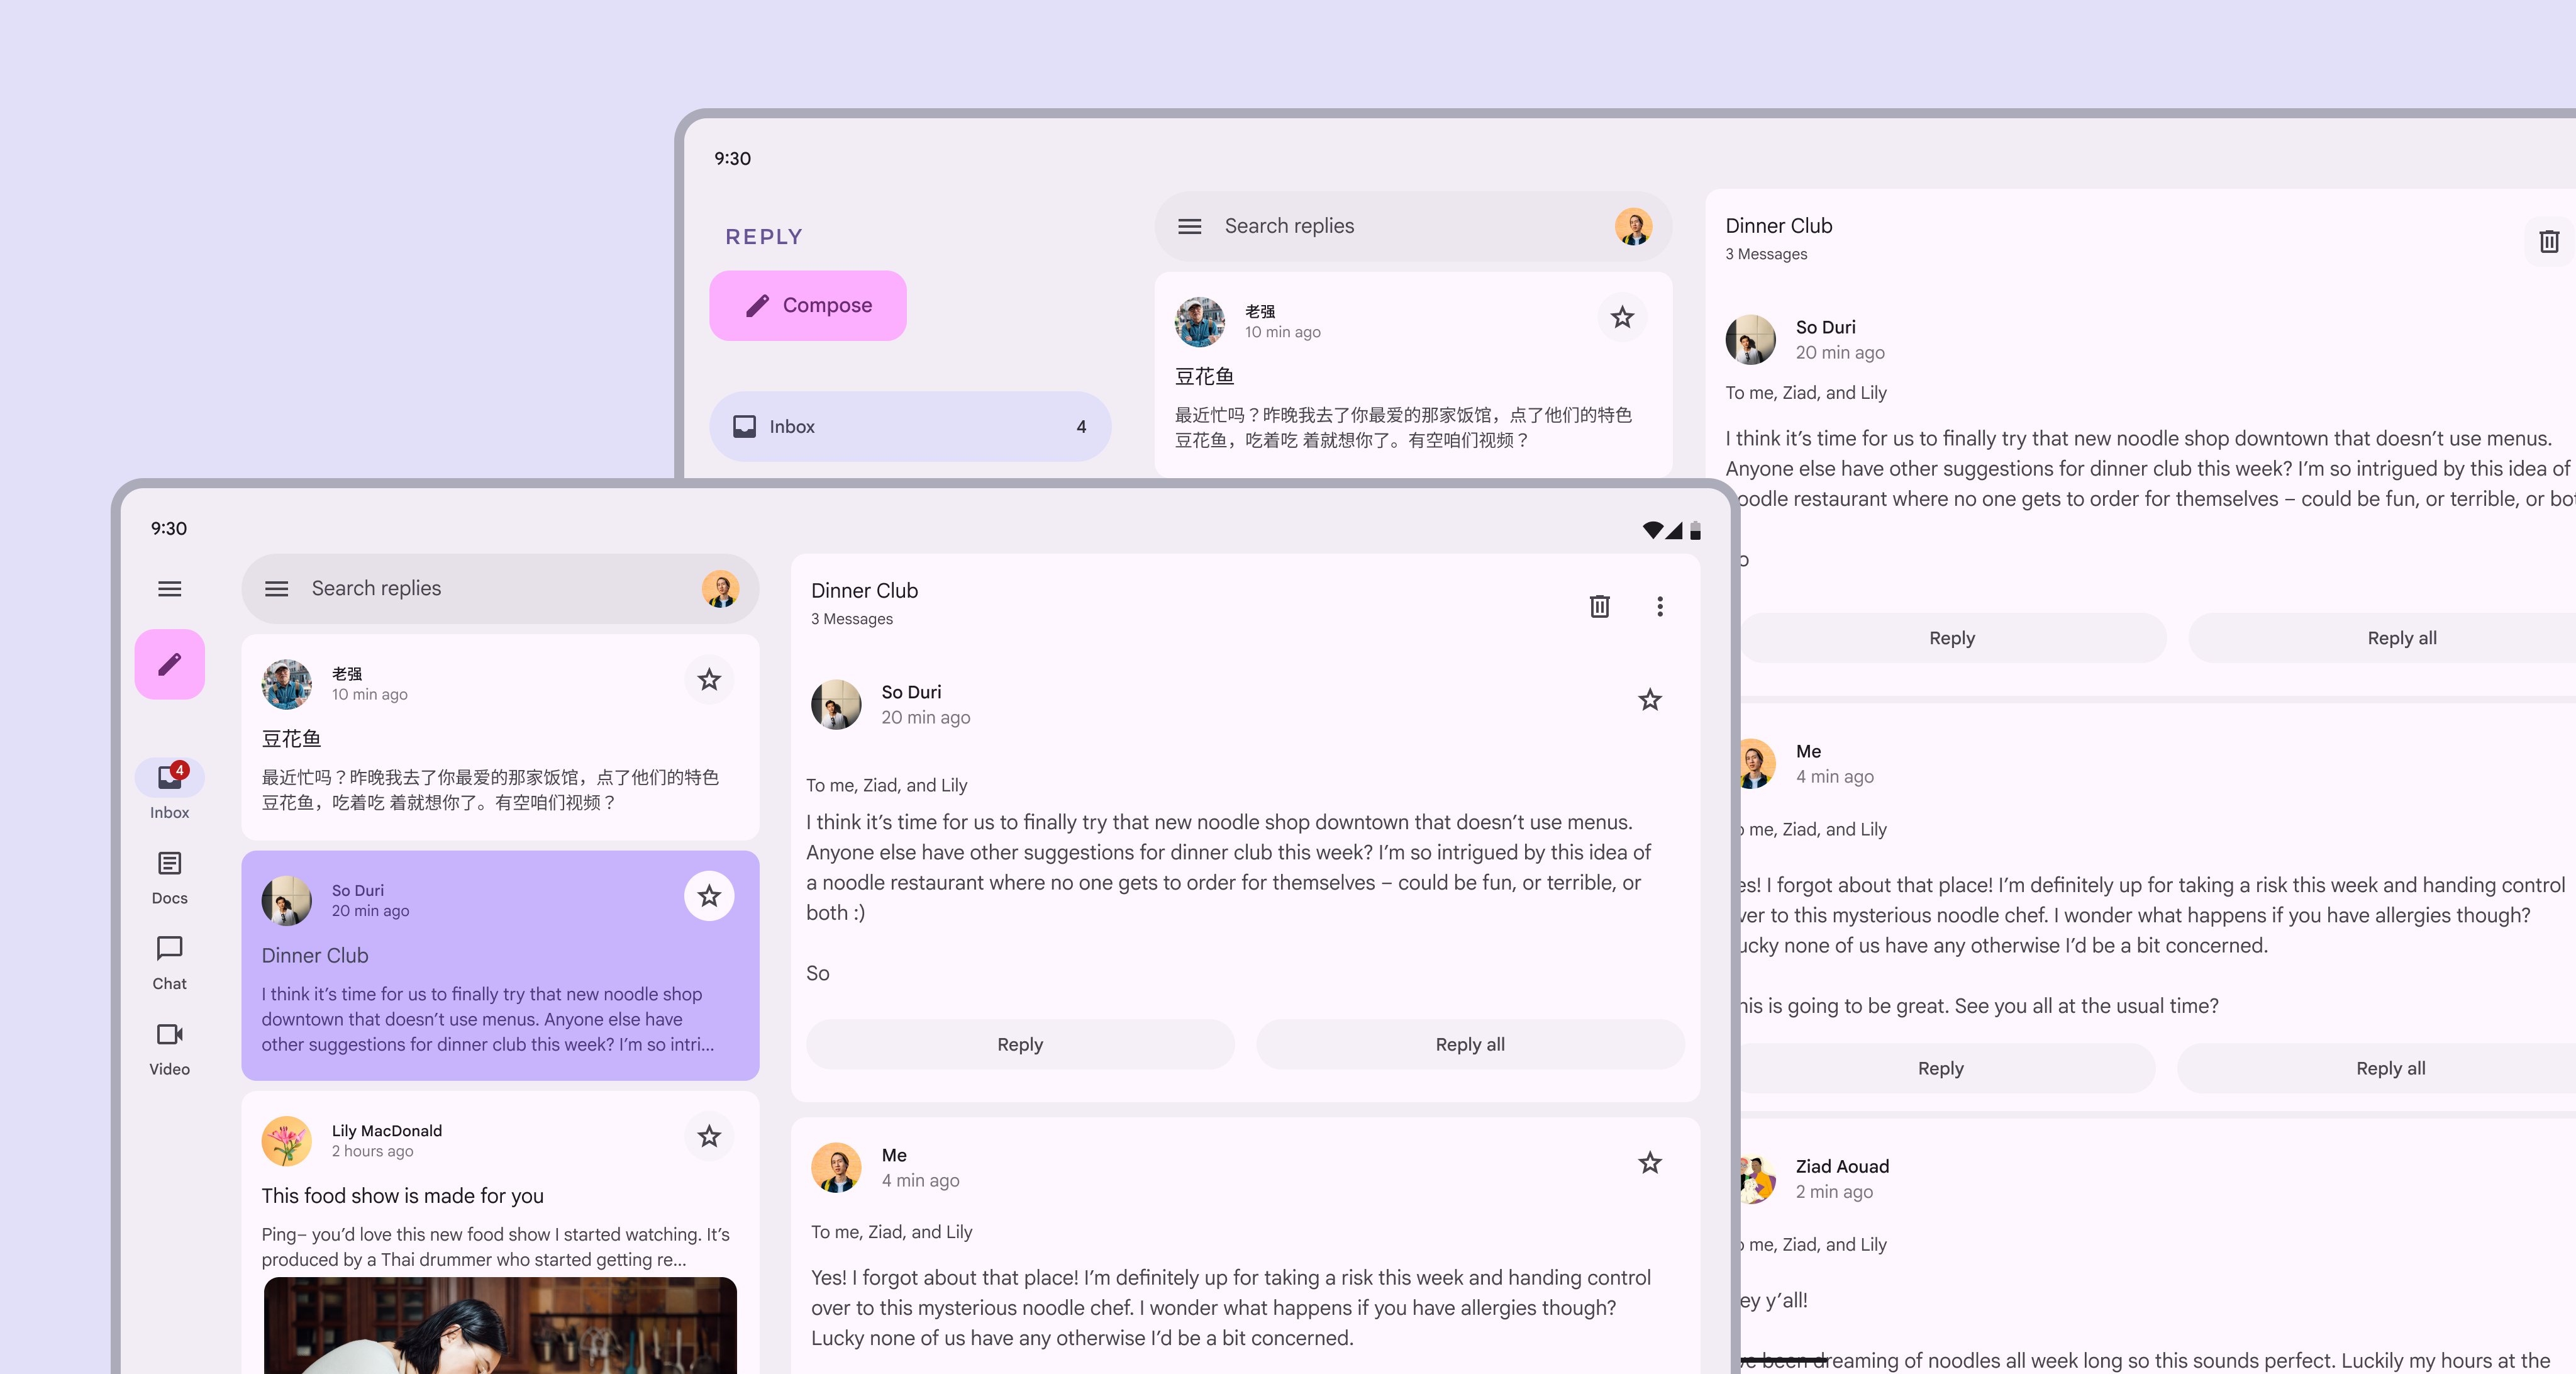
An email app shown at 3 breakpoints: compact, medium, and expanded.
Products should automatically adapt to any breakpoint

2 screens at large and extra-large breakpoints.
A product’s layout should adjust to fit each breakpoint. For example, a large window can have two panes, while an extra-large window can have three.

Each product view should have a layout for the breakpoints most appropriate for your platform and users.

Different components are recommended for performing the same function across the five layouts.

BreakpointPanesNavigationCommunicationAction
Compact1Navigation bar, modal expanded
navigation rail
Simple dialog
Full-screen dialog
Bottom sheet
Medium1 (recommended) or 2Navigation bar, modal expanded
navigation rail
Simple dialogMenu
Expanded1 or 2 (recommended)Modal or standard expanded
navigation rail
Simple dialogMenu
Large1 or 2 (recommended)Modal or standard expanded
navigation rail
Simple dialogMenu
Extra-large1 to 3 (recommended)Modal or standard expanded
navigation rail
Simple dialogMenu

Start by designing for one breakpoint, then adjust the layout for the next size by asking these five questions:

1. What should be revealed?

Parts of the UI that are hidden on smaller devices can be revealed in larger layouts.

For example:

  • On mobile, the navigation rail is collapsed by default
  • On an expanded device, the navigation rail can be open by default, revealing more actions and features
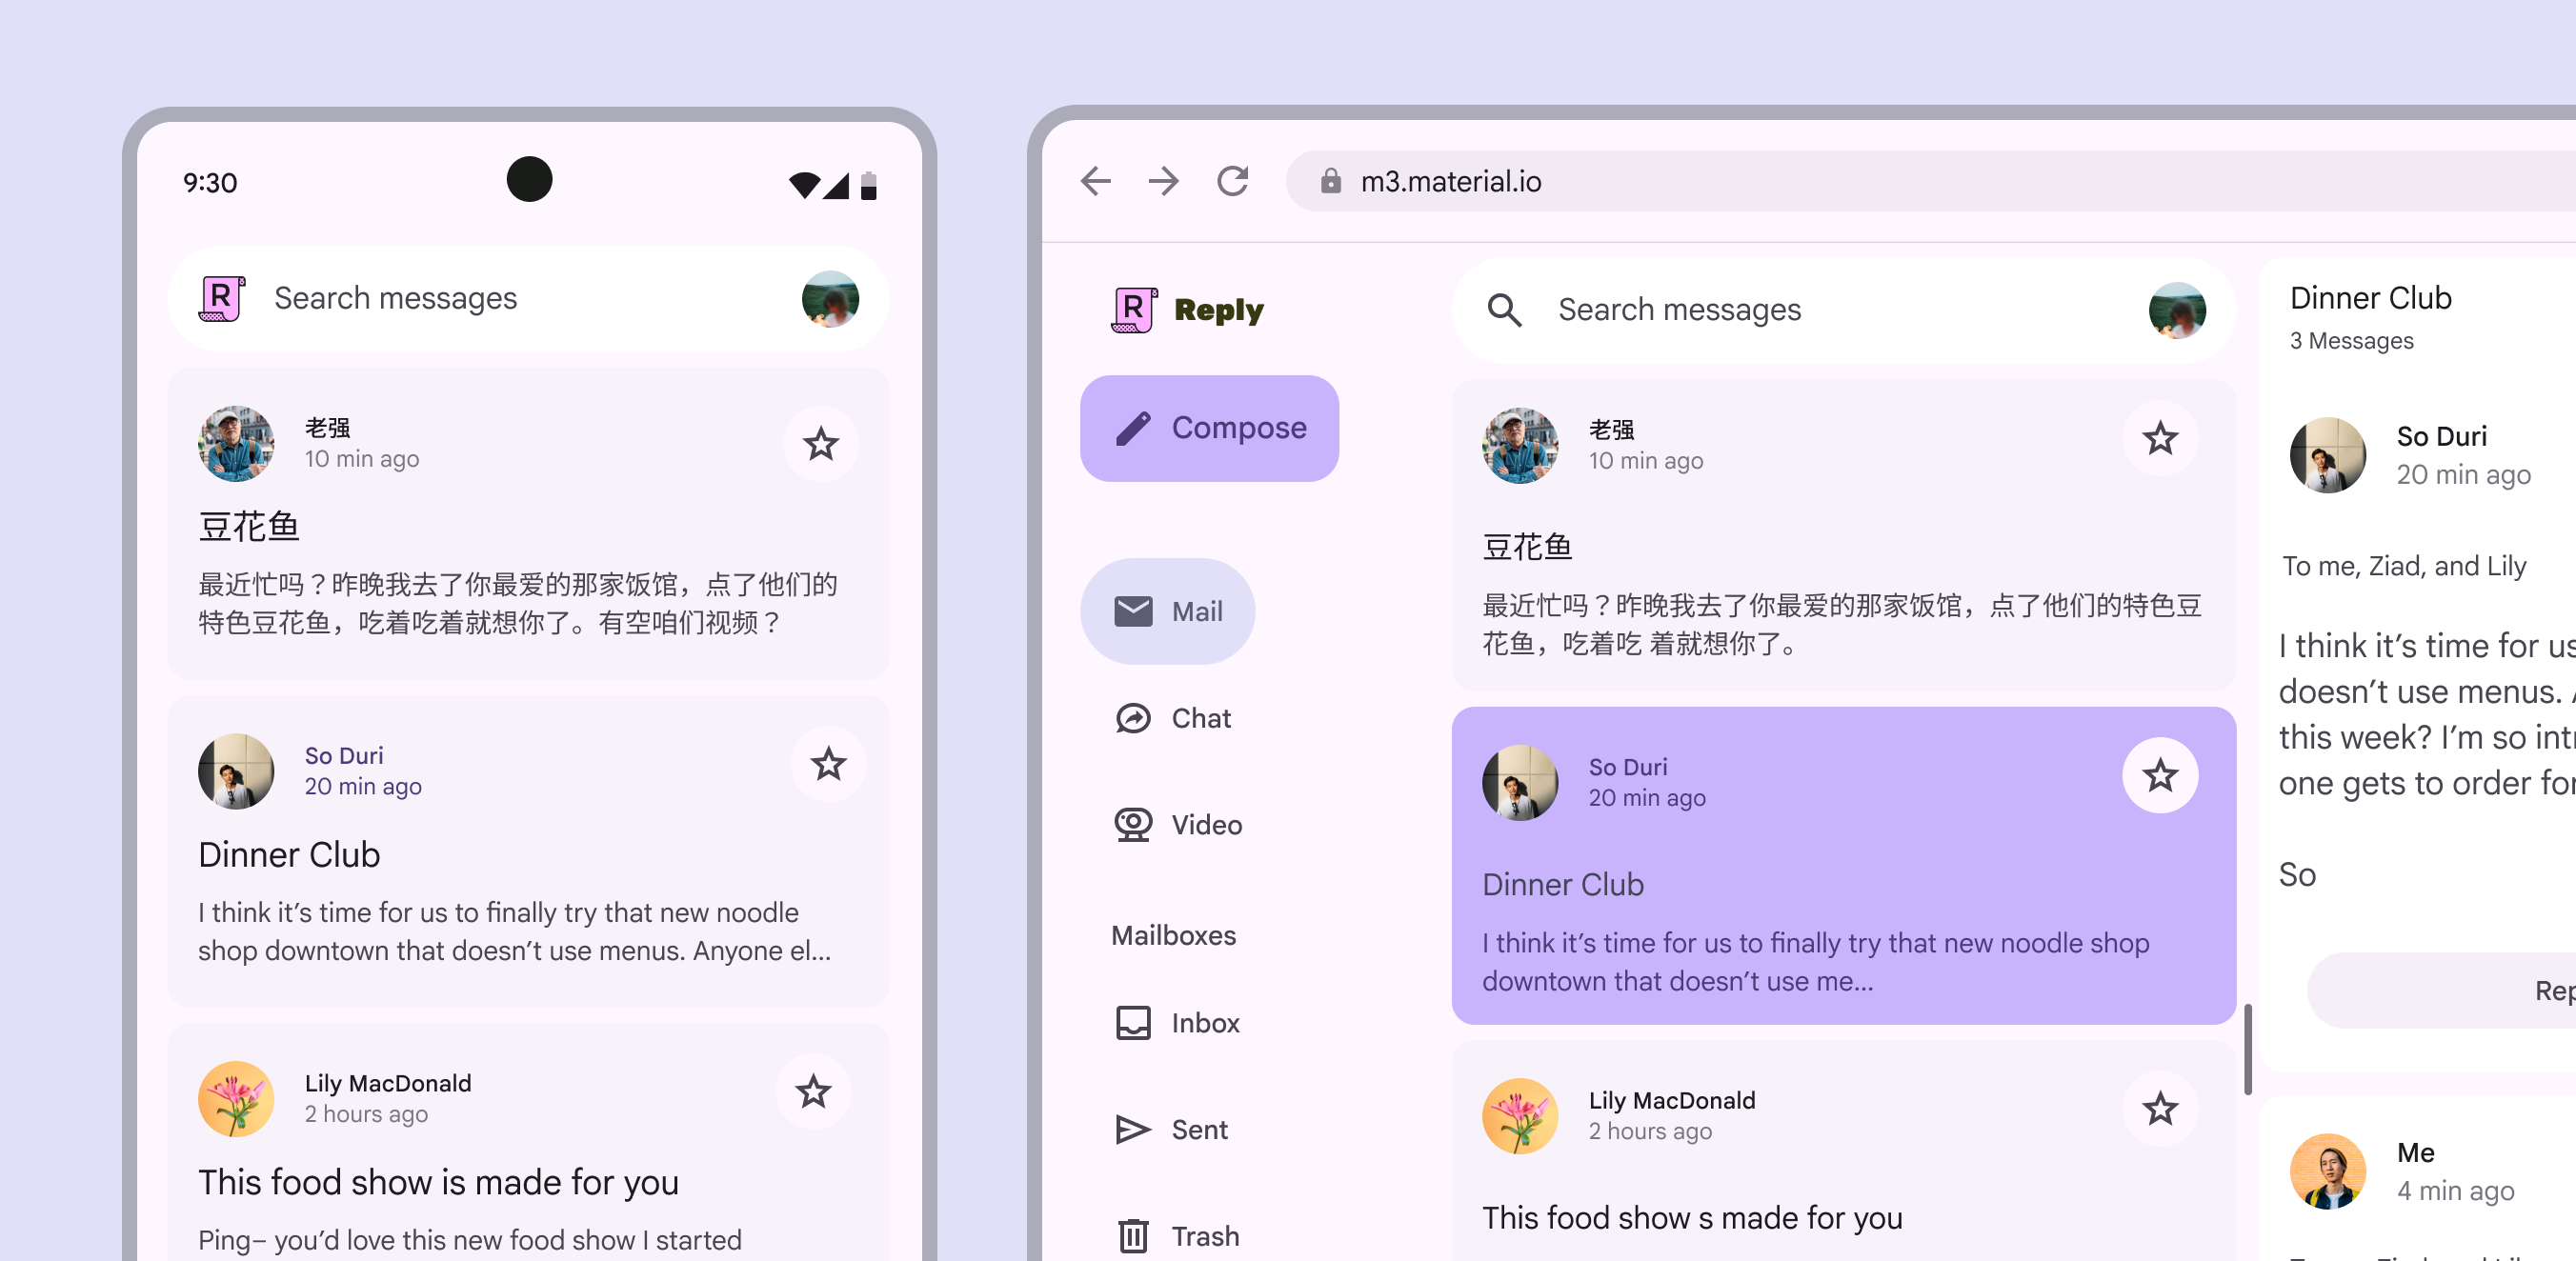
Email app layouts in compact and expanded windows.
A product’s navigation rail can be revealed in an expanded layout

The same can be applied to panes. Larger layouts can simultaneously display an inbox pane and a pane containing a selected conversation. Additional space doesn’t just mean making the same thing bigger.
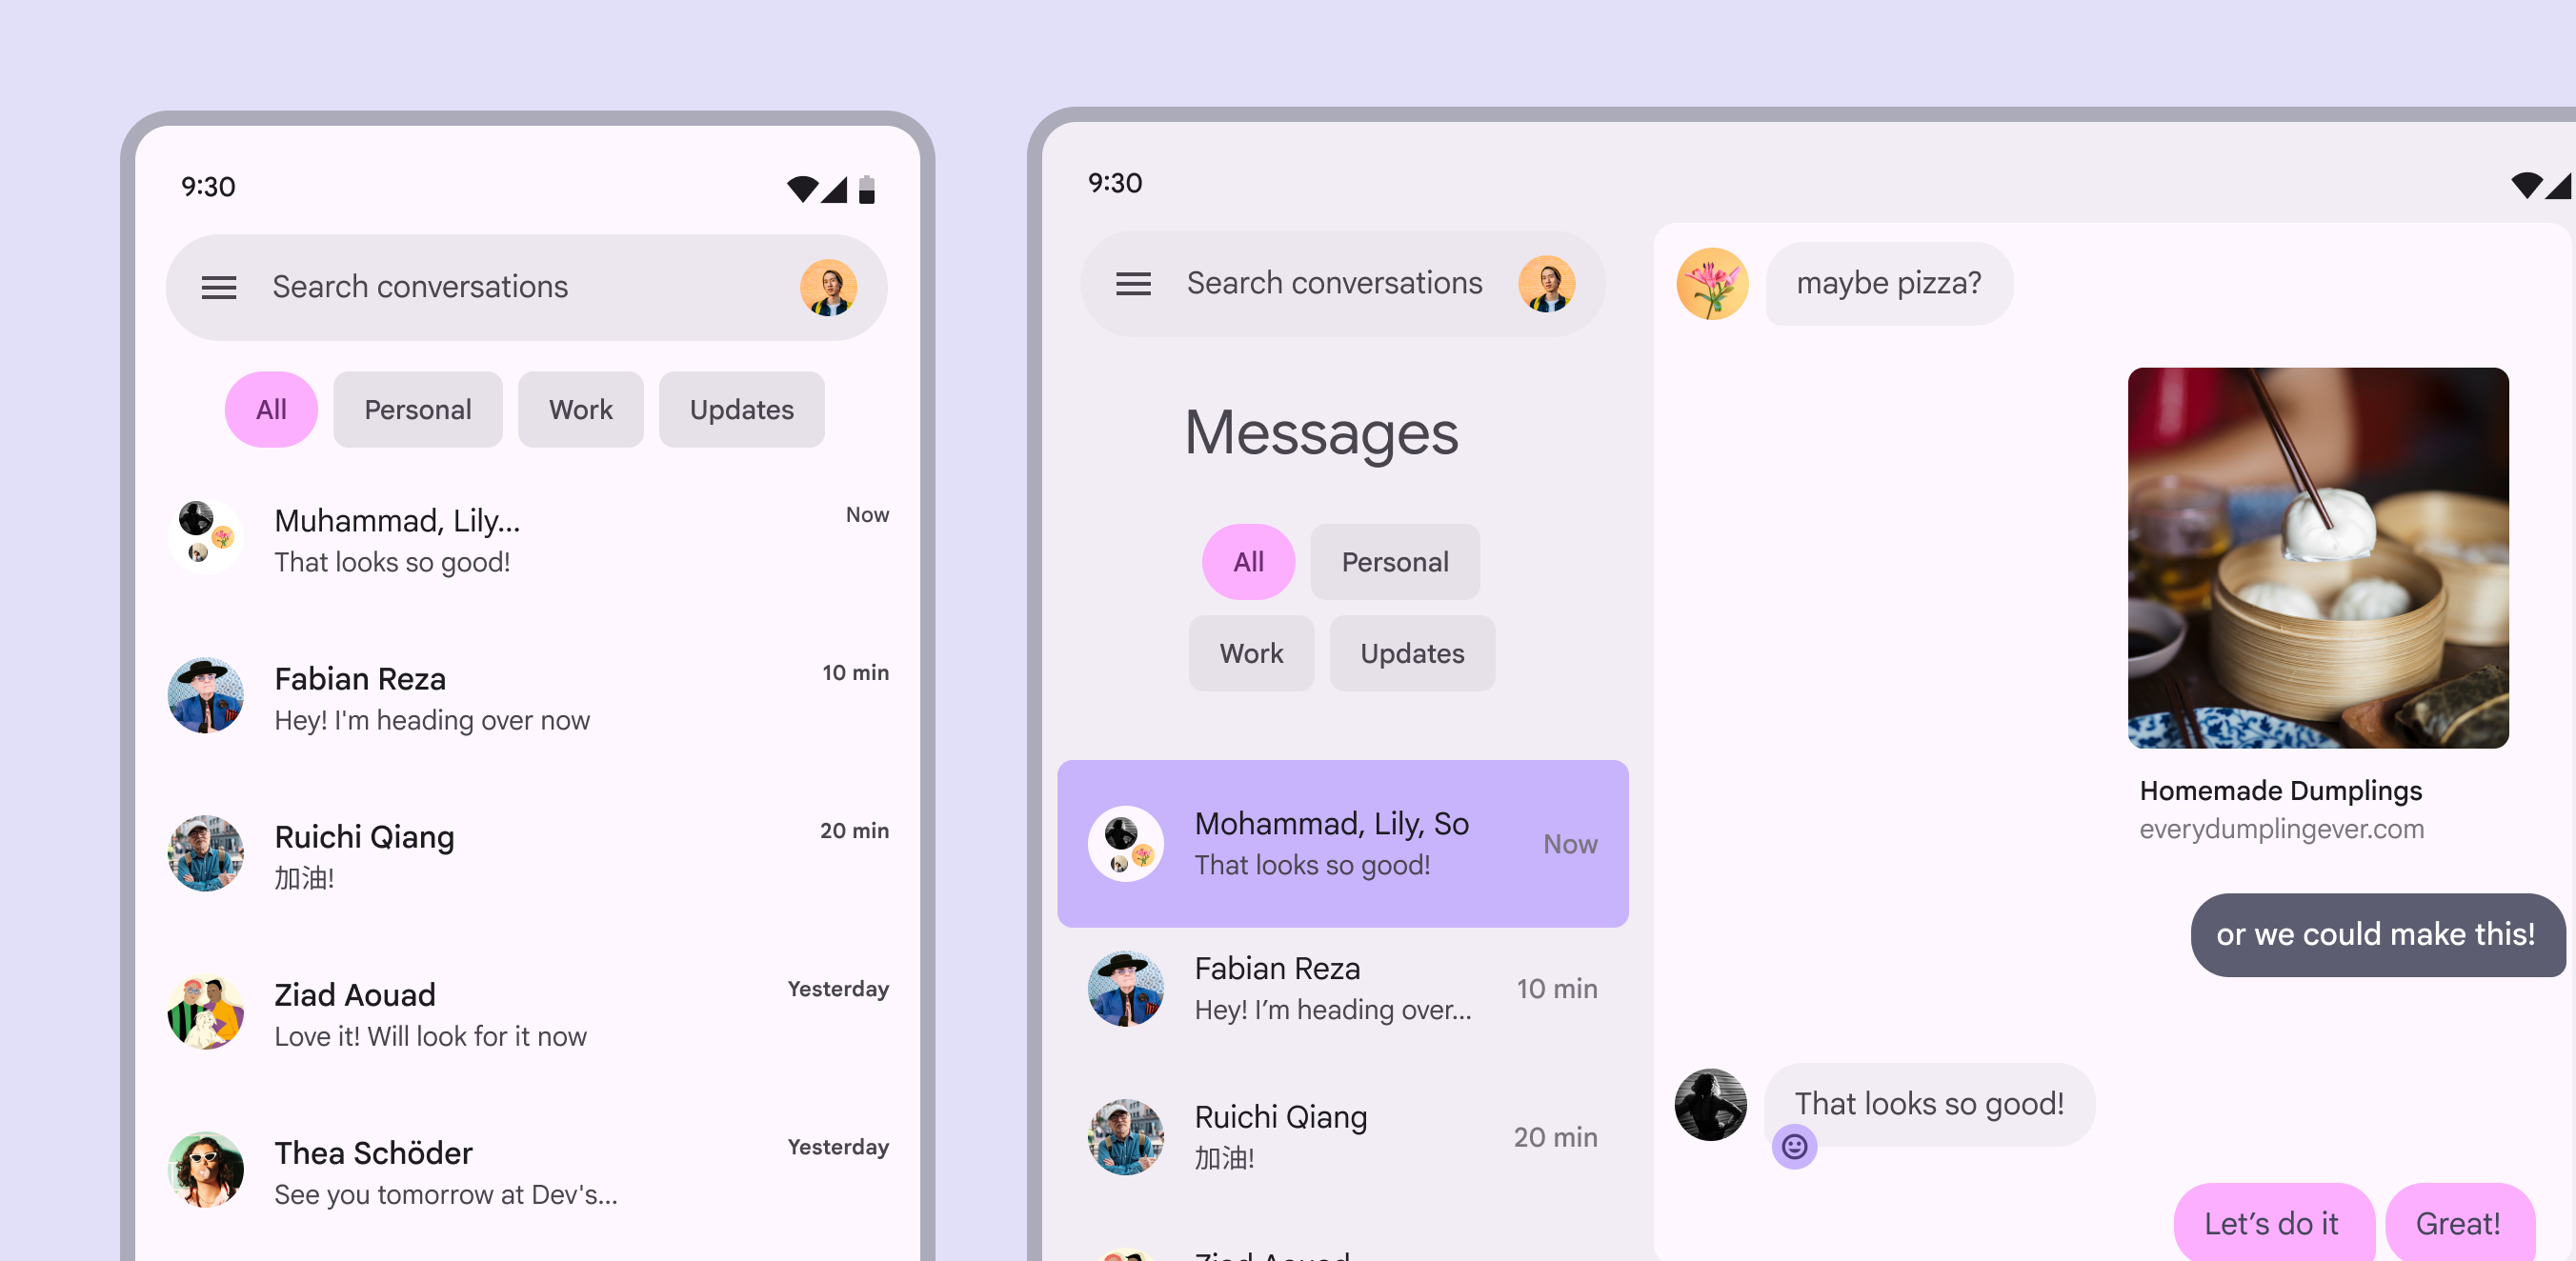
Messaging app layouts in compact and expanded windows.
An expanded layout for a messaging app reveals a second pane with the selected conversation

2. How should a screen be divided?

When dividing a screen into layout panes, consider the breakpoint:

  • Compact and medium breakpoints: A single pane works best
  • Expanded and large breakpoints: Two panes are recommended
  • Extra-large breakpoints: Consider using three panes
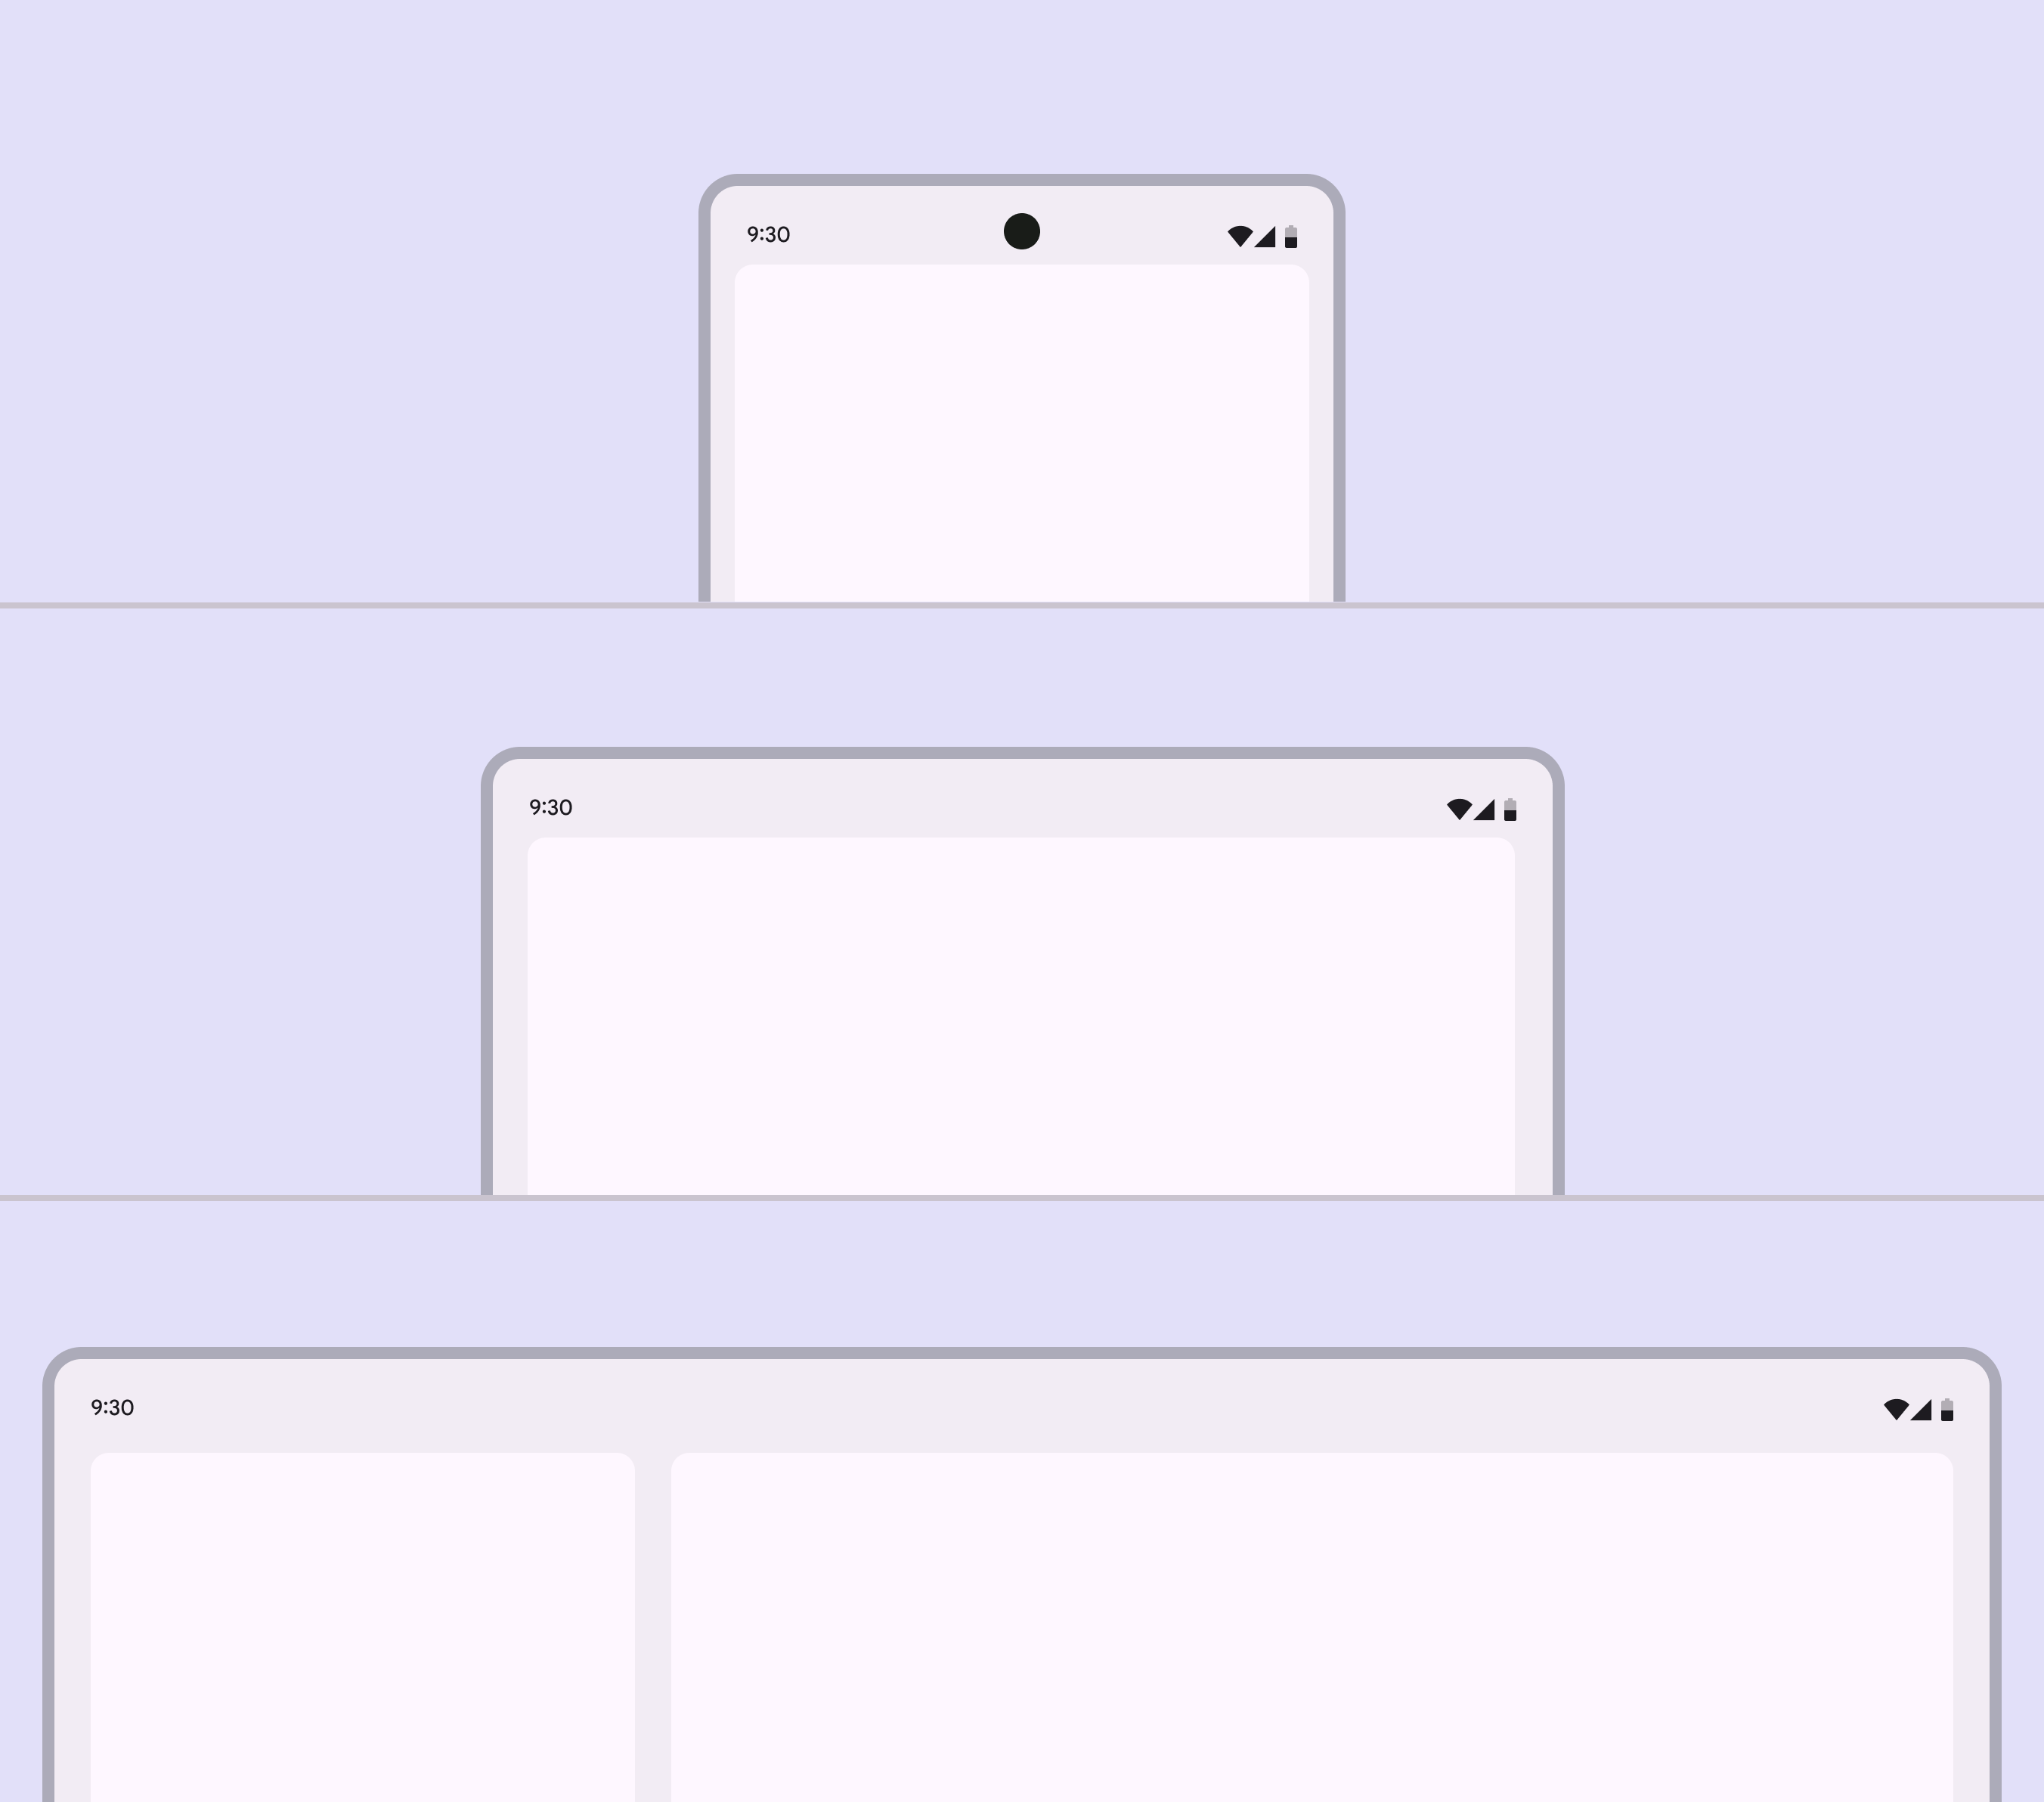
A compact and medium window have a single pane. A larger window has 2 panes.
Compact and medium breakpoints should use a single pane, while larger breakpoints can use two

At medium breakpoints, two panes are useful when they contain low-density content with clear actions.

Don’t use two panes in medium layouts with high information density, as it can reduce usability.
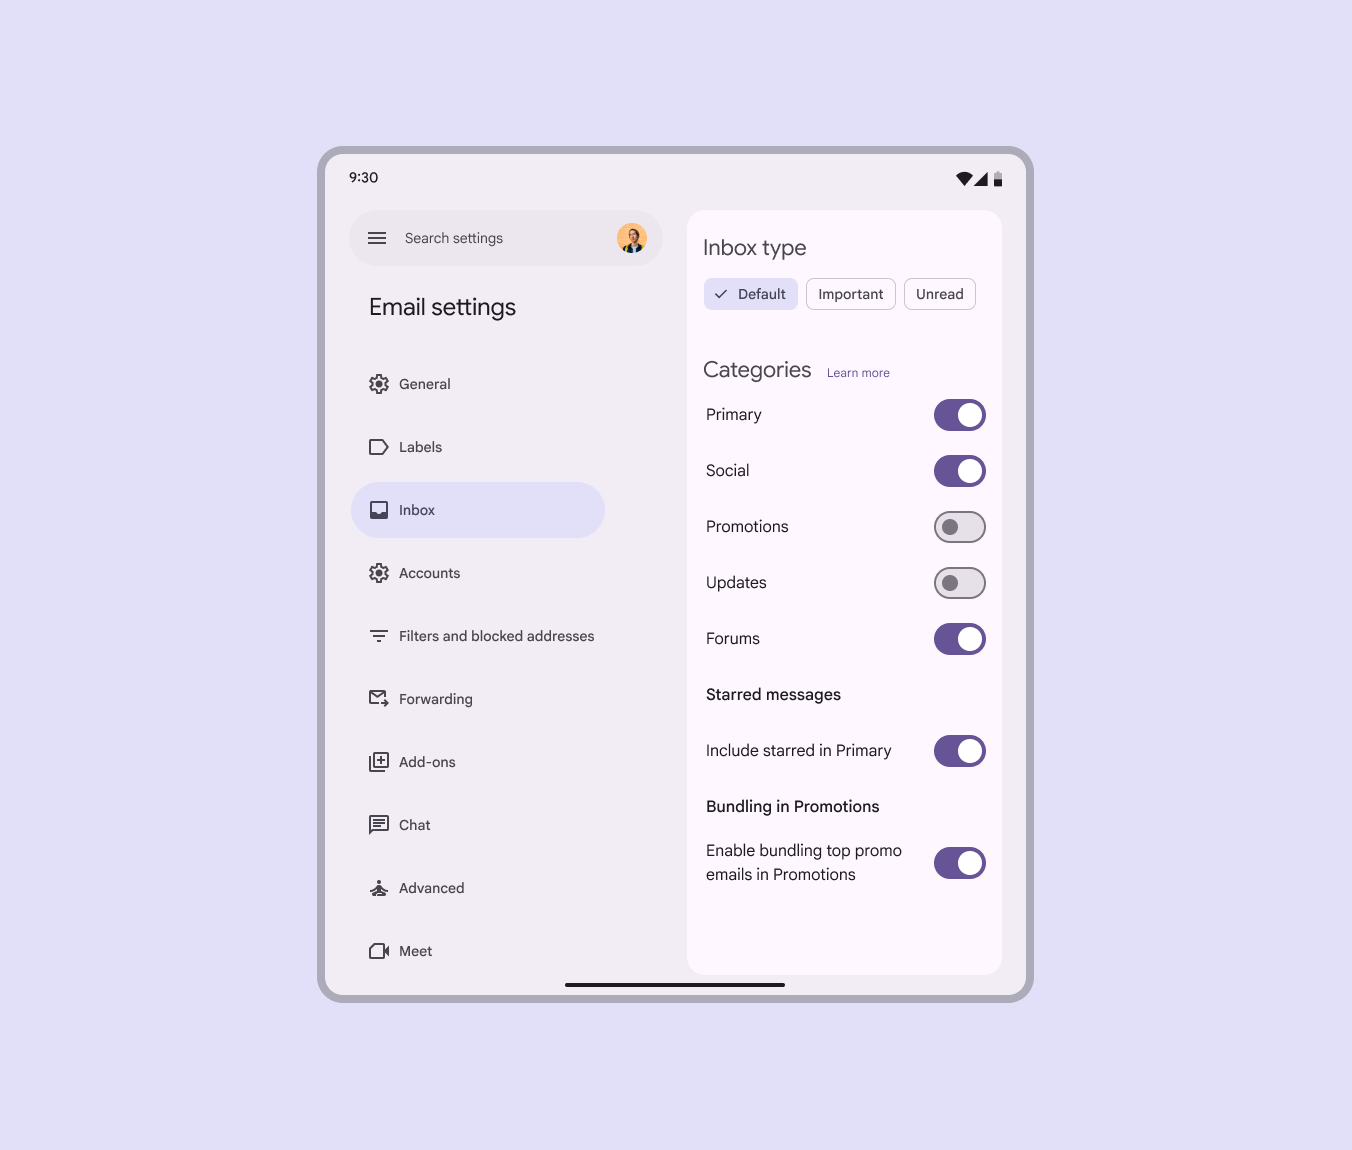
Medium window with 2 panes with low-density content: an email setting menu and a list of setting switches.
A settings view with low-density content and quick actions is a good use of two panes in a medium layout
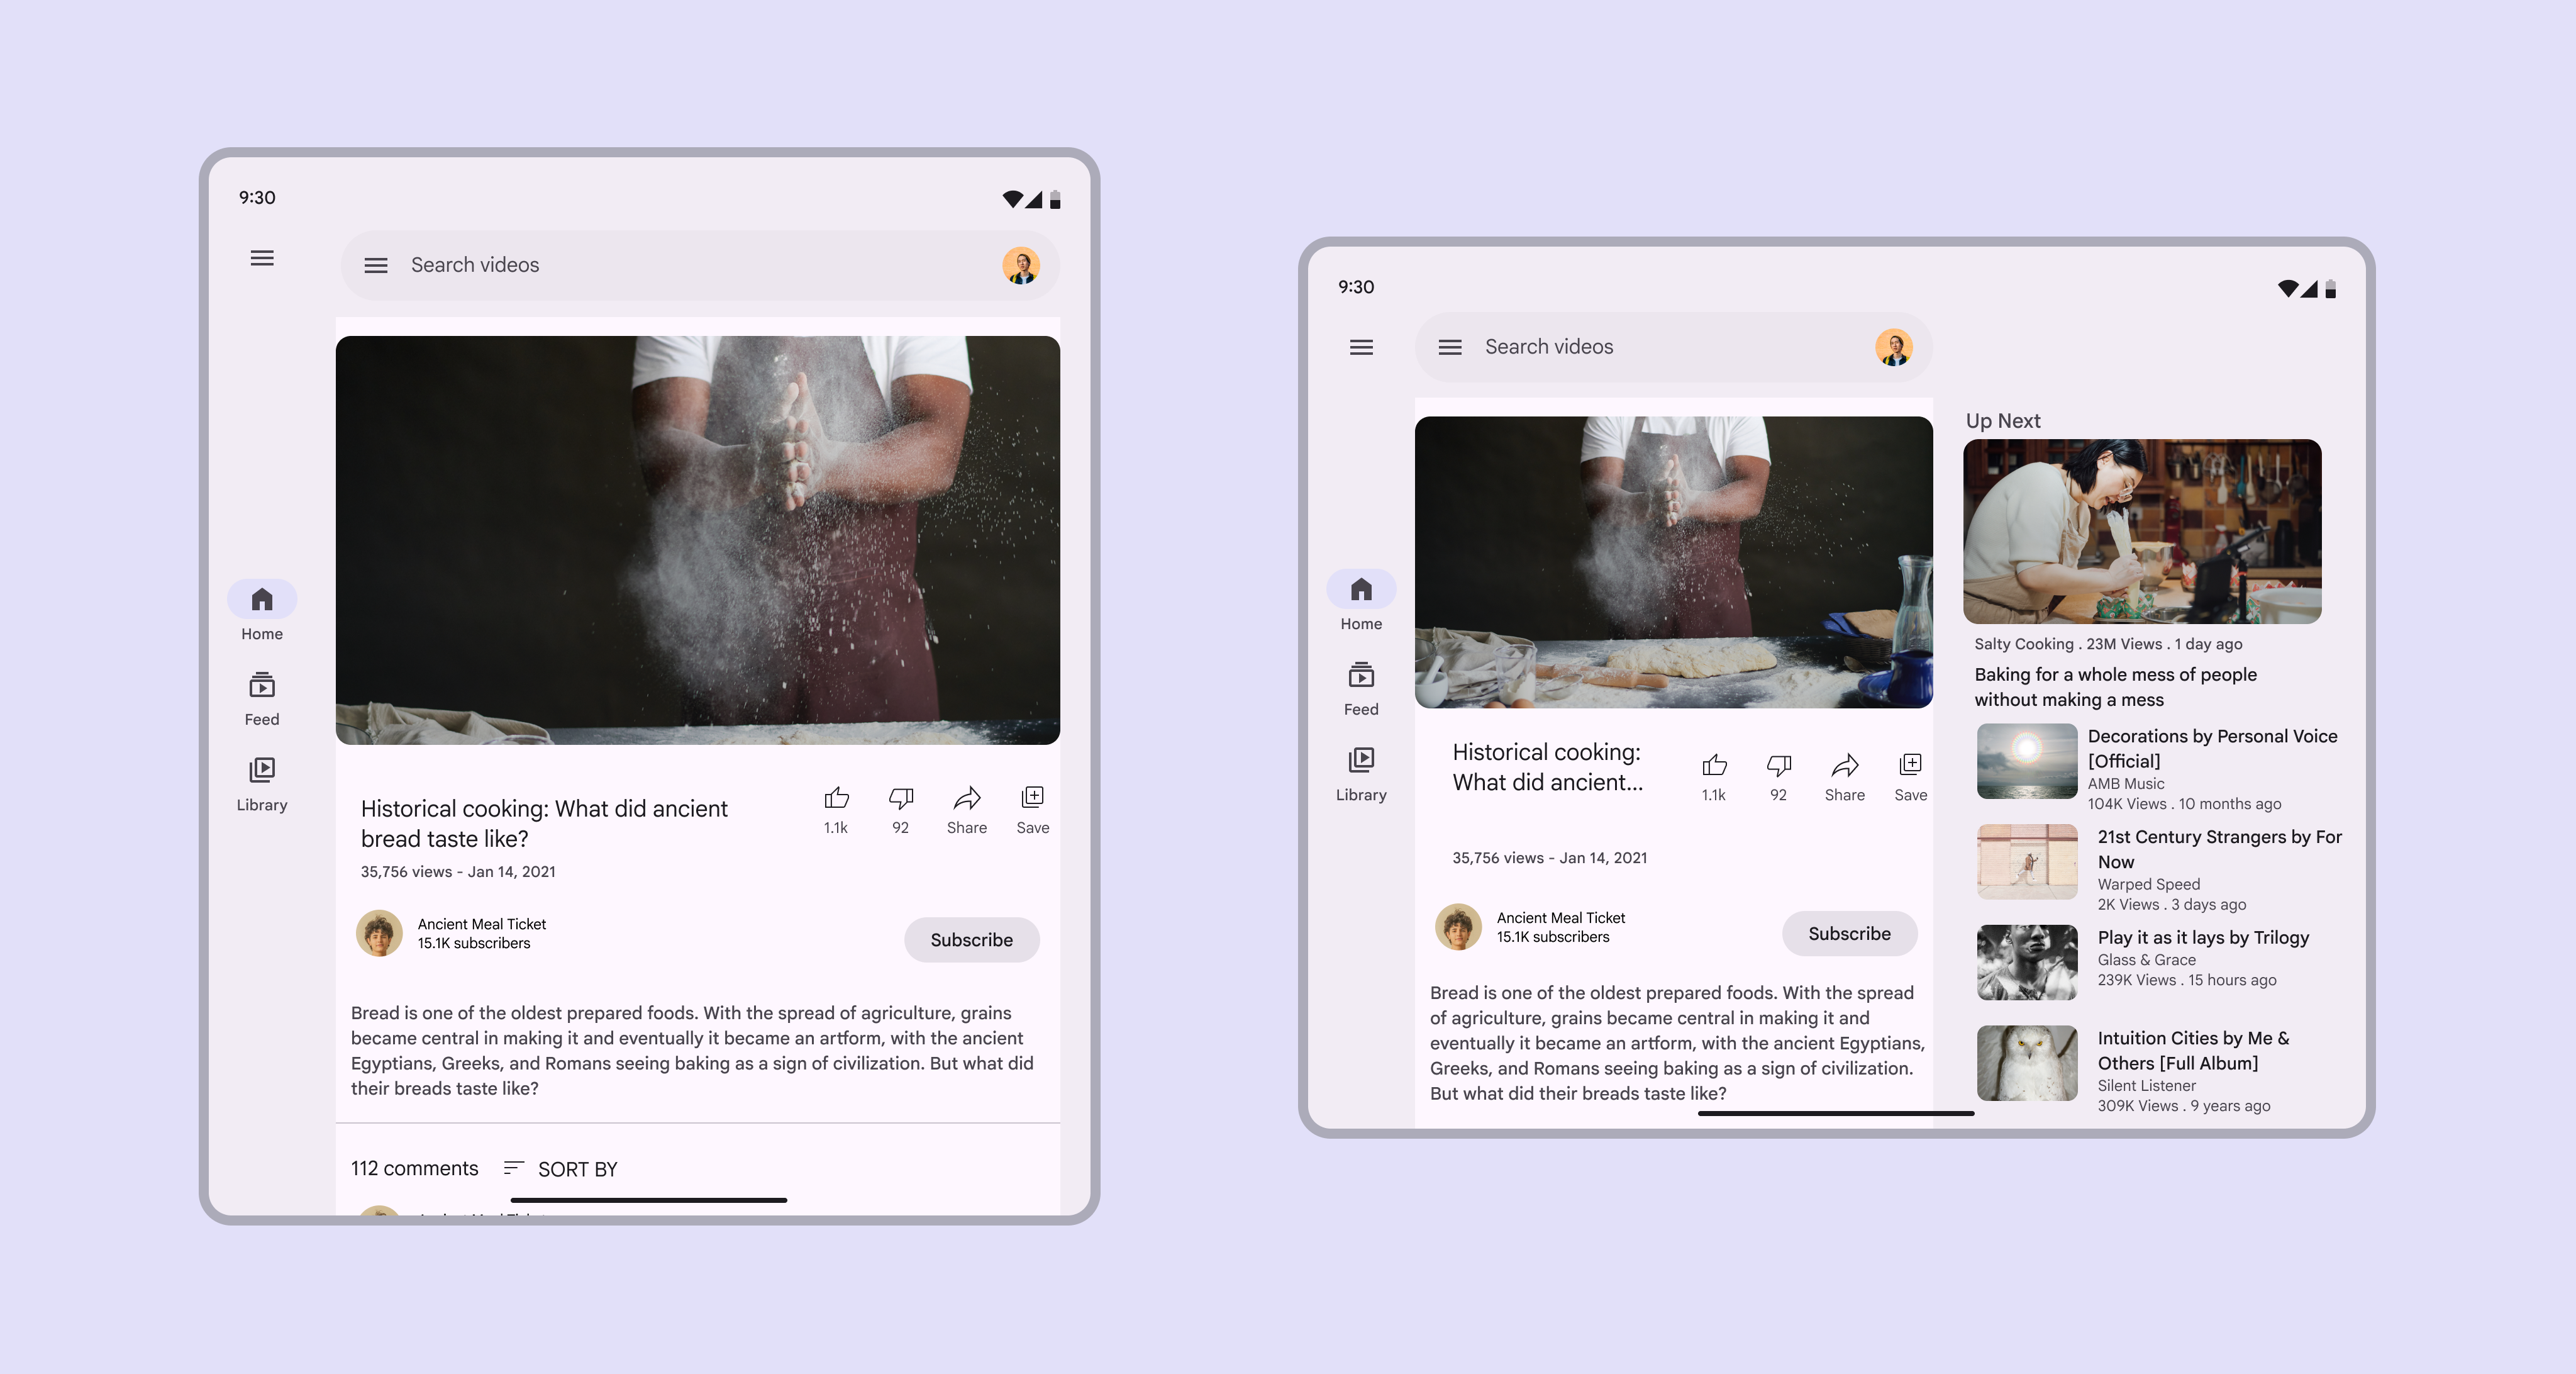
Video app in a medium window has 1 pane in portrait layout and 2 in landscape.
Rotating a device often changes the breakpoint. A layout can have two panes in landscape orientation, and one pane in portrait.

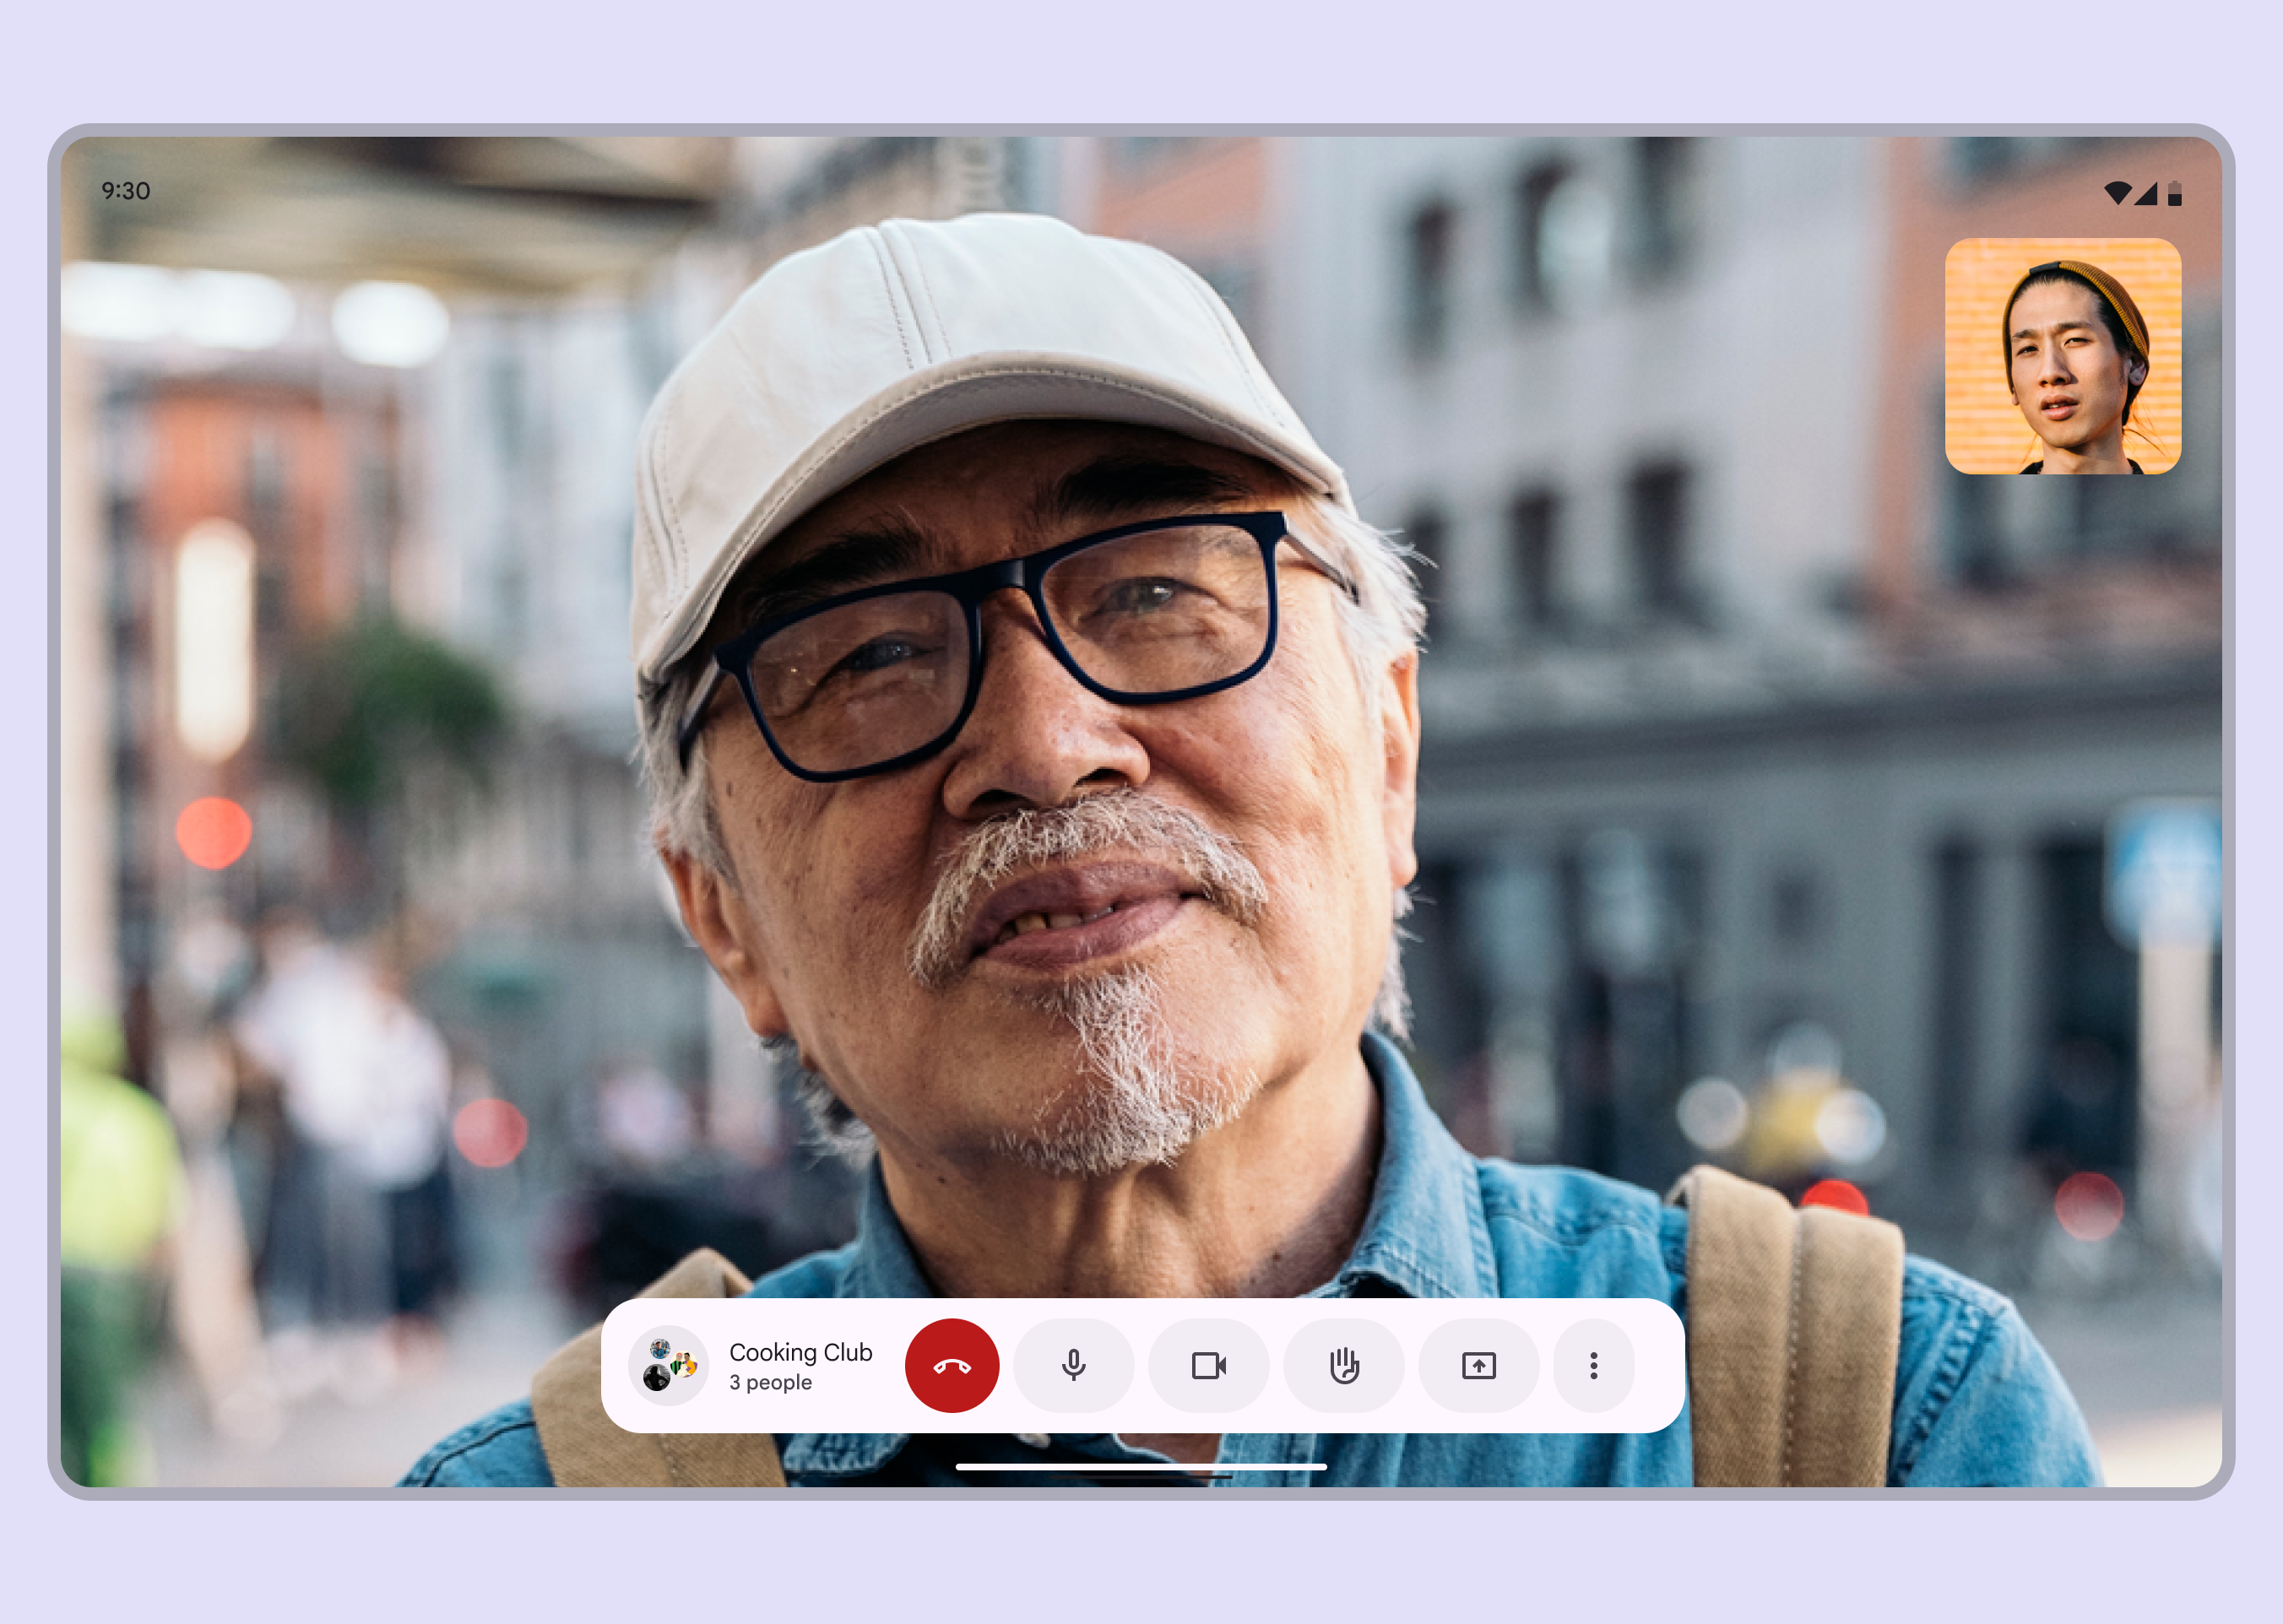
Single-pane layouts can focus attention on one action or view, creating a distraction-free environment for a specific goal such as:

  • Playing a game
  • Watching a movie
  • Video calls
  • Creative applications
Video app in a single-pane landscape layout at an expanded breakpoint.
Consider using an immersive single-pane layout for video calls

3. What should be resized?

UI elements that are small on compact screens can grow as breakpoints increase. Panes can also expand to rearrange elements and make better use of space.

Consider resizing:

  • Cards
  • Feeds
  • Lists
  • Panes

Resizing can highlight imagery and improve text readability. This type of adaptation affects the scale of content and the relationship between objects on screen. For example, a vertical card on mobile can adjust its margins, orientation, text size, and density to better fit a tablet.

Across all breakpoints, adjust margins and type styles to keep text between 40–60 characters per line.
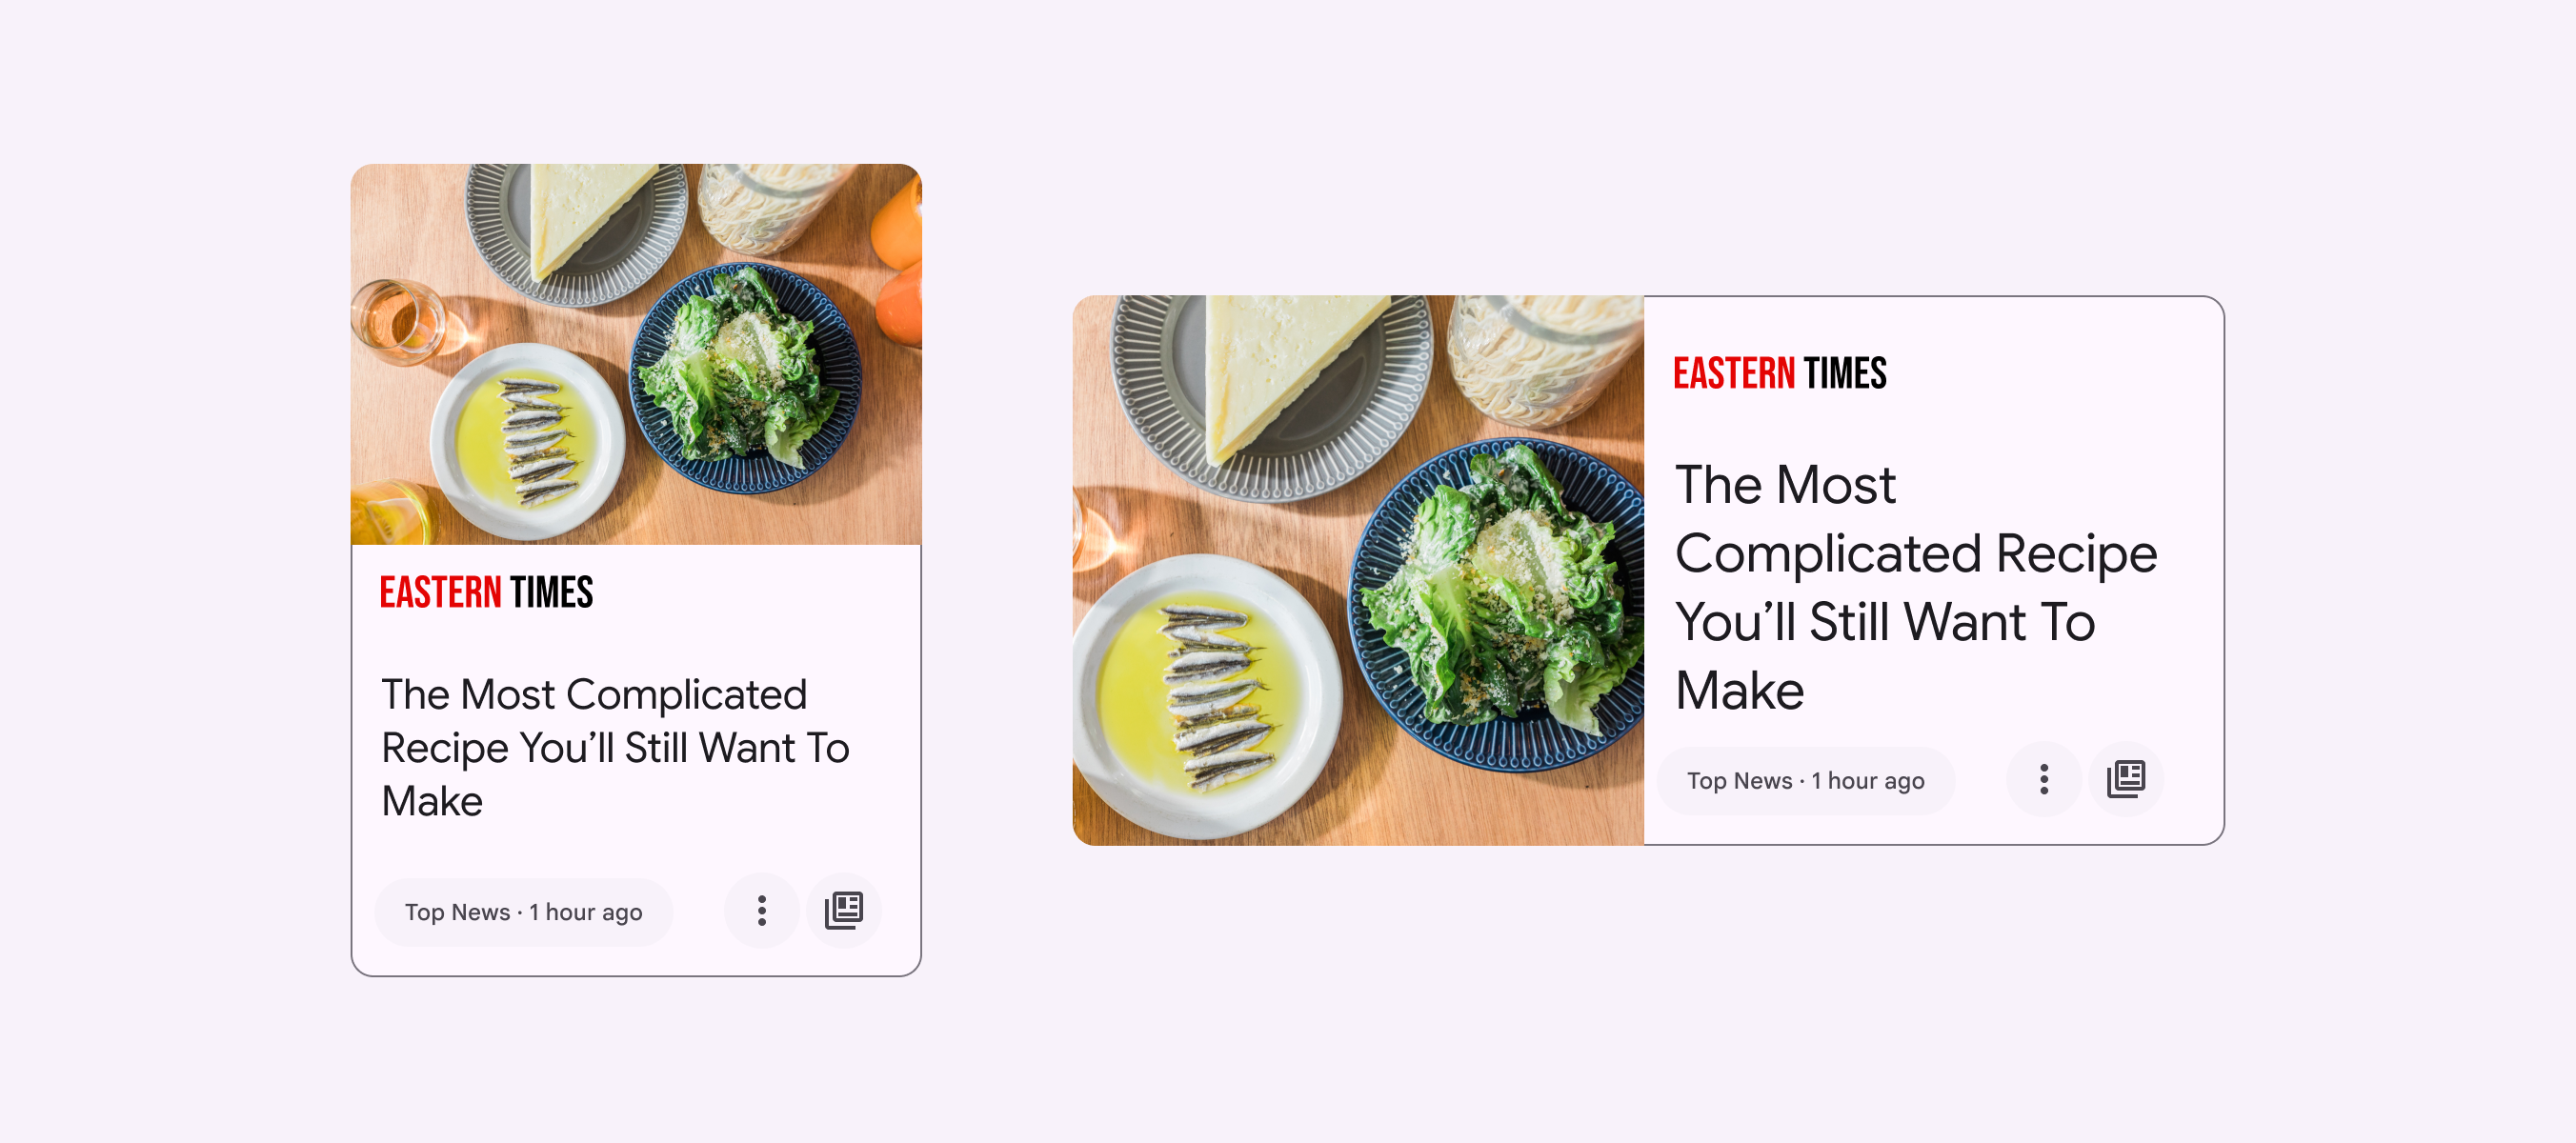
2 cards in compact and medium layouts. The image and text are rearranged and resized to be more legible in the medium layout.
A small card in a compact layout can be resized larger in a medium or expanded layout

4. What should be repositioned?

A UI and its components can reflow or reposition to make use of additional space on expanded screens and in resized panes. Repositioning is also a way to match the ergonomic and input needs that change across device sizes, such as shifting actions from the bottom of a compact window to the leading edge of medium and expanded windows. This method is similar to responsive design on the web.

Consider:

  • Repositioning cards
  • Adding a second column of content
  • Creating a more complex layout of photos
  • Introducing more negative space
  • Ensuring reachability for navigation and interactive elements

Internal elements can be anchored to the left, right, or center as a parent container scales. Internal elements can also maintain fixed positions, such as a floating action button (FAB) in a navigation rail.
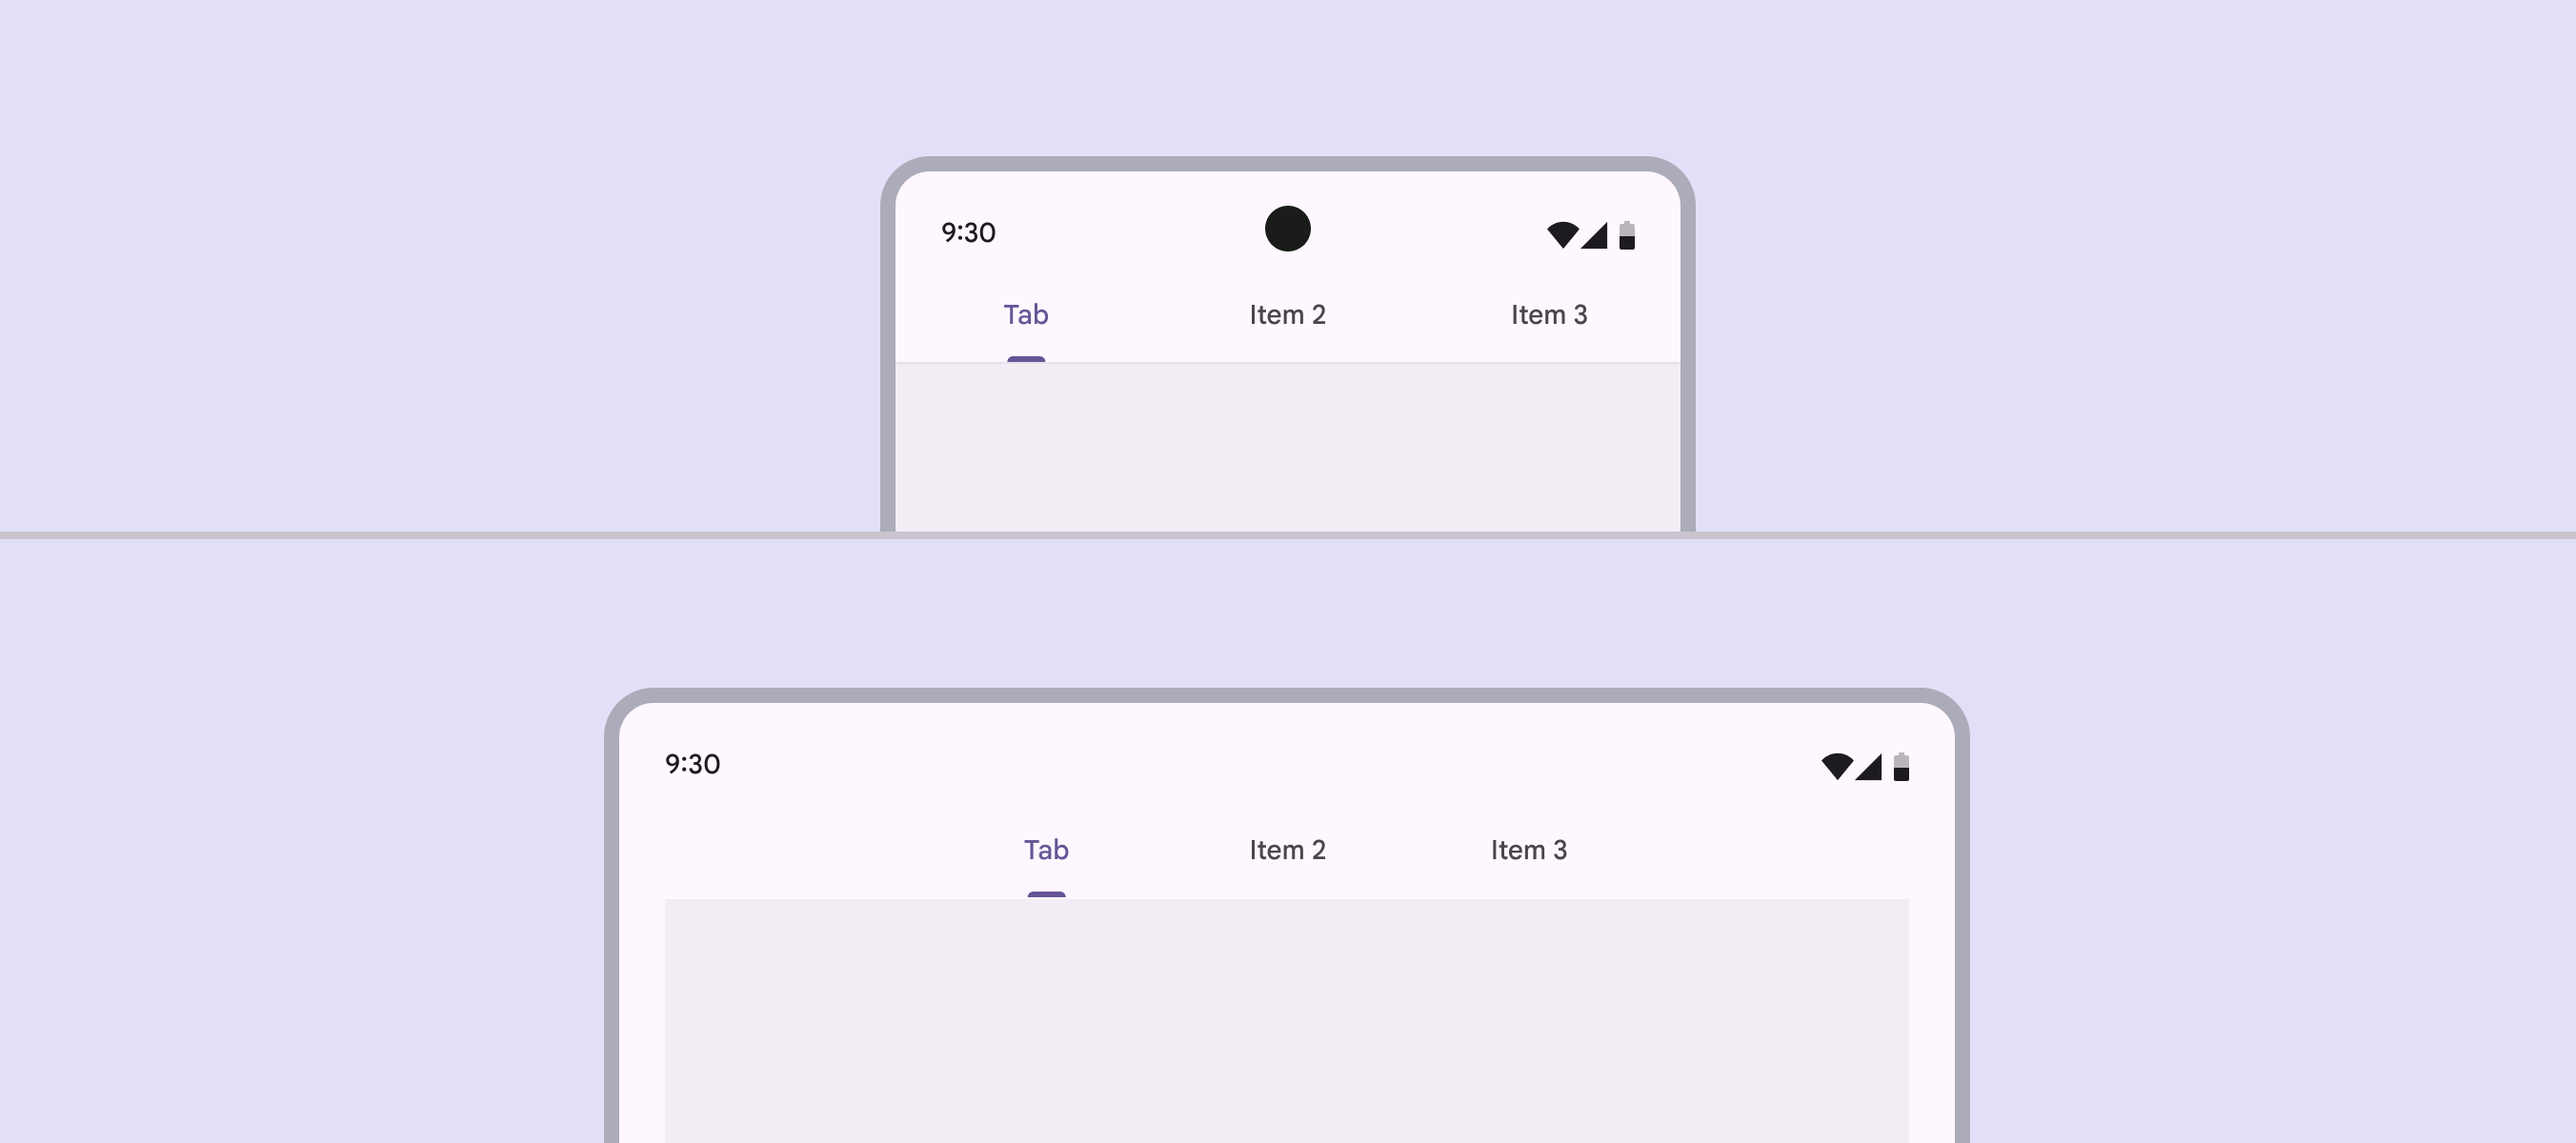
Comparison of compact and medium breakpoints with tabs anchored to the middle of each layout.
Tabs can remain anchored to the middle of a layout at both compact and medium breakpoints

In the case of a button, the icon and text label within the button container can remain anchored to each other, staying centered as the button container scales horizontally.
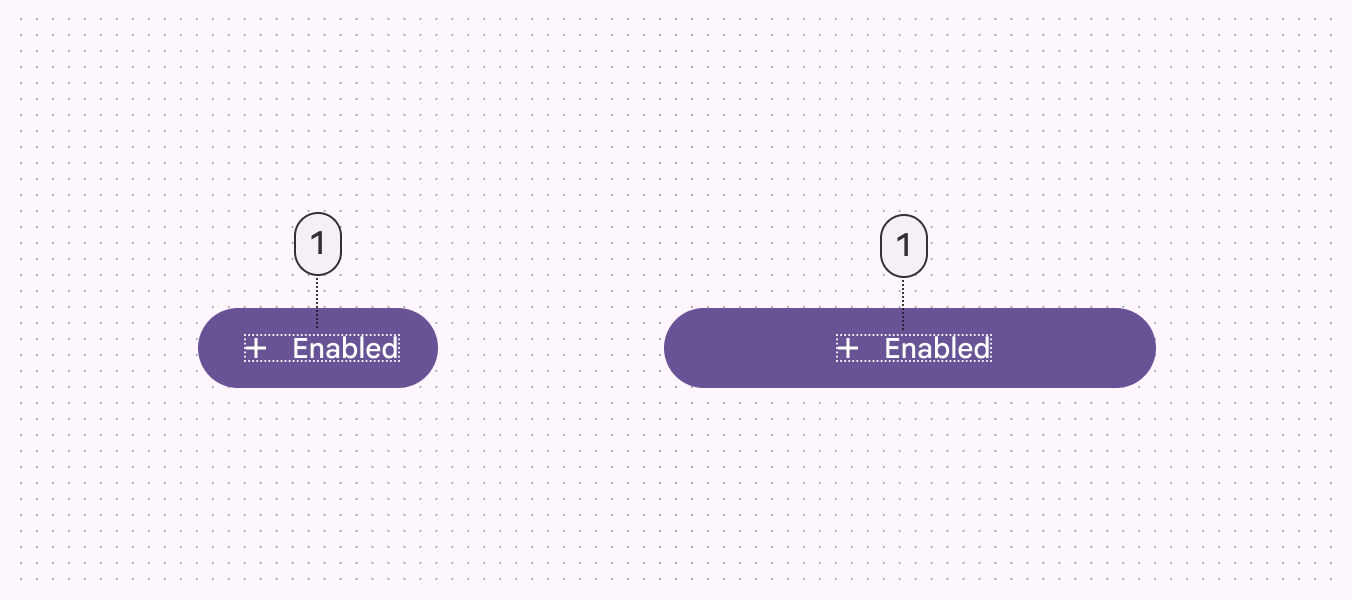
Label text remains the same size and centered as button size increases.
Button icons and label text can remain anchored to each other no matter the width

5. What should be swapped?

As a layout changes across breakpoints, components with similar functions can also be exchanged. This makes it possible to adjust a layout for large-scale changes to the ergonomic and functional qualities of an interface.

For example, a bottom navigation bar in a compact layout can be swapped with a navigation rail in a medium layout.
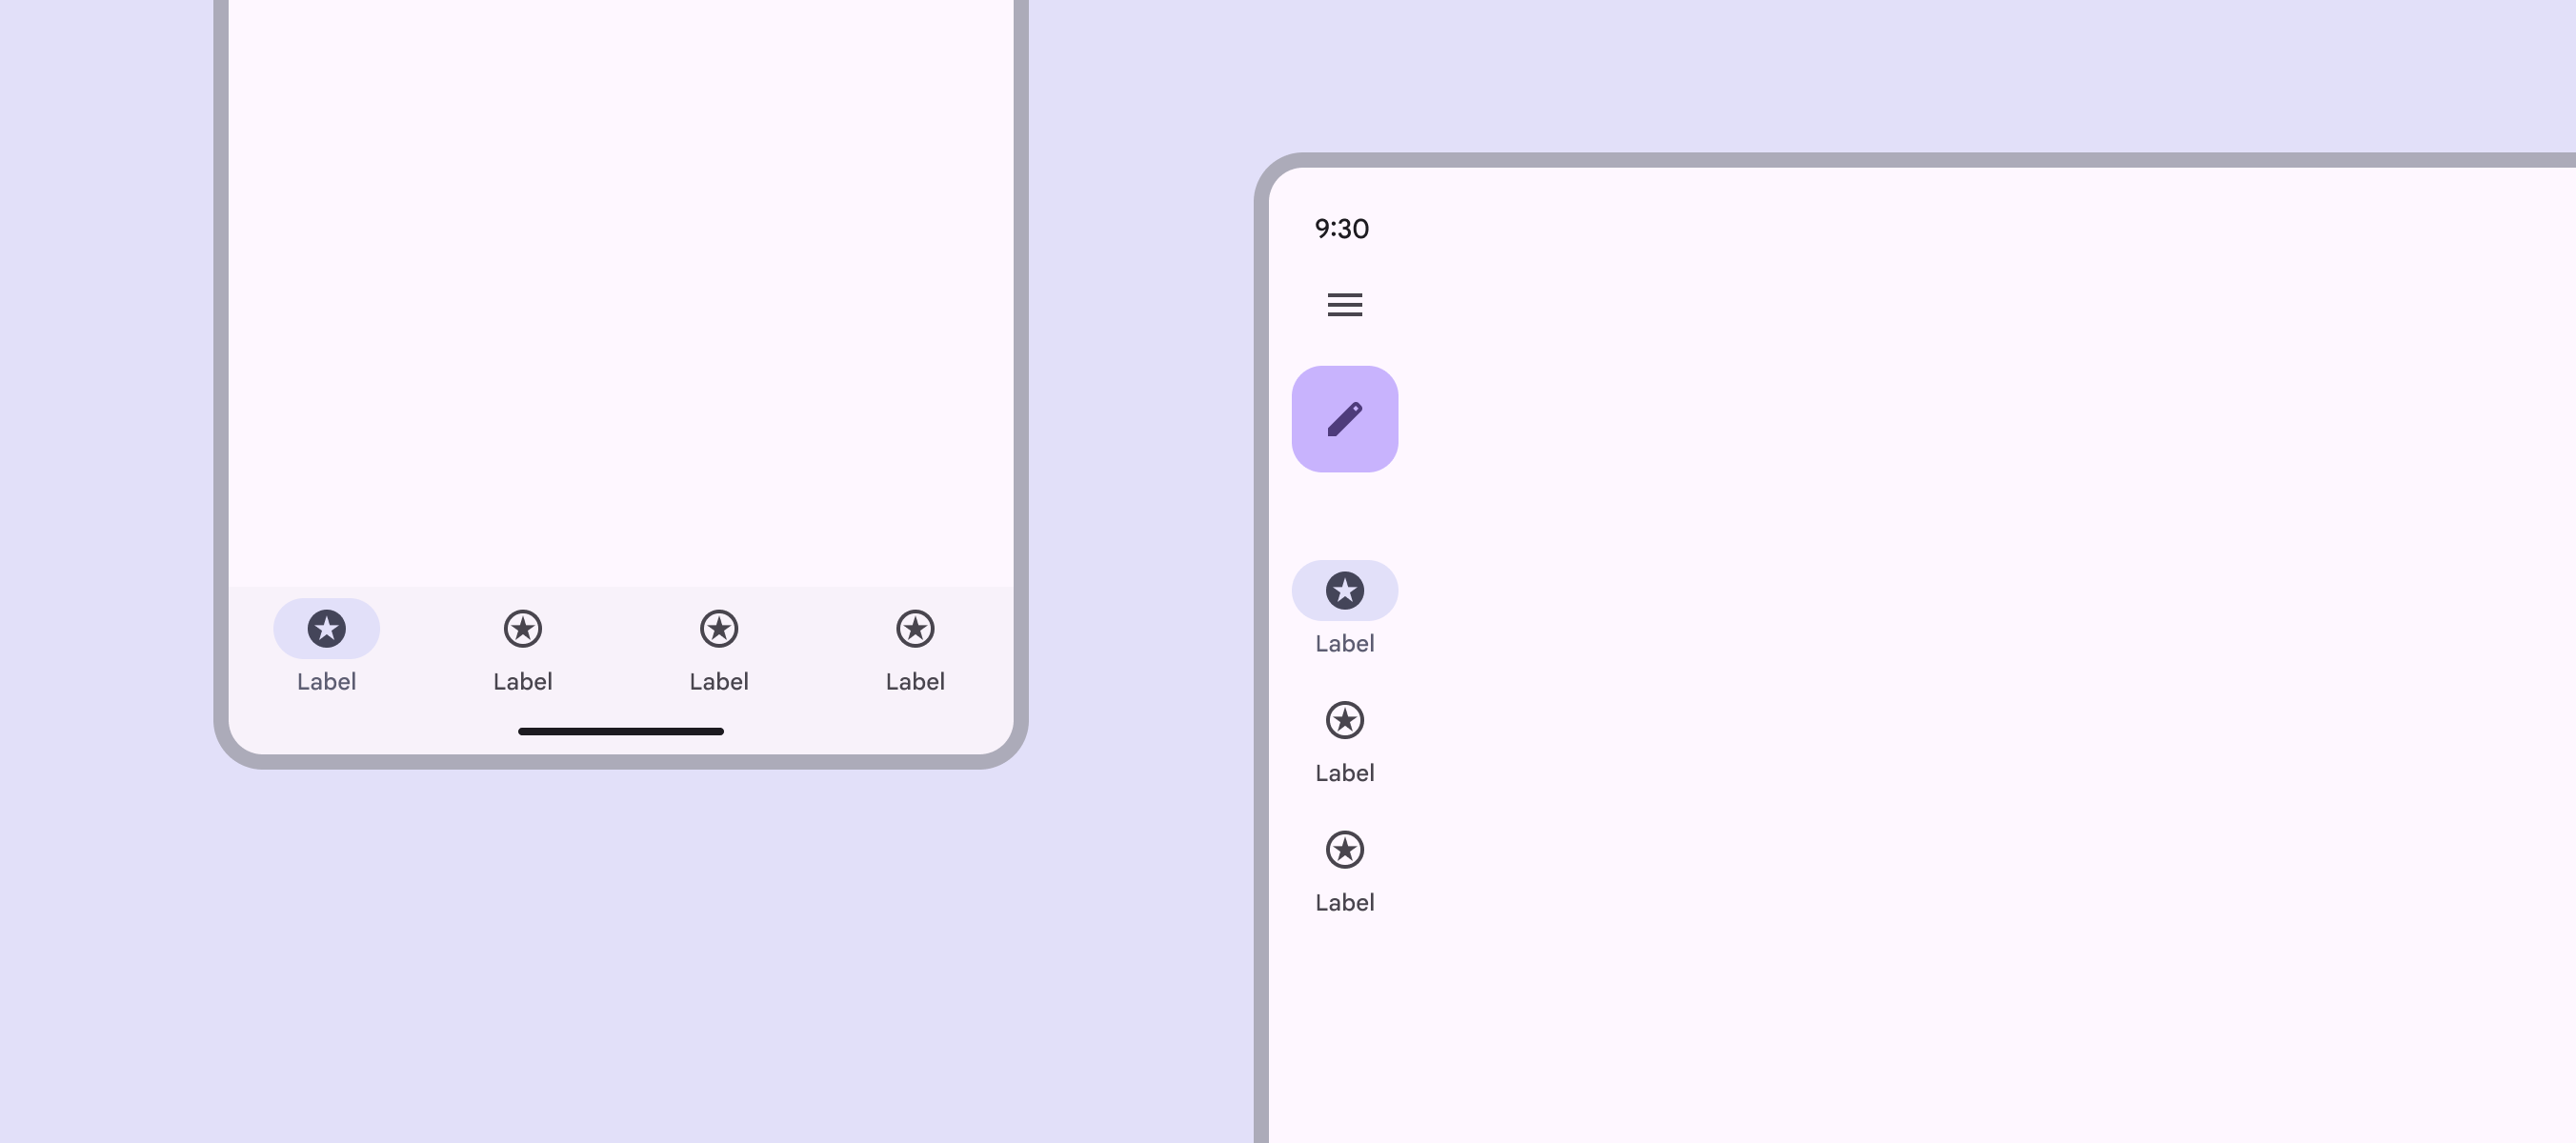
A compact layout’s navigation bar becomes a navigation rail in an expanded layout.
Do Swap a navigation bar in a compact layout for a navigation rail in a medium or expanded layout

Likewise, a navigation rail can swap from collapsed to expanded at larger breakpoints.

Use caution when swapping components. Make sure:

  • The interchangeable components are functionally equivalent
  • The component swap serves a functional and ergonomic purpose

Don’t swap a button for a chip. Be careful when changing between list items and cards.
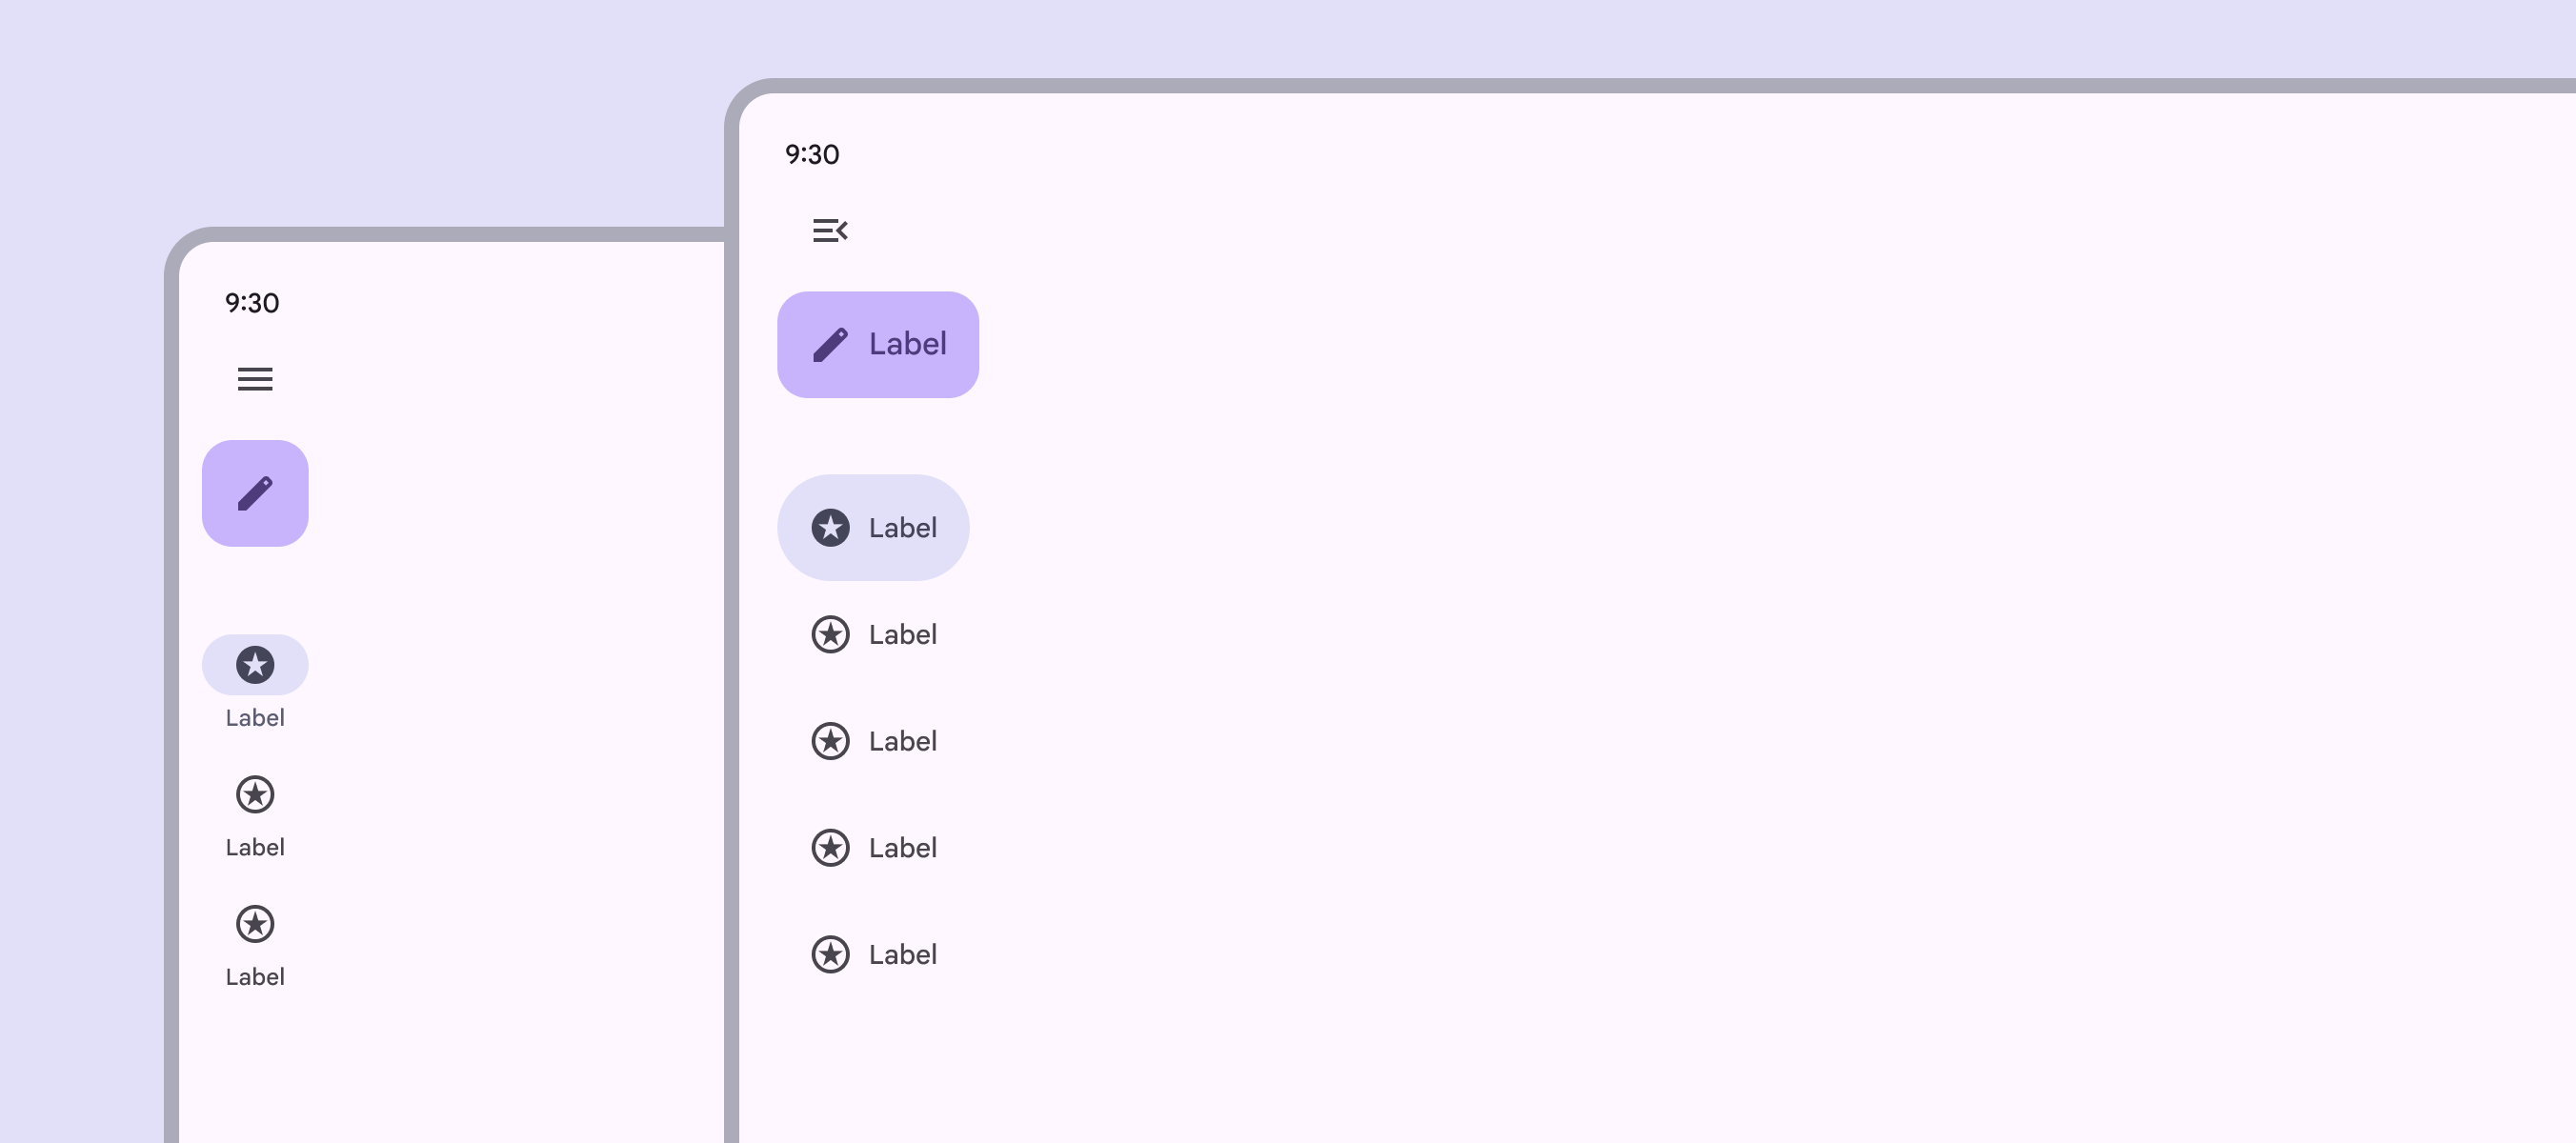
A compact layout’s navigation rail expands in an extra-large layout.
Do A collapsed navigation rail in medium or expanded layouts can become an expanded navigation rail in large or extra-large layouts
A button is swapped out for a menu in a food delivery app.
Don’t Don’t arbitrarily swap components that aren’t functionally equivalent, such as swapping a button with a menu

Common swappable components ​

Component typeCompactMediumExpanded
NavigationNavigation barNavigation bars let people switch between UI views on smaller devices.More on navigation barsCollapsed navigation railCollapsed navigation rails take up minimal space and are best for medium windows and larger.More on navigation railsCollapsed navigation railCollapsed navigation rails take up minimal space and are best for medium windows and larger.More on navigation rails
NavigationModal expanded navigation railExpanded navigation rails show text labels and an extended FAB, and can be default or modal.More on navigation railsModal expanded navigation railExpanded navigation rails show text labels and an extended FAB, and can be default or modal.More on navigation railsStandard expanded navigation railExpanded navigation rails show text labels and an extended FAB, and can be default or modal.More on navigation rails
CommunicationBasic or full-screen dialogFull-screen dialogs fill the entire screen, displaying actions that require a series of tasks to complete. They're often used for creating a calendar entry.More on full-screen dialogsBasic dialogBasic dialogs interrupt users with urgent information, details, or actions. They're often used for alerts, quick selection, or confirmation.More on basic dialogsBasic dialogBasic dialogs interrupt users with urgent information, details, or actions. They're often used for alerts, quick selection, or confirmation.More on basic dialogs
Supplemental selectionBottom sheetBottom sheets show secondary content anchored to the bottom of the screen.More on bottom sheetsMenuMenus display a list of choices on a temporary surface.More on menusMenuMenus display a list of choices on a temporary surface.More on menus
Pager
Previous pageGrids & spacing: Density
Next pageBreakpoints: Compact

Released under the Apache 2.0 or CC BY 4.0

Copyright © 2018-Present Google

https://m3.material.io/foundations/layout/breakpoints/overview

Released under the Apache 2.0 or CC BY 4.0

Copyright © 2018-Present Google