Skip to content
Material Design 3
Main Navigation
v3
v2
v1

English

简体中文
繁體中文
Español
Français
Русский
Português – Brasil
Deutsch
日本語
한국어
Italiano
Polski
Türkçe
čeština
magyar

English

简体中文
繁體中文
Español
Français
Русский
Português – Brasil
Deutsch
日本語
한국어
Italiano
Polski
Türkçe
čeština
magyar

Appearance

Sidebar Navigation

Foundations

Accessibility

Overview: Principles

Overview: Assistive technology

Designing: Overview

Designing: Color contrast

Designing: Structure

Designing: Flow

Designing: Elements

Writing and text: Best practices

Writing and text: Text truncation

Writing and text: Text resizing

Building for all: User needs

Building for all: Co-design

Content design

Overview

Alt text

Global writing: Overview

Global writing: Word choice

Notifications

Style guide: UX writing best practices

Style guide: Word choice

Style guide: Grammar and punctuation

Customizing Material

Devices

Watches: Overview

Watches: Foundations

Watches: Styles

Watches: Layout

XR

Design: Overview

Design: Interaction

Design: Layout

Design: Accessibility

Components: Overview

Components: App bars

Components: Dialogs

Components: Nav bar

Components: Nav rail

Components: Toolbars

Design tokens: Overview

Design tokens: How to use tokens

Interaction

Gestures

Inputs

Selection

States: Overview

States: State layers

States: Applying states

Layout

Overview: Overview

Overview: Parts of layout

Overview: Adaptive design

Scaffold: Overview

Scaffold: Bars

Scaffold: Rails

Scaffold: Panes

Grids & spacing: Overview

Grids & spacing: Grids

Grids & spacing: Spacing

Grids & spacing: Density

Breakpoints: Overview

Breakpoints: Compact

Breakpoints: Medium

Breakpoints: Expanded

Breakpoints: Large & extra-large

Bidirectionality & RTL

Canonical examples: Overview

Canonical examples: Feed

Canonical examples: List-detail

Canonical examples: Supporting pane

Usability: Overview

Usability: Applying M3 Expressive

Material A-Z

Styles

Color

Color system: Overview

Color system: How the system works

Color roles

Color schemes

Choosing a scheme

Static: Baseline

Static: Custom brand

Dynamic: Choosing a source

Dynamic: User-generated source

Dynamic: Content-based source

Advanced: Overview

Advanced: Apply colors

Advanced: Define new colors

Advanced: Adjust existing colors

Color resources

Elevation: Overview

Elevation: Applying elevation

Elevation: Tokens

Icons: Overview

Icons: Designing icons

Icons: Applying icons

Motion

Motion physics system: How it works

Motion physics system: Specs

Easing and duration: Applying easing and duration

Easing and duration: Tokens & specs

Transitions: Transition patterns

Transitions: Applying transitions

Shape: Overview & principles

Shape: Corner radius scale

Shape: Shape morph

Spacing: Overview

Spacing: Applying spacing

Spacing: Tokens

Typography: Overview

Typography: Fonts

Typography: Type scale & tokens

Typography: Applying type

Typography: Editorial treatments

Components

App bars: Overview

App bars: Specs

App bars: Guidelines

App bars: Accessibility

Badges: Overview

Badges: Specs

Badges: Guidelines

Badges: Accessibility

Buttons

All buttons

Button groups: Overview

Button groups: Specs

Button groups: Guidelines

Button groups: Accessibility

Buttons: Overview

Buttons: Specs

Buttons: Guidelines

Buttons: Accessibility

Extended FABs: Overview

Extended FABs: Specs

Extended FABs: Guidelines

Extended FABs: Accessibility

FAB menu: Overview

FAB menu: Specs

FAB menu: Guidelines

FAB menu: Accessibility

FABs: Overview

FABs: Specs

FABs: Guidelines

FABs: Accessibility

Icon buttons: Overview

Icon buttons: Specs

Icon buttons: Guidelines

Icon buttons: Accessibility

Segmented buttons: Overview

Segmented buttons: Specs

Segmented buttons: Guidelines

Segmented buttons: Accessibility

Split button: Overview

Split button: Specs

Split button: Guidelines

Split button: Accessibility

Cards: Overview

Cards: Specs

Cards: Guidelines

Cards: Accessibility

Carousel: Overview

Carousel: Specs

Carousel: Guidelines

Carousel: Accessibility

Checkbox: Overview

Checkbox: Specs

Checkbox: Guidelines

Checkbox: Accessibility

Chips: Overview

Chips: Specs

Chips: Guidelines

Chips: Accessibility

Date & time pickers

Date pickers: Overview

Date pickers: Specs

Date pickers: Guidelines

Date pickers: Accessibility

Time pickers: Overview

Time pickers: Specs

Time pickers: Guidelines

Time pickers: Accessibility

Dialogs: Overview

Dialogs: Specs

Dialogs: Guidelines

Dialogs: Accessibility

Divider: Overview

Divider: Specs

Divider: Guidelines

Divider: Accessibility

Lists: Overview

Lists: Specs

Lists: Guidelines

Lists: Accessibility

Loading & progress

Loading indicator: Overview

Loading indicator: Specs

Loading indicator: Guidelines

Loading indicator: Accessibility

Progress indicators: Overview

Progress indicators: Specs

Progress indicators: Guidelines

Progress indicators: Accessibility

Menus: Overview

Menus: Specs

Menus: Guidelines

Menus: Accessibility

Navigation

Navigation bar: Overview

Navigation bar: Specs

Navigation bar: Guidelines

Navigation bar: Accessibility

Navigation drawer: Overview

Navigation drawer: Specs

Navigation drawer: Guidelines

Navigation drawer: Accessibility

Navigation rail: Overview

Navigation rail: Specs

Navigation rail: Guidelines

Navigation rail: Accessibility

Radio button: Overview

Radio button: Specs

Radio button: Guidelines

Radio button: Accessibility

Search: Overview

Search: Specs

Search: Guidelines

Search: Accessibility

Sheets

Bottom sheets: Overview

Bottom sheets: Specs

Bottom sheets: Guidelines

Bottom sheets: Accessibility

Side sheets: Overview

Side sheets: Specs

Side sheets: Guidelines

Side sheets: Accessibility

Sliders: Overview

Sliders: Specs

Sliders: Guidelines

Sliders: Accessibility

Snackbar: Overview

Snackbar: Specs

Snackbar: Guidelines

Snackbar: Accessibility

Switch: Overview

Switch: Specs

Switch: Guidelines

Switch: Accessibility

Tabs: Overview

Tabs: Specs

Tabs: Guidelines

Tabs: Accessibility

Text fields: Overview

Text fields: Specs

Text fields: Guidelines

Text fields: Accessibility

Toolbars: Overview

Toolbars: Specs

Toolbars: Guidelines

Toolbars: Accessibility

Tooltips: Overview

Tooltips: Specs

Tooltips: Guidelines

Tooltips: Accessibility

On this page

Writing and text: Text resizing ​

Ensure text is helpful, clear, and resilient to change

Background ​

People with low vision or those who prefer large text must be able to scale up the size of text in a UI. This adjustment is often performed through a device OS setting or in-app option.

UIs should support a minimum text increase of 200%.

Most components behave the same when text is resized:

  • Text and line height scale up proportionally, multiplied by scale value
  • Padding remains constant at 1x the default size
  • Spacing between elements in a component remain constant at 1x the default size
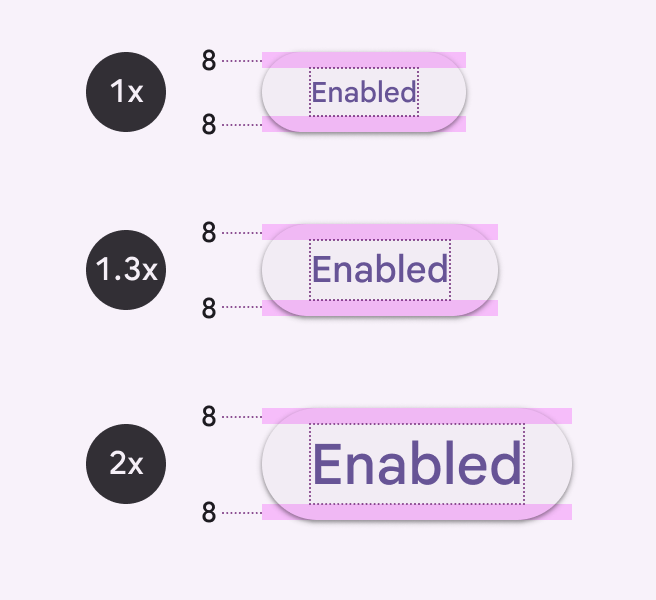
Padding is the same on the top and bottom edges of the buttons.
Button text displayed at 1x, 1.3x, and 2x scales. All have top and bottom padding of 8dp.
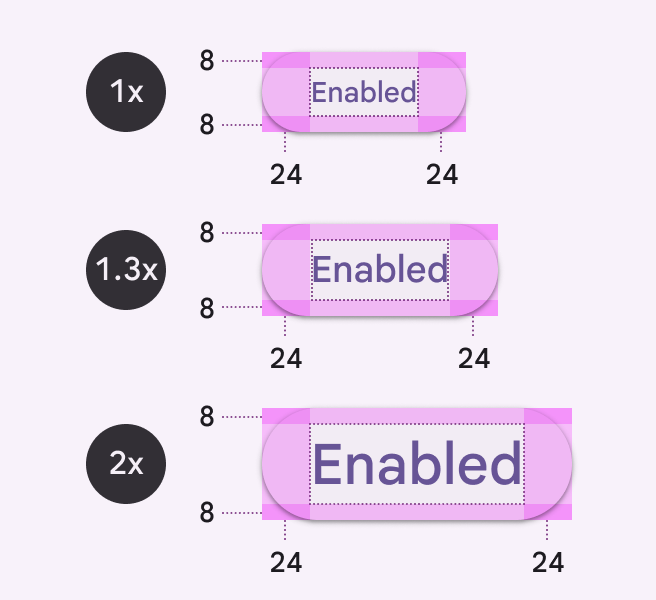
Button text displayed at 1x, 1.3x, and 2x scales. All have left and right padding of 24dp.
Left and right padding remains constant at 24dp as the text size increases.

When text resizing isn’t controlled by the device OS, offer multipliers such as 1.5x or 2x to allow users to increase the text size. Using multipliers to scale text can result in values with decimals, but this approach is more feasible for implementation.

To calculate a font’s size using multipliers, take the default font size (density = 0) and multiply it by the scale value.
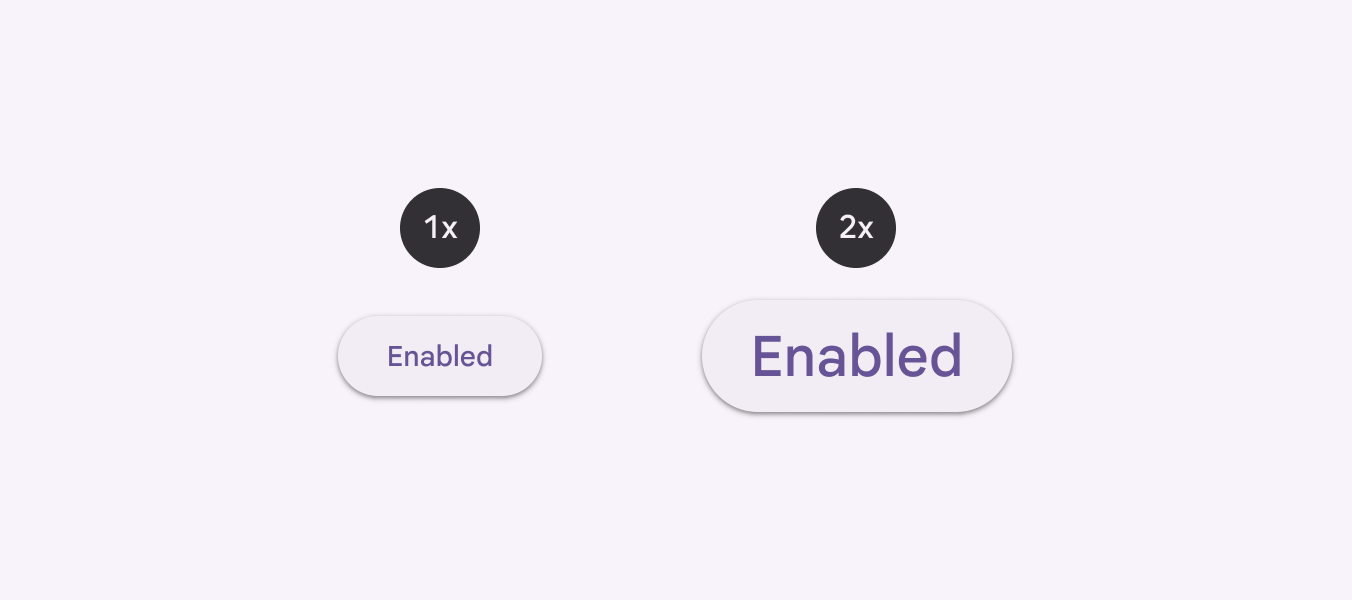
Button with label text at 1x and 2x scale.
For example, if a font is 14pt at 1x scale, then the font size should be 28pt when enlarged to 2x scale: (14pt) x (scale value 2) = 28.

Components that don’t include text, like progress indicators, checkboxes, or radio buttons, aren’t affected by text resizing.
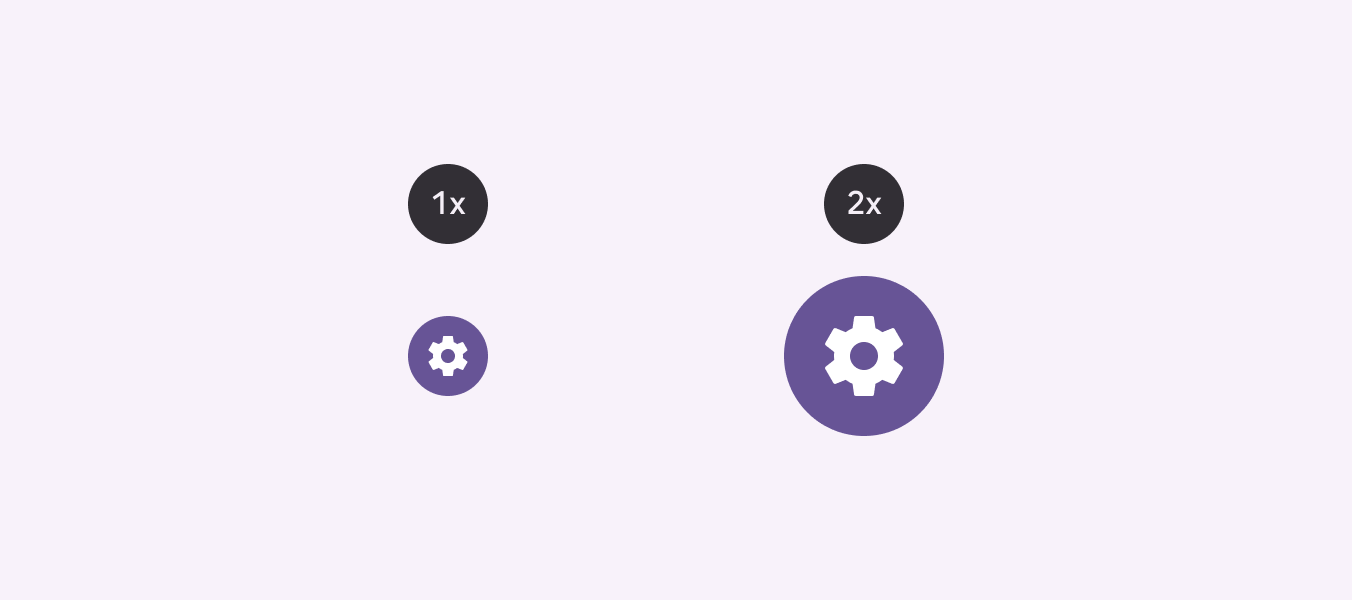
Icon button with the icon shown at 1x scale and incorrectly at 2x scale.
Don’t When designing for text resizing, don’t resize components without text
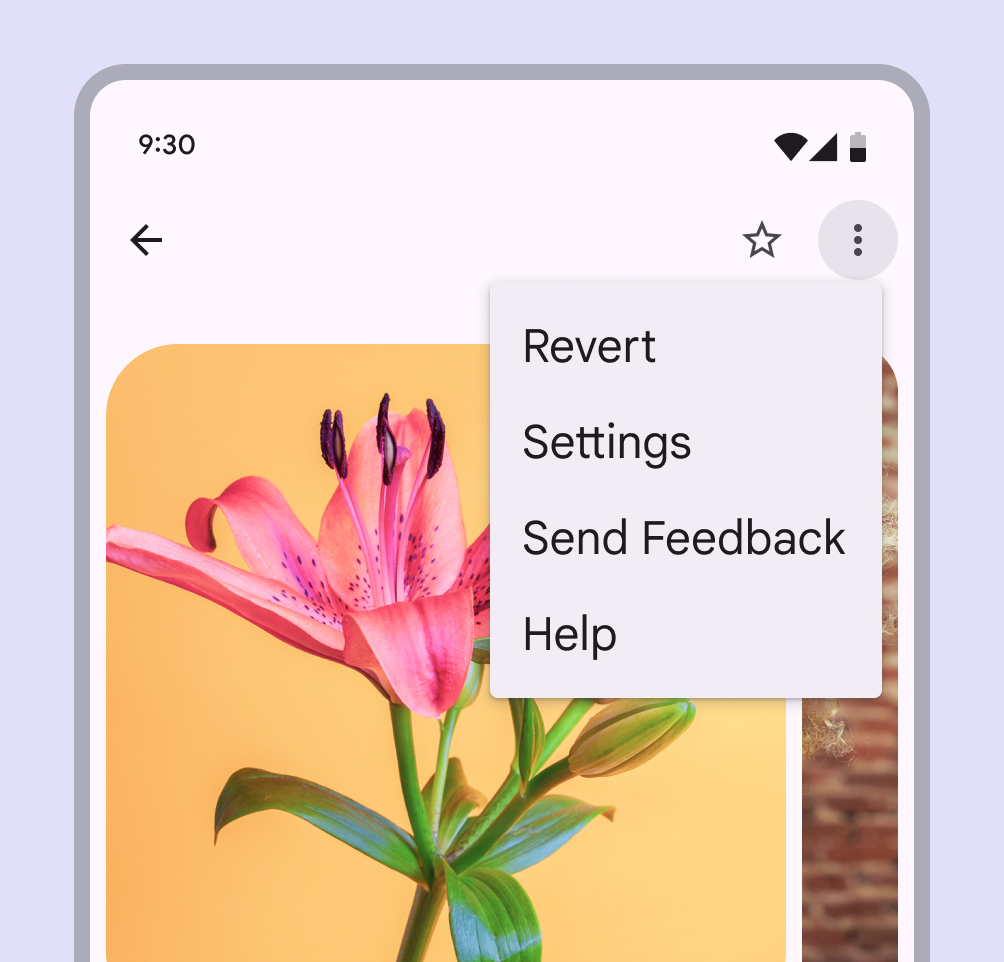
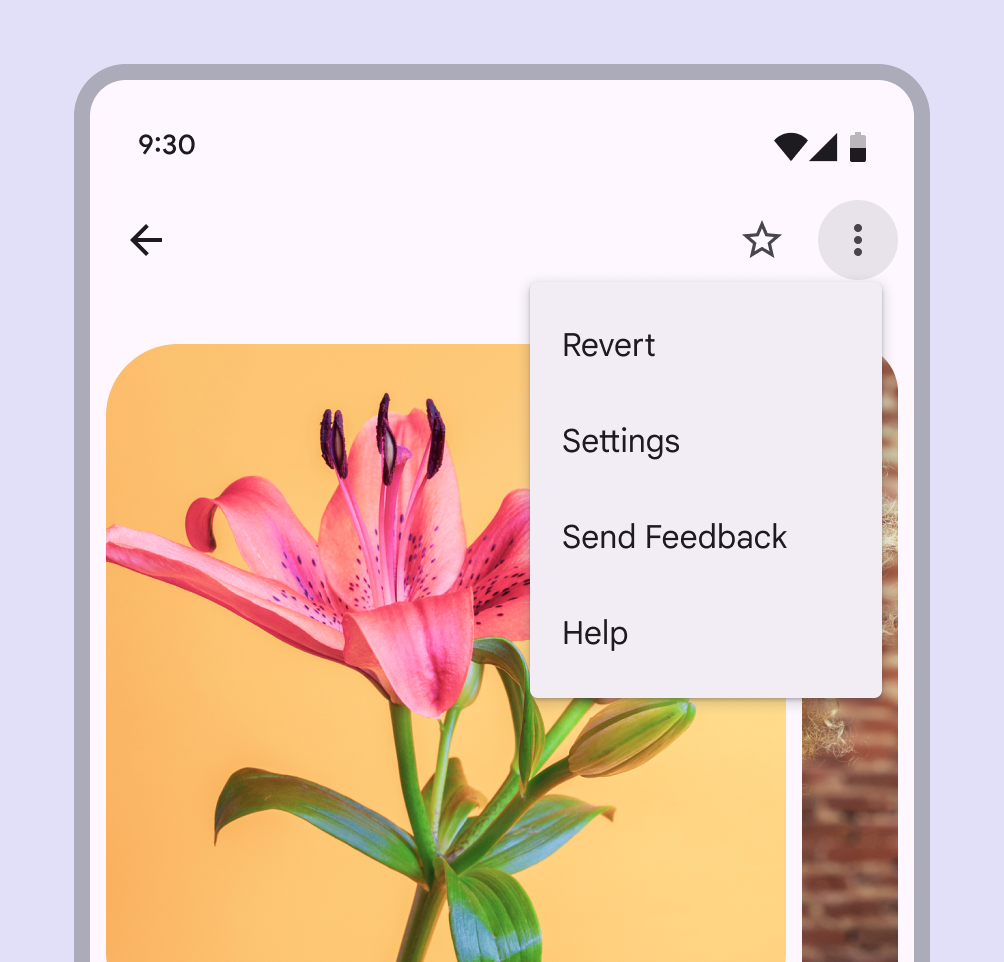
Menu with labels at 1x scale.
UI text displayed at 1x
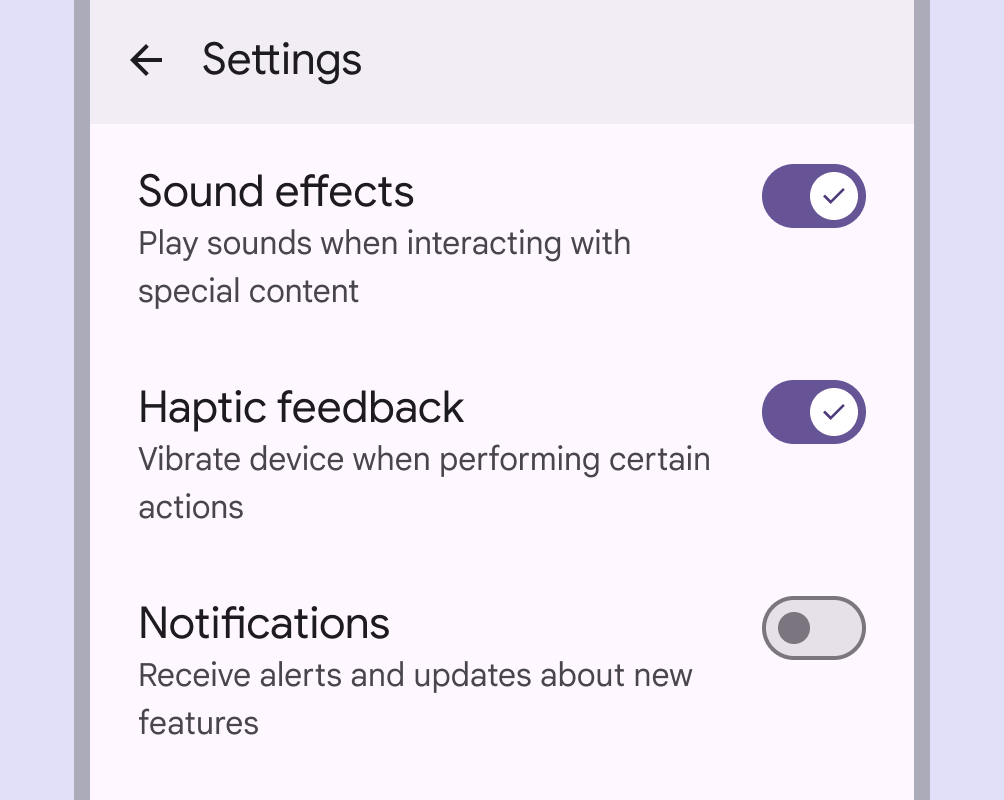
Menu with labels at 2x scale.
UI text displayed at 2x in which only text and line height is enlarged; the padding between components remains the same as in the 1x UI.

Designing for large type ​

Large type is used regularly by people with low vision and those with difficulty processing written words. They tend to increase text size:

  • To make it easier to read
  • To limit interruptions and focus on one task
  • To avoid overwhelming their senses

Use these methods to design a product to handle large type properly.
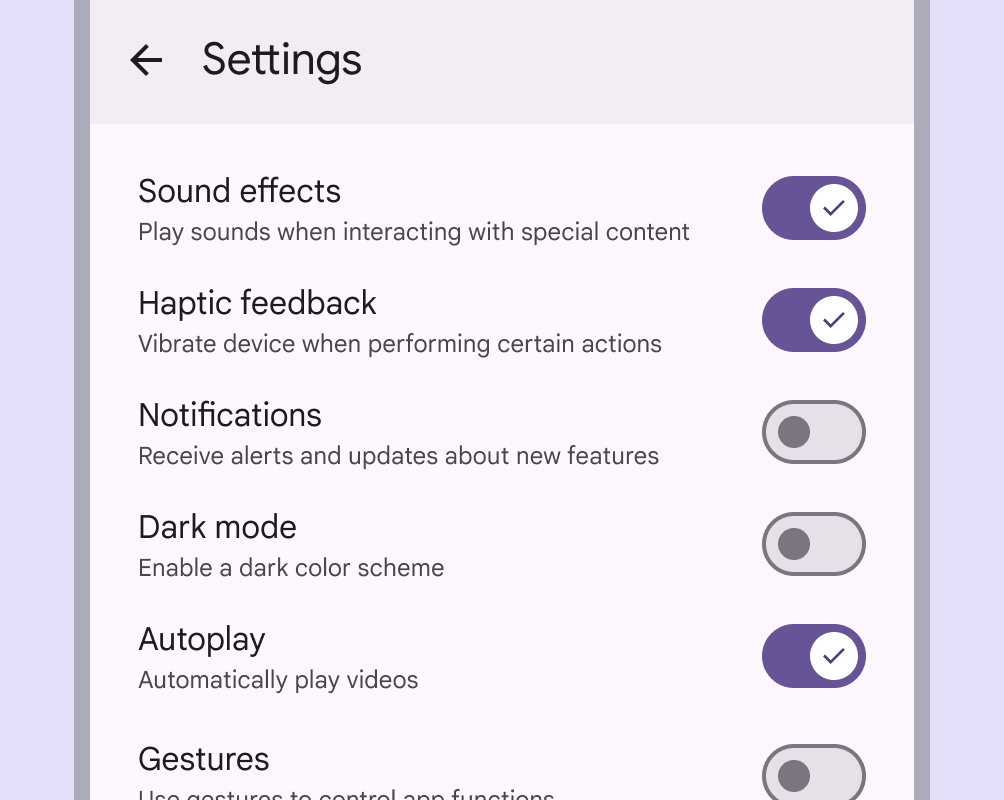
Menu with labels at 2x scale.
Text that is too small and dense can appear overwhelming and difficult to read
Menu with labels at 1x scale.
Larger text can help people focus on one decision at a time and improve understanding

Methods ​

Avoid common text resizing issues by increasing container size, reflowing layout, enabling scrolling, and adding tooltips.
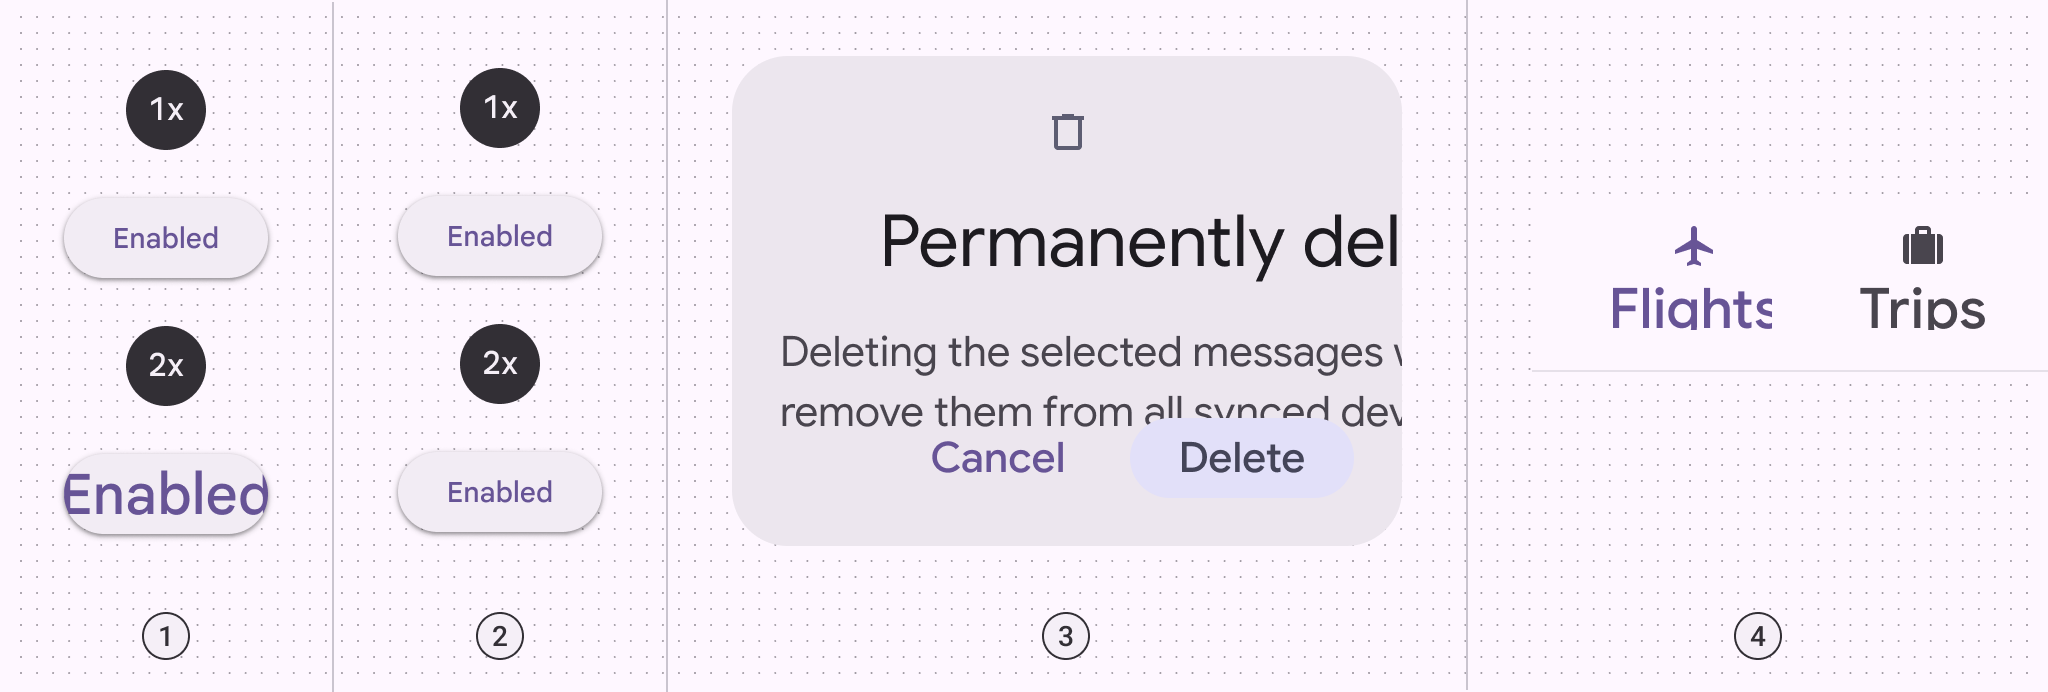
Side by side of 4 commonly found issues when resizing text up.
  1. Unresponsive container; unintentionally clipped text
  2. Unresponsive text
  3. Overlapping elements
  4. Unwanted truncation

Increase container size

Resizing containers can prevent text from overlapping, clipping, or truncating.

Consider how text might reflow in a way that allows the eye to follow the end of one line to the beginning of the following line.

Reflow the layout

Consider reflowing the layout, especially when components grow very long. To accommodate larger text, components can be stacked on top of one another, rather than fixed side-by-side.
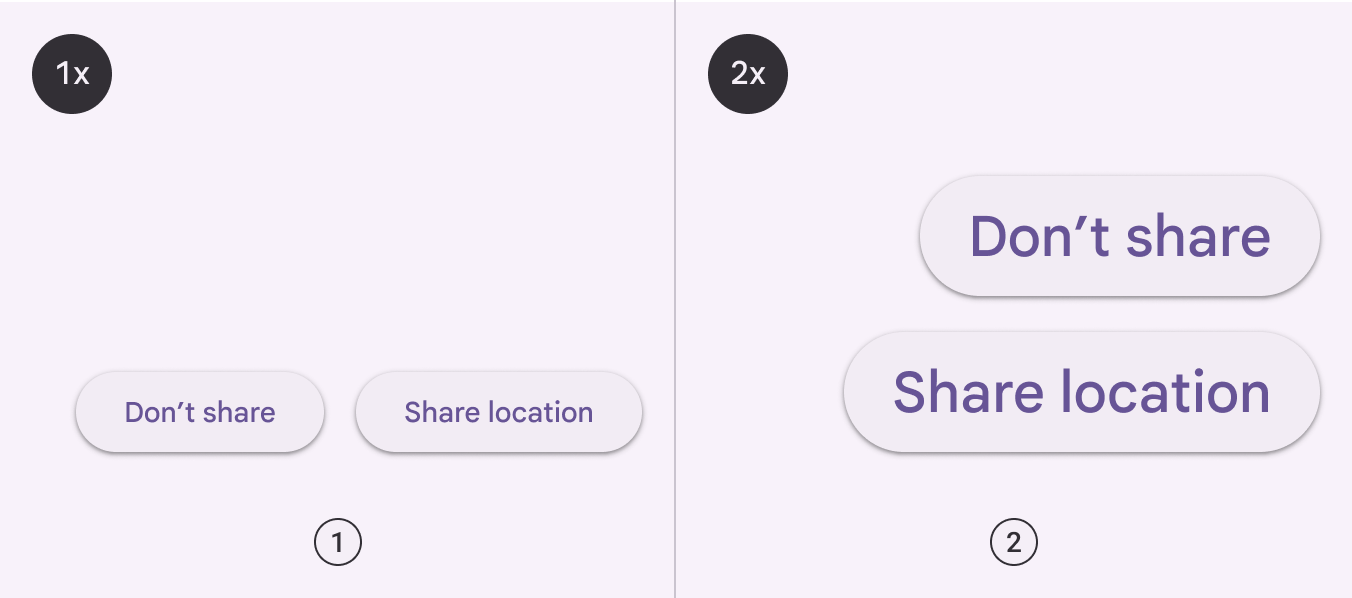
Left: buttons placed side-by-side. Right: buttons stacked on top of one another.
  1. UI displayed at 1x: buttons positioned side-by-side in a standard layout
  2. UI displayed at 2x: buttons stacked to fit the limited horizontal width after text is resized

Enable content to scroll

When long strings of enlarged text don’t fit on one screen, consider adding a scrollbar to provide access to more content.

Vertical scrolling is preferable to horizontal. Users should only be asked to scroll in one direction, rather than both vertically and horizontally.
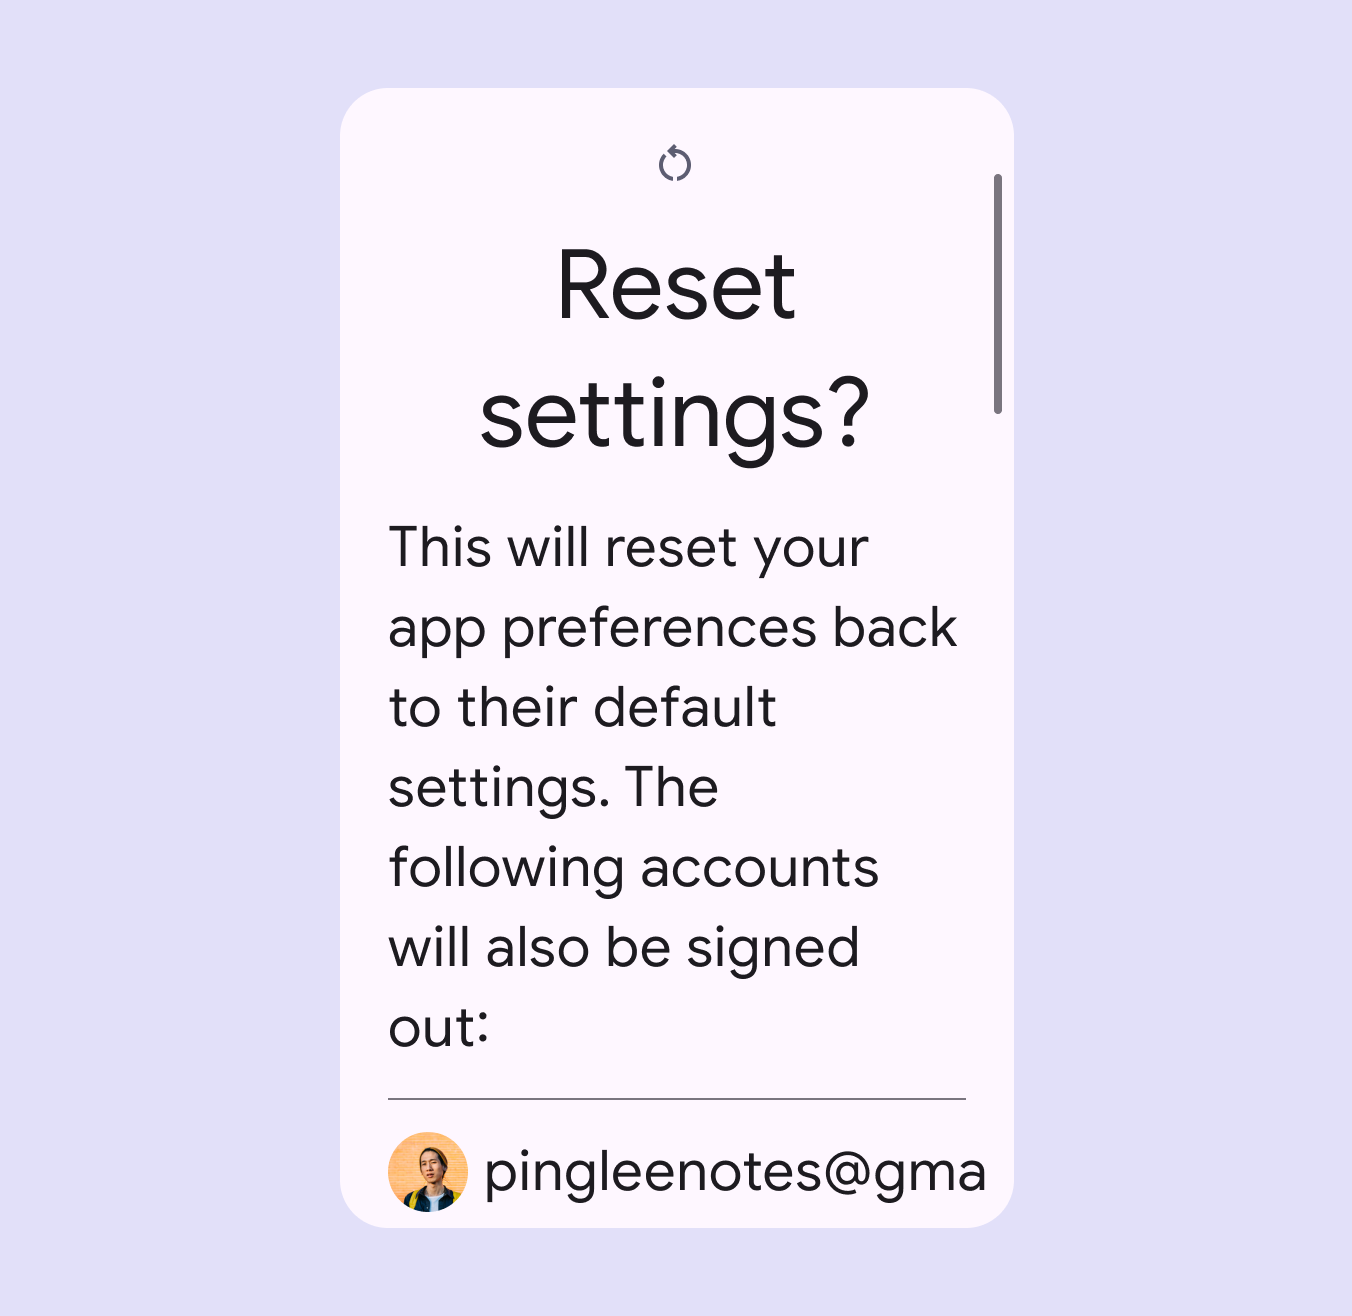
Dialog with a lot of text at 2x size. The text is cut off but accessible when scrolling.
Some screens may not be able to resize and display necessary content. In this situation a scrollbar can be used to access more text.

Use touch & hold tooltips to provide enlarged labels

Some components, such as app bars and navigation bars, position text in spaces with stricter space and character limits. In these situations, you can add a tooltip to display enlarged content in the UI.

In this case, the text size in the component remains displayed at 1x while the scaled up text is displayed in a tooltip on touch & hold.

Tooltips are the best choice for displaying enlarged text in:

  • Top app bar
  • Navigation bar
  • Navigation rail
  • Tabs, when fixed to the top of a screen and don’t move off-screen upon scrolling
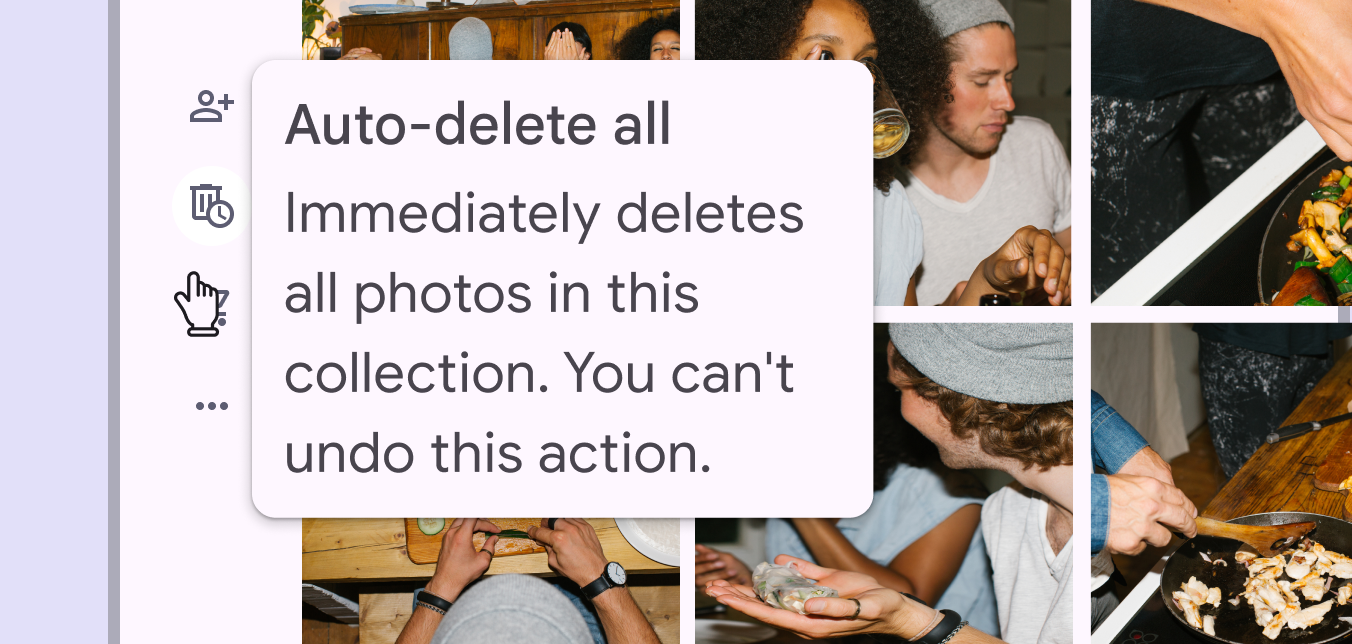
Tooltip on navigation rail displays scaled up label text.
Do Scale up text in an adjacent tooltip to maintain space in a UI for consuming content.
Pager
Previous pageWriting and text: Text truncation
Next pageBuilding for all: User needs

Released under the Apache 2.0 or CC BY 4.0

Copyright © 2018-Present Google

https://m3.material.io/foundations/writing/text-resizing

Released under the Apache 2.0 or CC BY 4.0

Copyright © 2018-Present Google