Skip to content
Material Design 3
Main Navigation
v3
v2
v1

English

简体中文
繁體中文
Español
Français
Русский
Português – Brasil
Deutsch
日本語
한국어
Italiano
Polski
Türkçe
čeština
magyar

English

简体中文
繁體中文
Español
Français
Русский
Português – Brasil
Deutsch
日本語
한국어
Italiano
Polski
Türkçe
čeština
magyar

Appearance

Sidebar Navigation

Foundations

Accessibility

Overview: Principles

Overview: Assistive technology

Designing: Overview

Designing: Color contrast

Designing: Structure

Designing: Flow

Designing: Elements

Writing and text: Best practices

Writing and text: Text truncation

Writing and text: Text resizing

Building for all: User needs

Building for all: Co-design

Content design

Overview

Alt text

Global writing: Overview

Global writing: Word choice

Notifications

Style guide: UX writing best practices

Style guide: Word choice

Style guide: Grammar and punctuation

Customizing Material

Devices

Watches: Overview

Watches: Foundations

Watches: Styles

Watches: Layout

XR

Design: Overview

Design: Interaction

Design: Layout

Design: Accessibility

Components: Overview

Components: App bars

Components: Dialogs

Components: Nav bar

Components: Nav rail

Components: Toolbars

Design tokens: Overview

Design tokens: How to use tokens

Interaction

Gestures

Inputs

Selection

States: Overview

States: State layers

States: Applying states

Layout

Overview: Overview

Overview: Parts of layout

Overview: Adaptive design

Scaffold: Overview

Scaffold: Bars

Scaffold: Rails

Scaffold: Panes

Grids & spacing: Overview

Grids & spacing: Grids

Grids & spacing: Spacing

Grids & spacing: Density

Breakpoints: Overview

Breakpoints: Compact

Breakpoints: Medium

Breakpoints: Expanded

Breakpoints: Large & extra-large

Bidirectionality & RTL

Canonical examples: Overview

Canonical examples: Feed

Canonical examples: List-detail

Canonical examples: Supporting pane

Usability: Overview

Usability: Applying M3 Expressive

Material A-Z

Styles

Color

Color system: Overview

Color system: How the system works

Color roles

Color schemes

Choosing a scheme

Static: Baseline

Static: Custom brand

Dynamic: Choosing a source

Dynamic: User-generated source

Dynamic: Content-based source

Advanced: Overview

Advanced: Apply colors

Advanced: Define new colors

Advanced: Adjust existing colors

Color resources

Elevation: Overview

Elevation: Applying elevation

Elevation: Tokens

Icons: Overview

Icons: Designing icons

Icons: Applying icons

Motion

Motion physics system: How it works

Motion physics system: Specs

Easing and duration: Applying easing and duration

Easing and duration: Tokens & specs

Transitions: Transition patterns

Transitions: Applying transitions

Shape: Overview & principles

Shape: Corner radius scale

Shape: Shape morph

Spacing: Overview

Spacing: Applying spacing

Spacing: Tokens

Typography: Overview

Typography: Fonts

Typography: Type scale & tokens

Typography: Applying type

Typography: Editorial treatments

Components

App bars: Overview

App bars: Specs

App bars: Guidelines

App bars: Accessibility

Badges: Overview

Badges: Specs

Badges: Guidelines

Badges: Accessibility

Buttons

All buttons

Button groups: Overview

Button groups: Specs

Button groups: Guidelines

Button groups: Accessibility

Buttons: Overview

Buttons: Specs

Buttons: Guidelines

Buttons: Accessibility

Extended FABs: Overview

Extended FABs: Specs

Extended FABs: Guidelines

Extended FABs: Accessibility

FAB menu: Overview

FAB menu: Specs

FAB menu: Guidelines

FAB menu: Accessibility

FABs: Overview

FABs: Specs

FABs: Guidelines

FABs: Accessibility

Icon buttons: Overview

Icon buttons: Specs

Icon buttons: Guidelines

Icon buttons: Accessibility

Segmented buttons: Overview

Segmented buttons: Specs

Segmented buttons: Guidelines

Segmented buttons: Accessibility

Split button: Overview

Split button: Specs

Split button: Guidelines

Split button: Accessibility

Cards: Overview

Cards: Specs

Cards: Guidelines

Cards: Accessibility

Carousel: Overview

Carousel: Specs

Carousel: Guidelines

Carousel: Accessibility

Checkbox: Overview

Checkbox: Specs

Checkbox: Guidelines

Checkbox: Accessibility

Chips: Overview

Chips: Specs

Chips: Guidelines

Chips: Accessibility

Date & time pickers

Date pickers: Overview

Date pickers: Specs

Date pickers: Guidelines

Date pickers: Accessibility

Time pickers: Overview

Time pickers: Specs

Time pickers: Guidelines

Time pickers: Accessibility

Dialogs: Overview

Dialogs: Specs

Dialogs: Guidelines

Dialogs: Accessibility

Divider: Overview

Divider: Specs

Divider: Guidelines

Divider: Accessibility

Lists: Overview

Lists: Specs

Lists: Guidelines

Lists: Accessibility

Loading & progress

Loading indicator: Overview

Loading indicator: Specs

Loading indicator: Guidelines

Loading indicator: Accessibility

Progress indicators: Overview

Progress indicators: Specs

Progress indicators: Guidelines

Progress indicators: Accessibility

Menus: Overview

Menus: Specs

Menus: Guidelines

Menus: Accessibility

Navigation

Navigation bar: Overview

Navigation bar: Specs

Navigation bar: Guidelines

Navigation bar: Accessibility

Navigation drawer: Overview

Navigation drawer: Specs

Navigation drawer: Guidelines

Navigation drawer: Accessibility

Navigation rail: Overview

Navigation rail: Specs

Navigation rail: Guidelines

Navigation rail: Accessibility

Radio button: Overview

Radio button: Specs

Radio button: Guidelines

Radio button: Accessibility

Search: Overview

Search: Specs

Search: Guidelines

Search: Accessibility

Sheets

Bottom sheets: Overview

Bottom sheets: Specs

Bottom sheets: Guidelines

Bottom sheets: Accessibility

Side sheets: Overview

Side sheets: Specs

Side sheets: Guidelines

Side sheets: Accessibility

Sliders: Overview

Sliders: Specs

Sliders: Guidelines

Sliders: Accessibility

Snackbar: Overview

Snackbar: Specs

Snackbar: Guidelines

Snackbar: Accessibility

Switch: Overview

Switch: Specs

Switch: Guidelines

Switch: Accessibility

Tabs: Overview

Tabs: Specs

Tabs: Guidelines

Tabs: Accessibility

Text fields: Overview

Text fields: Specs

Text fields: Guidelines

Text fields: Accessibility

Toolbars: Overview

Toolbars: Specs

Toolbars: Guidelines

Toolbars: Accessibility

Tooltips: Overview

Tooltips: Specs

Tooltips: Guidelines

Tooltips: Accessibility

On this page

Typography: Editorial treatments ​

Use typography to make content readable and beautiful

Editorial treatments ​

Editorial treatments are standalone, showcase moments driven by type. They involve dynamic, attention-grabbing use of custom sizes, which can involve larger display type or a blockier look and feel. They should depart from purely functional layouts or basic stages in a user flow.

In the expressive system, editorial treatments can be combined with elements such as motion, shape, or color, to create product-wide hero moments.

A series of editorial moments making dynamic use of type, including a calculator, lock screen, and temperature.
In editorial treatments, type can freely dominate the screen

Examples of editorial treatments ​

Use editorial treatments in three key ways: to celebrate content, to highlight the voice of the user, or to draw attention to bespoke functionality within the product.

Celebrating content

Editorial treatments can dramatically take over the screen to mark a particular user action, memory, or preference.

Try matching the text to the tone of the product or a strong emotion, like a narrow, thin style for serenity, or a bolder, italicized style for liveliness.

Large type reading “Mesa Verde National Park” with a hiker in the foreground.
Use an exuberant cover image for a photo album, here shown with Roboto Flex

Voice of the user

Express the voice of the user by letting them personalize the appearance of typography or by adjusting text based on their input.

Use customization selectively to frame a user’s mood and make it stand out.

A text exchange in which one party is responding enthusiastically in extremely large letters.
A response with the right type treatment can convey ecstatic emotion. Here, the text is shown in Roboto Flex and PT Serif Caption.

Bespoke functionality

Editorial treatments can also be used to help express moments of unique functionality within the product experience.
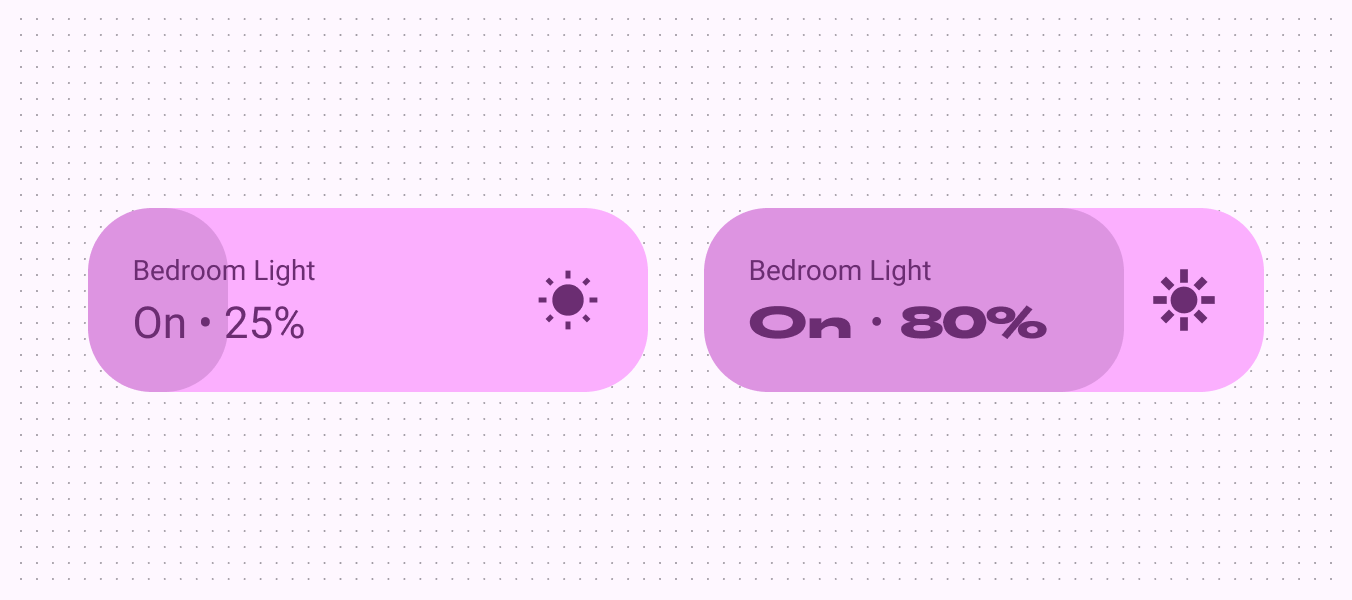
A slider to adjust bedroom lights. The characters increase in width and weight as the brightness is increased.
The increase in the bedroom light brightness prompts an algorithmic response in the width and weight axes

Editorial treatment best practices ​

As there is intentionally much room for choice in developing editorial treatments, there are a few guard rails that will prevent inconsistency, illegibility, or distracting design.

These best practices include:

  • Ensuring consistency between similar-looking editorial moments, creating tokens for each where needed
  • Matching the emotional tone of text to the task at hand
  • Not mixing multiple or clashing styles in the same layout
  • Not mimicking personalization theming
A UI showing two instances of editorial treatments with consistent styling.
Do Create tokens for editorial treatments to apply them consistently in your product
A UI featuring a name in which the first is using a different custom type treatment than the last.
Caution Use caution when mixing different editorial treatments in the same layout. Try to keep them consistent.

Use variable axes to make editorial treatments ​

Adjust variable font axes like weight, grade, width, and optical size to match the font to the feeling. Baseline and emphasized type styles can still be used. Though, editorial treatments shouldn’t be used in labels or just to give information.

Weight

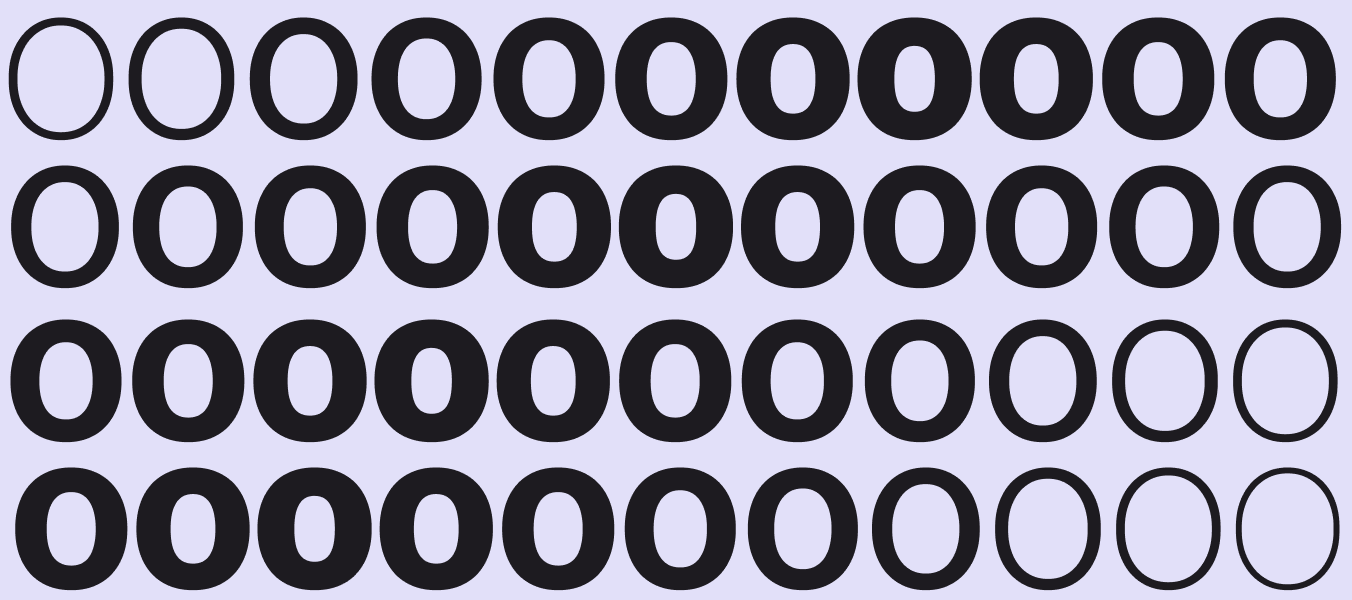
Weight is the primary attribute that defines the overall thickness of a typeface’s strokes in any given font. The most common weights are regular and bold, but weights can cover extremes from the very light to the very heavy.

If the typeface is variable, it provides a full, continuous range of stroke thicknesses, making the number of weights effectively unlimited.
Learn more about weight on Google Fonts

Many examples of Roboto Flex weights.
A variable font, Roboto Flex offers a fluid range of weights
Light text in use as body text.
Caution Be careful when using very light weight for body text. Lower-resolution displays can struggle to show thin typography, especially at small sizes. Instead, consider lighter weights at larger font sizes, such as display type.
Navigation bar using bold typography for label text, making it challenging to read.
Caution Excessive weight at smaller sizes can make text harder to read

Grade

Grade is a secondary modifier of a typeface’s optical weight, independent of the weight axis. Both weight and grade axes affect a letter’s thickness, but adjustments with grade are much more granular and don’t change any letter widths or line breaks.

Learn more about grade on Google Fonts

Three ampersands set in Roboto Flex without grade over Roboto Flex with 150 grade.
Roboto Flex offers a positive grade of 150 and a negative grade of 200
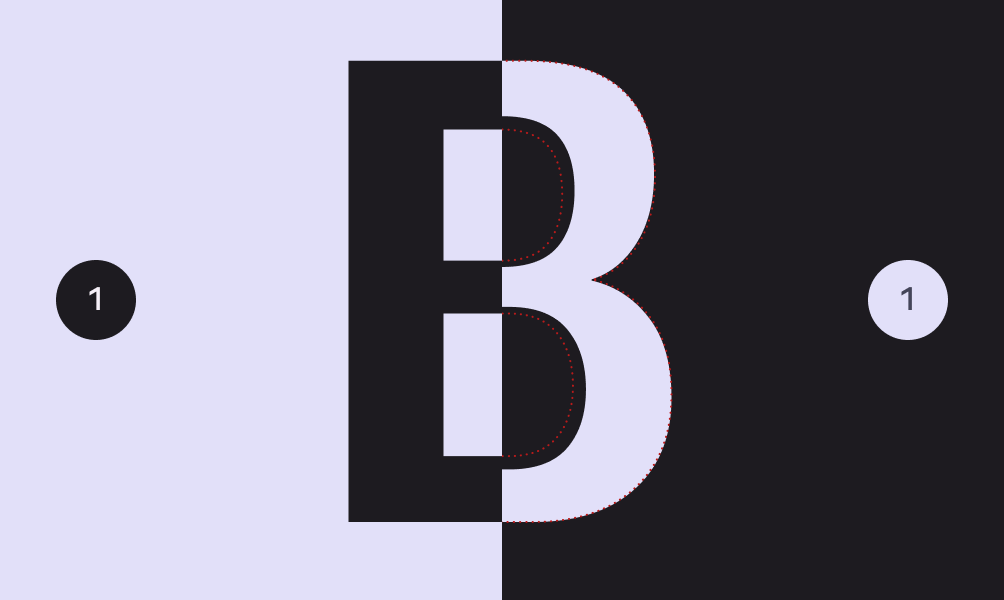
A light and dark screen each showing the letter B.
When switching between dark and light mode, the same text may appear heavier despite having the same settings. Consider using a negative grade to counteract this.
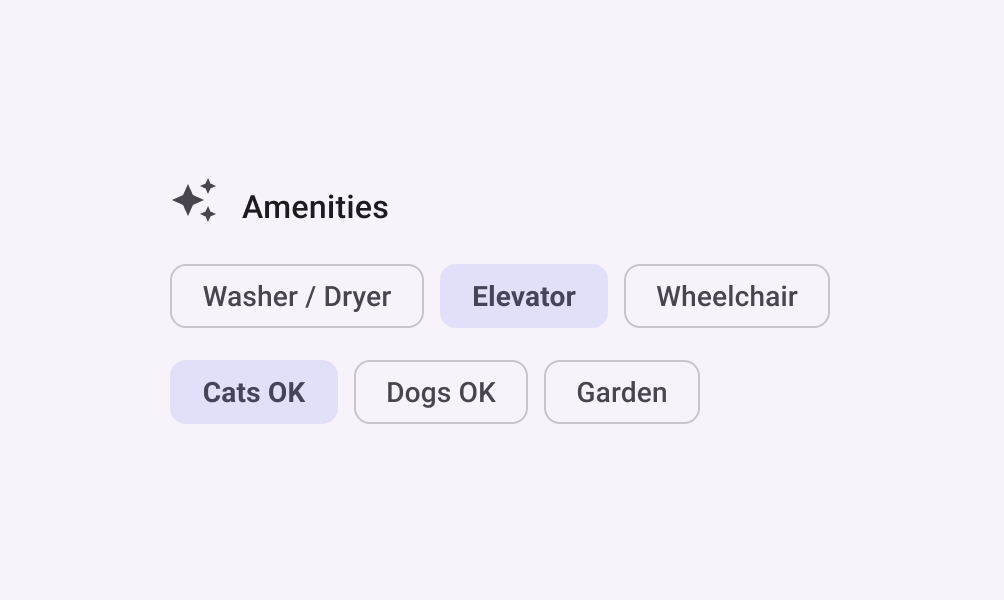
A list of amenities where the filter chip for “Elevator” and “Cats OK” are selected and have a heavier grade applied.
Grade can change the emphasis without reflowing text

Width

Width is the result of how much horizontal space is taken up by a typeface’s characters.

A narrow width allows more characters to fit per line while a wider width may offer more personality.

Learn more about width on Google Fonts

The letter ‘N’, set in Roboto Flex, rendered in varying widths.
Roboto Flex offers a fluid range of widths, from 25 to 150
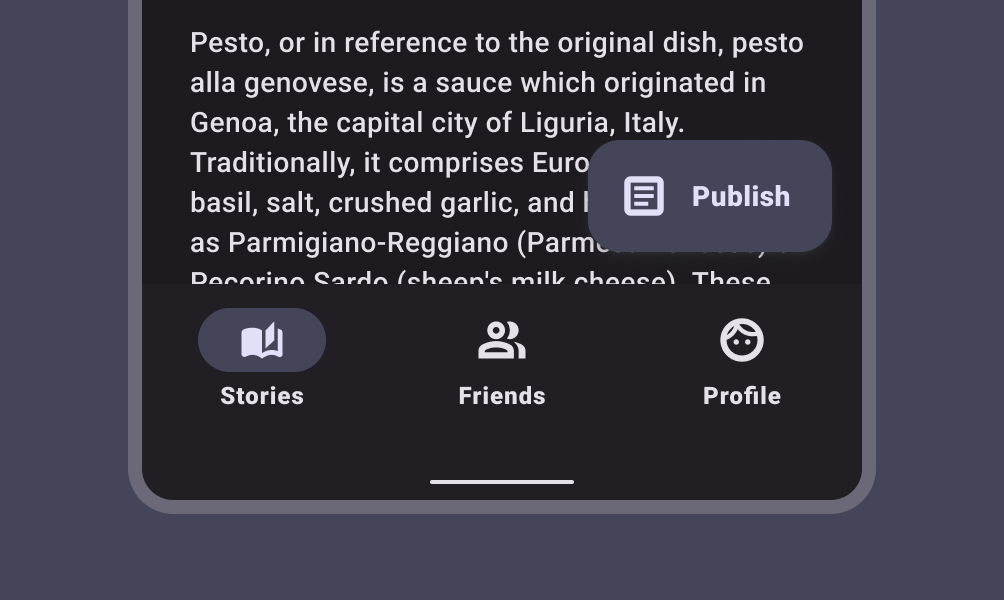
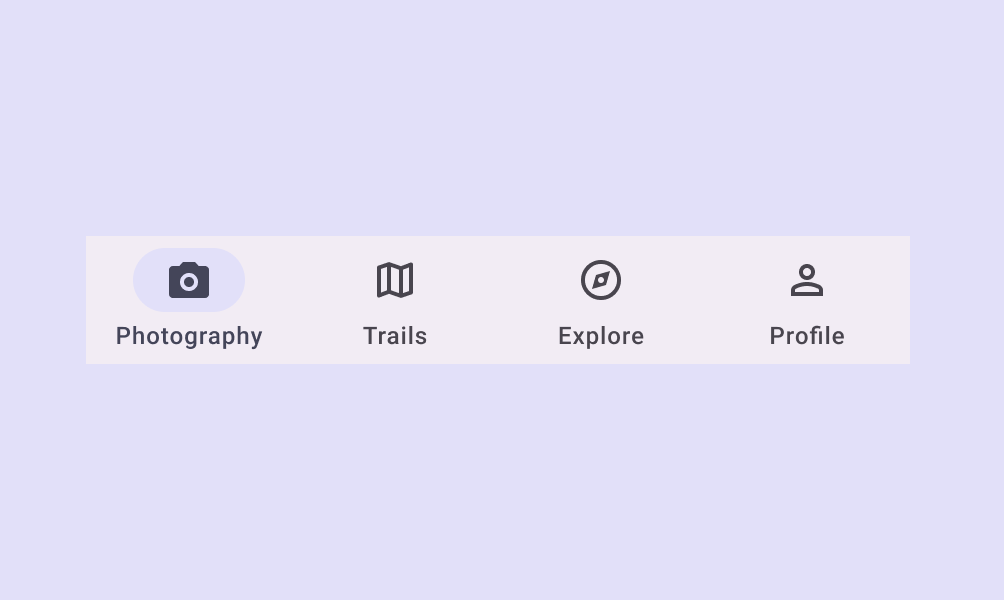
A bottom navigation bar with four icons using narrow label text under the icons.
Do A thinner width can allow for more characters to fit at small sizes, such as in a label
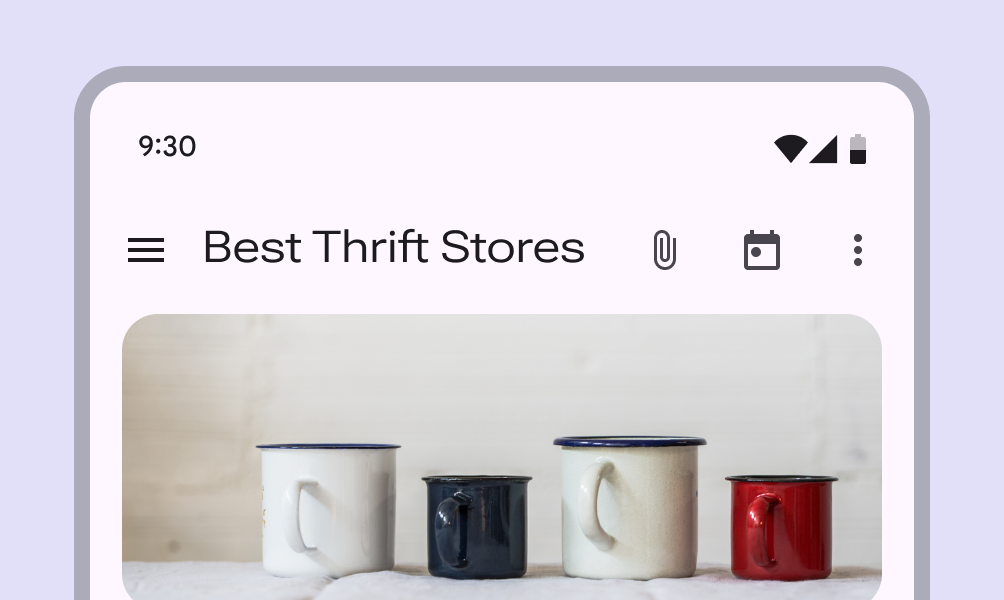
Top app bar with the title best thrift stores in wide type next to three icons.
Don’t Since wider styles take up more space, avoid using them for areas with limited space, such as in a top app bar

Optical size

Optical sizes are different versions of a typeface optimized for use at different sizes.

Small size designs focus on enhancing readability, while large size designs can show off the intricacies of the letter forms and offer many more weights and widths.

Learn about choosing typefaces that have optical sizes.

The word hello at a small optical size overlaid over the word hello at a large optical size.
The typeface Literata has a continuous range of optical size, from 7pt to 72pt
The words “massive” and “tiny” with optical sizes that match their type size.
Do Use an optical size that matches your type size
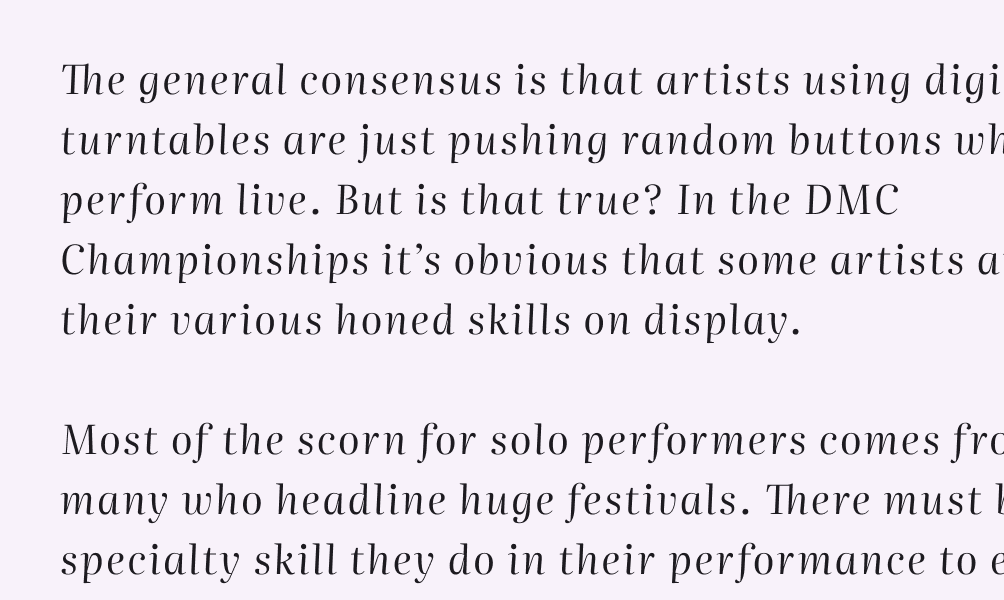
Two paragraphs of text set with an optical size larger than the type size.
Don’t Don’t use large optical type sizes at small sizes. Instead use a smaller optical size, if available.
Pager
Previous pageTypography: Applying type
Next pageComponents

Released under the Apache 2.0 or CC BY 4.0

Copyright © 2018-Present Google

https://m3.material.io/styles/typography/editorial-treatments

Released under the Apache 2.0 or CC BY 4.0

Copyright © 2018-Present Google