Skip to content
Material Design 3
Main Navigation
v3
v2
v1

English

简体中文
繁體中文
Español
Français
Русский
Português – Brasil
Deutsch
日本語
한국어
Italiano
Polski
Türkçe
čeština
magyar

English

简体中文
繁體中文
Español
Français
Русский
Português – Brasil
Deutsch
日本語
한국어
Italiano
Polski
Türkçe
čeština
magyar

Appearance

Sidebar Navigation

Foundations

Accessibility

Overview: Principles

Overview: Assistive technology

Designing: Overview

Designing: Color contrast

Designing: Structure

Designing: Flow

Designing: Elements

Writing and text: Best practices

Writing and text: Text truncation

Writing and text: Text resizing

Building for all: User needs

Building for all: Co-design

Content design

Overview

Alt text

Global writing: Overview

Global writing: Word choice

Notifications

Style guide: UX writing best practices

Style guide: Word choice

Style guide: Grammar and punctuation

Customizing Material

Devices

Watches: Overview

Watches: Foundations

Watches: Styles

Watches: Layout

XR

Design: Overview

Design: Interaction

Design: Layout

Design: Accessibility

Components: Overview

Components: App bars

Components: Dialogs

Components: Nav bar

Components: Nav rail

Components: Toolbars

Design tokens: Overview

Design tokens: How to use tokens

Interaction

Gestures

Inputs

Selection

States: Overview

States: State layers

States: Applying states

Layout

Overview: Overview

Overview: Parts of layout

Overview: Adaptive design

Scaffold: Overview

Scaffold: Bars

Scaffold: Rails

Scaffold: Panes

Grids & spacing: Overview

Grids & spacing: Grids

Grids & spacing: Spacing

Grids & spacing: Density

Breakpoints: Overview

Breakpoints: Compact

Breakpoints: Medium

Breakpoints: Expanded

Breakpoints: Large & extra-large

Bidirectionality & RTL

Canonical examples: Overview

Canonical examples: Feed

Canonical examples: List-detail

Canonical examples: Supporting pane

Usability: Overview

Usability: Applying M3 Expressive

Material A-Z

Styles

Color

Color system: Overview

Color system: How the system works

Color roles

Color schemes

Choosing a scheme

Static: Baseline

Static: Custom brand

Dynamic: Choosing a source

Dynamic: User-generated source

Dynamic: Content-based source

Advanced: Overview

Advanced: Apply colors

Advanced: Define new colors

Advanced: Adjust existing colors

Color resources

Elevation: Overview

Elevation: Applying elevation

Elevation: Tokens

Icons: Overview

Icons: Designing icons

Icons: Applying icons

Motion

Motion physics system: How it works

Motion physics system: Specs

Easing and duration: Applying easing and duration

Easing and duration: Tokens & specs

Transitions: Transition patterns

Transitions: Applying transitions

Shape: Overview & principles

Shape: Corner radius scale

Shape: Shape morph

Spacing: Overview

Spacing: Applying spacing

Spacing: Tokens

Typography: Overview

Typography: Fonts

Typography: Type scale & tokens

Typography: Applying type

Typography: Editorial treatments

Components

App bars: Overview

App bars: Specs

App bars: Guidelines

App bars: Accessibility

Badges: Overview

Badges: Specs

Badges: Guidelines

Badges: Accessibility

Buttons

All buttons

Button groups: Overview

Button groups: Specs

Button groups: Guidelines

Button groups: Accessibility

Buttons: Overview

Buttons: Specs

Buttons: Guidelines

Buttons: Accessibility

Extended FABs: Overview

Extended FABs: Specs

Extended FABs: Guidelines

Extended FABs: Accessibility

FAB menu: Overview

FAB menu: Specs

FAB menu: Guidelines

FAB menu: Accessibility

FABs: Overview

FABs: Specs

FABs: Guidelines

FABs: Accessibility

Icon buttons: Overview

Icon buttons: Specs

Icon buttons: Guidelines

Icon buttons: Accessibility

Segmented buttons: Overview

Segmented buttons: Specs

Segmented buttons: Guidelines

Segmented buttons: Accessibility

Split button: Overview

Split button: Specs

Split button: Guidelines

Split button: Accessibility

Cards: Overview

Cards: Specs

Cards: Guidelines

Cards: Accessibility

Carousel: Overview

Carousel: Specs

Carousel: Guidelines

Carousel: Accessibility

Checkbox: Overview

Checkbox: Specs

Checkbox: Guidelines

Checkbox: Accessibility

Chips: Overview

Chips: Specs

Chips: Guidelines

Chips: Accessibility

Date & time pickers

Date pickers: Overview

Date pickers: Specs

Date pickers: Guidelines

Date pickers: Accessibility

Time pickers: Overview

Time pickers: Specs

Time pickers: Guidelines

Time pickers: Accessibility

Dialogs: Overview

Dialogs: Specs

Dialogs: Guidelines

Dialogs: Accessibility

Divider: Overview

Divider: Specs

Divider: Guidelines

Divider: Accessibility

Lists: Overview

Lists: Specs

Lists: Guidelines

Lists: Accessibility

Loading & progress

Loading indicator: Overview

Loading indicator: Specs

Loading indicator: Guidelines

Loading indicator: Accessibility

Progress indicators: Overview

Progress indicators: Specs

Progress indicators: Guidelines

Progress indicators: Accessibility

Menus: Overview

Menus: Specs

Menus: Guidelines

Menus: Accessibility

Navigation

Navigation bar: Overview

Navigation bar: Specs

Navigation bar: Guidelines

Navigation bar: Accessibility

Navigation drawer: Overview

Navigation drawer: Specs

Navigation drawer: Guidelines

Navigation drawer: Accessibility

Navigation rail: Overview

Navigation rail: Specs

Navigation rail: Guidelines

Navigation rail: Accessibility

Radio button: Overview

Radio button: Specs

Radio button: Guidelines

Radio button: Accessibility

Search: Overview

Search: Specs

Search: Guidelines

Search: Accessibility

Sheets

Bottom sheets: Overview

Bottom sheets: Specs

Bottom sheets: Guidelines

Bottom sheets: Accessibility

Side sheets: Overview

Side sheets: Specs

Side sheets: Guidelines

Side sheets: Accessibility

Sliders: Overview

Sliders: Specs

Sliders: Guidelines

Sliders: Accessibility

Snackbar: Overview

Snackbar: Specs

Snackbar: Guidelines

Snackbar: Accessibility

Switch: Overview

Switch: Specs

Switch: Guidelines

Switch: Accessibility

Tabs: Overview

Tabs: Specs

Tabs: Guidelines

Tabs: Accessibility

Text fields: Overview

Text fields: Specs

Text fields: Guidelines

Text fields: Accessibility

Toolbars: Overview

Toolbars: Specs

Toolbars: Guidelines

Toolbars: Accessibility

Tooltips: Overview

Tooltips: Specs

Tooltips: Guidelines

Tooltips: Accessibility

On this page

Dialogs: Guidelines ​

Dialogs provide important prompts in a user flow


Basic dialog in isolation
A basic dialog

Usage ​

A dialog is a modal window that appears in front of app content to provide critical information or ask for a decision. Dialogs disable all app functionality when they appear, and remain on screen until confirmed, dismissed, or a required action has been taken.

Dialogs are purposefully interruptive, so they should be used sparingly. A less disruptive alternative is to use a dropdown menuMenus display a list of choices on a temporary surface.More on menus, which provides options without interrupting a user’s experience.
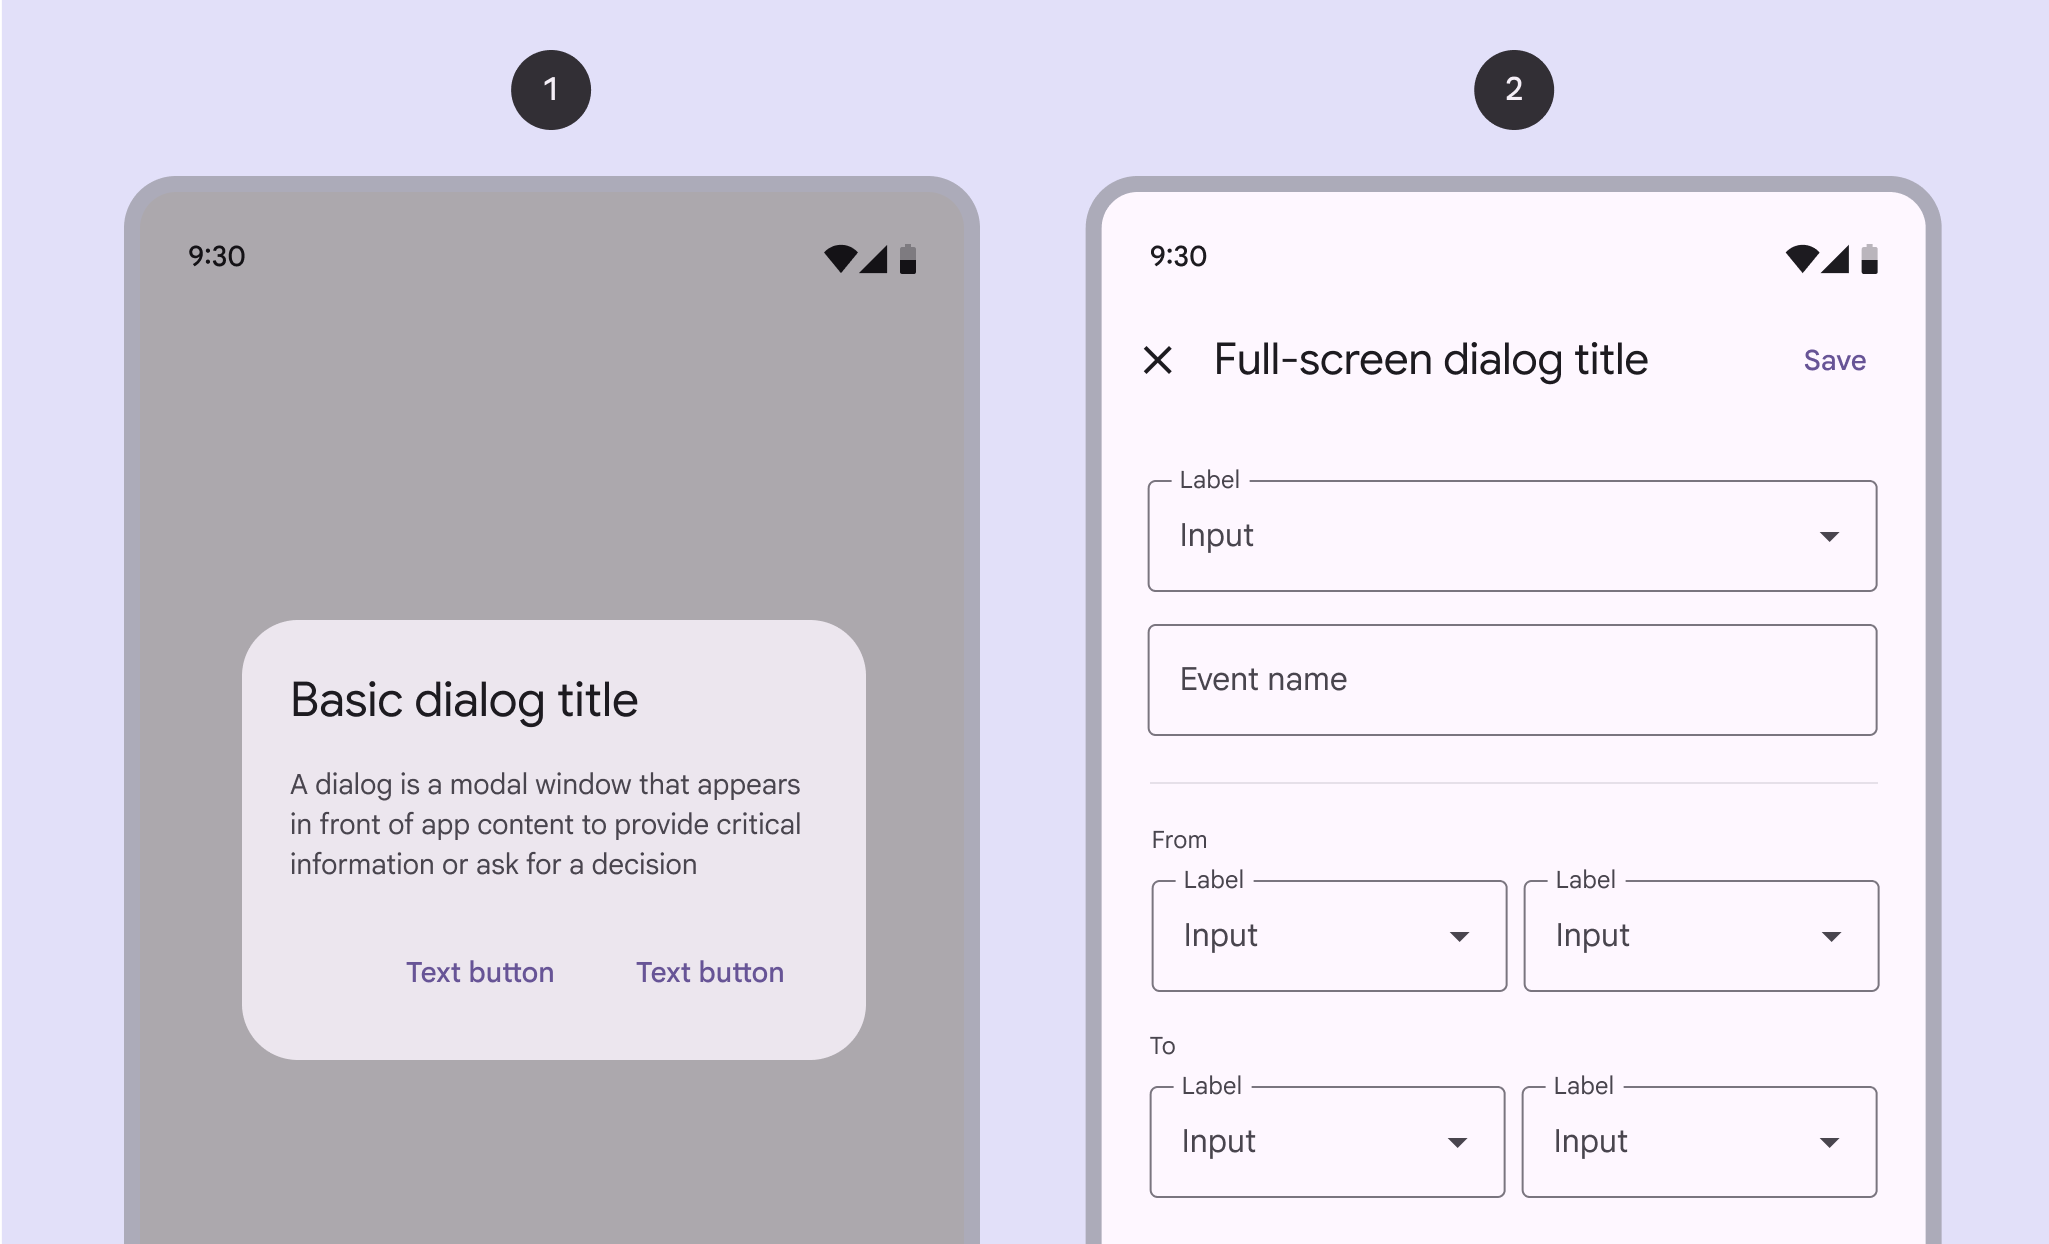
Diagram of basic and full-screen dialogs.

There are two variants of dialogs:

  1. Basic dialog
  2. Full-screen dialog
Dialog in front of app content.
Do Use dialogs for prompts that block an app’s normal operation, and for critical information that requires a specific user task, decision, or acknowledgement
Low-priority dialog in front of app content.
Don't Don’t use dialogs for low- or medium-priority information. Instead use a snackbar, which can be dismissed or disappear automatically.

Similar components

SnackbarsSnackbars show short updates about app processes at the bottom of the screen.More on snackbars are also designed to show important messages.

Choose the right component based on the importance of the message. This component messaging strategy helps avoid overusing dialogs.

Snackbar on a phone saying that new photos were synced to the device. No buttons exist.
Snackbars can disappear automatically
ComponentImportanceAction needed
SnackbarLow importanceOptional: Snackbars may not have a buttonButtons let people take action and make choices with one tap.More on buttons, and can disappear automatically
DialogHigh importanceRequired: Dialogs block the main content until an action is confirmed

Anatomy ​

Basic dialog ​


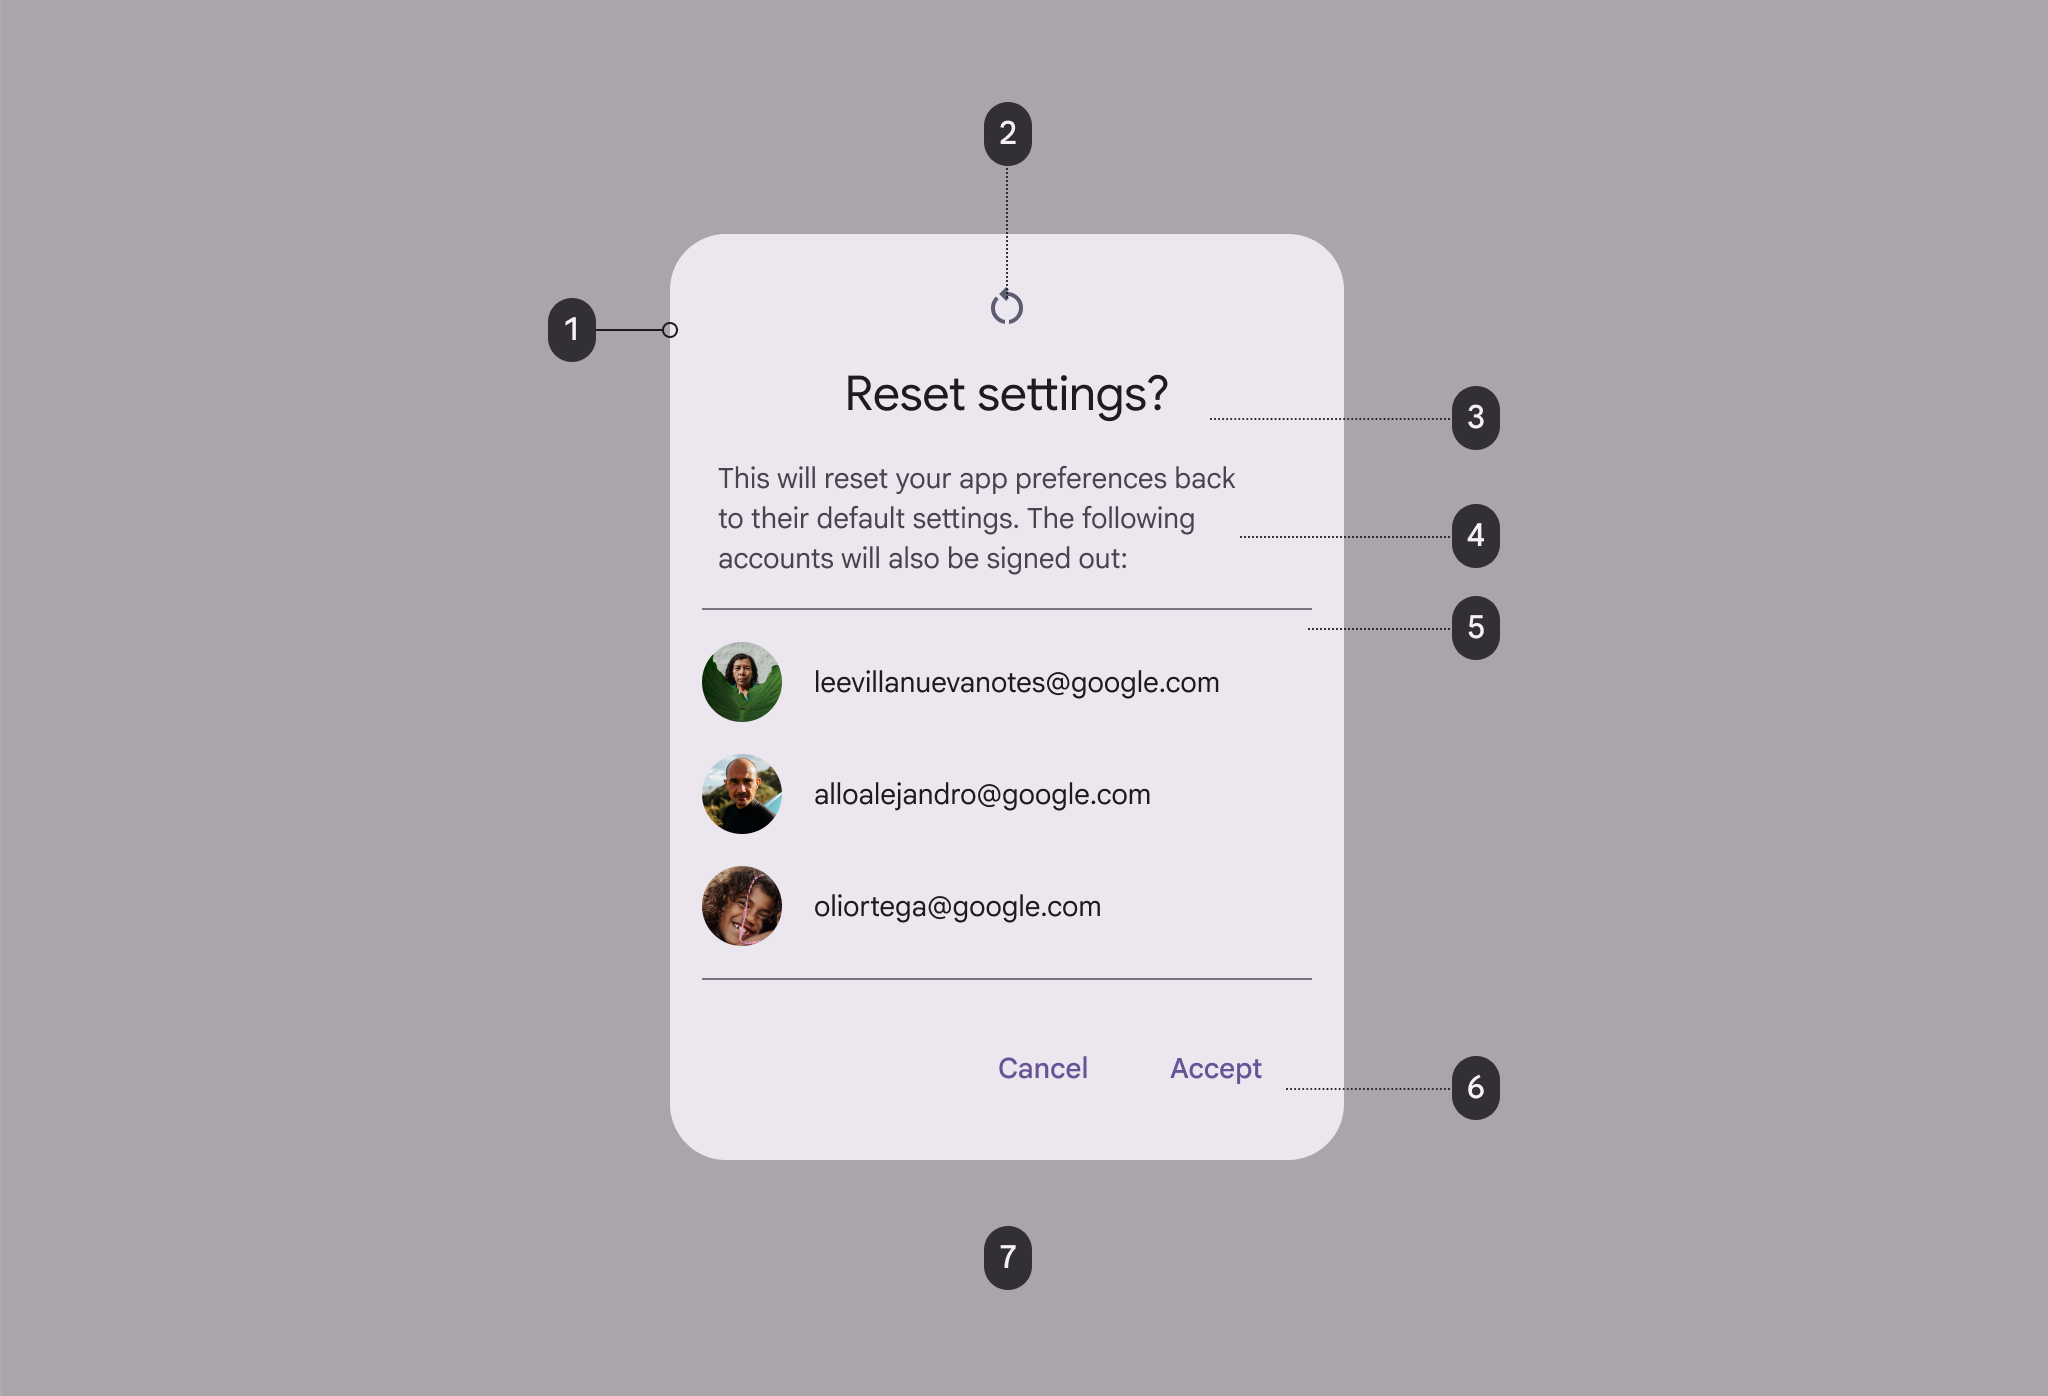
Diagram of 7 elements of basic dialog.
  1. Container
  2. Icon (optional)
  3. Headline (optional)
  4. Supporting text
  5. Divider (optional)
  6. Buttons label text
  7. Scrim

Full-screen dialog ​


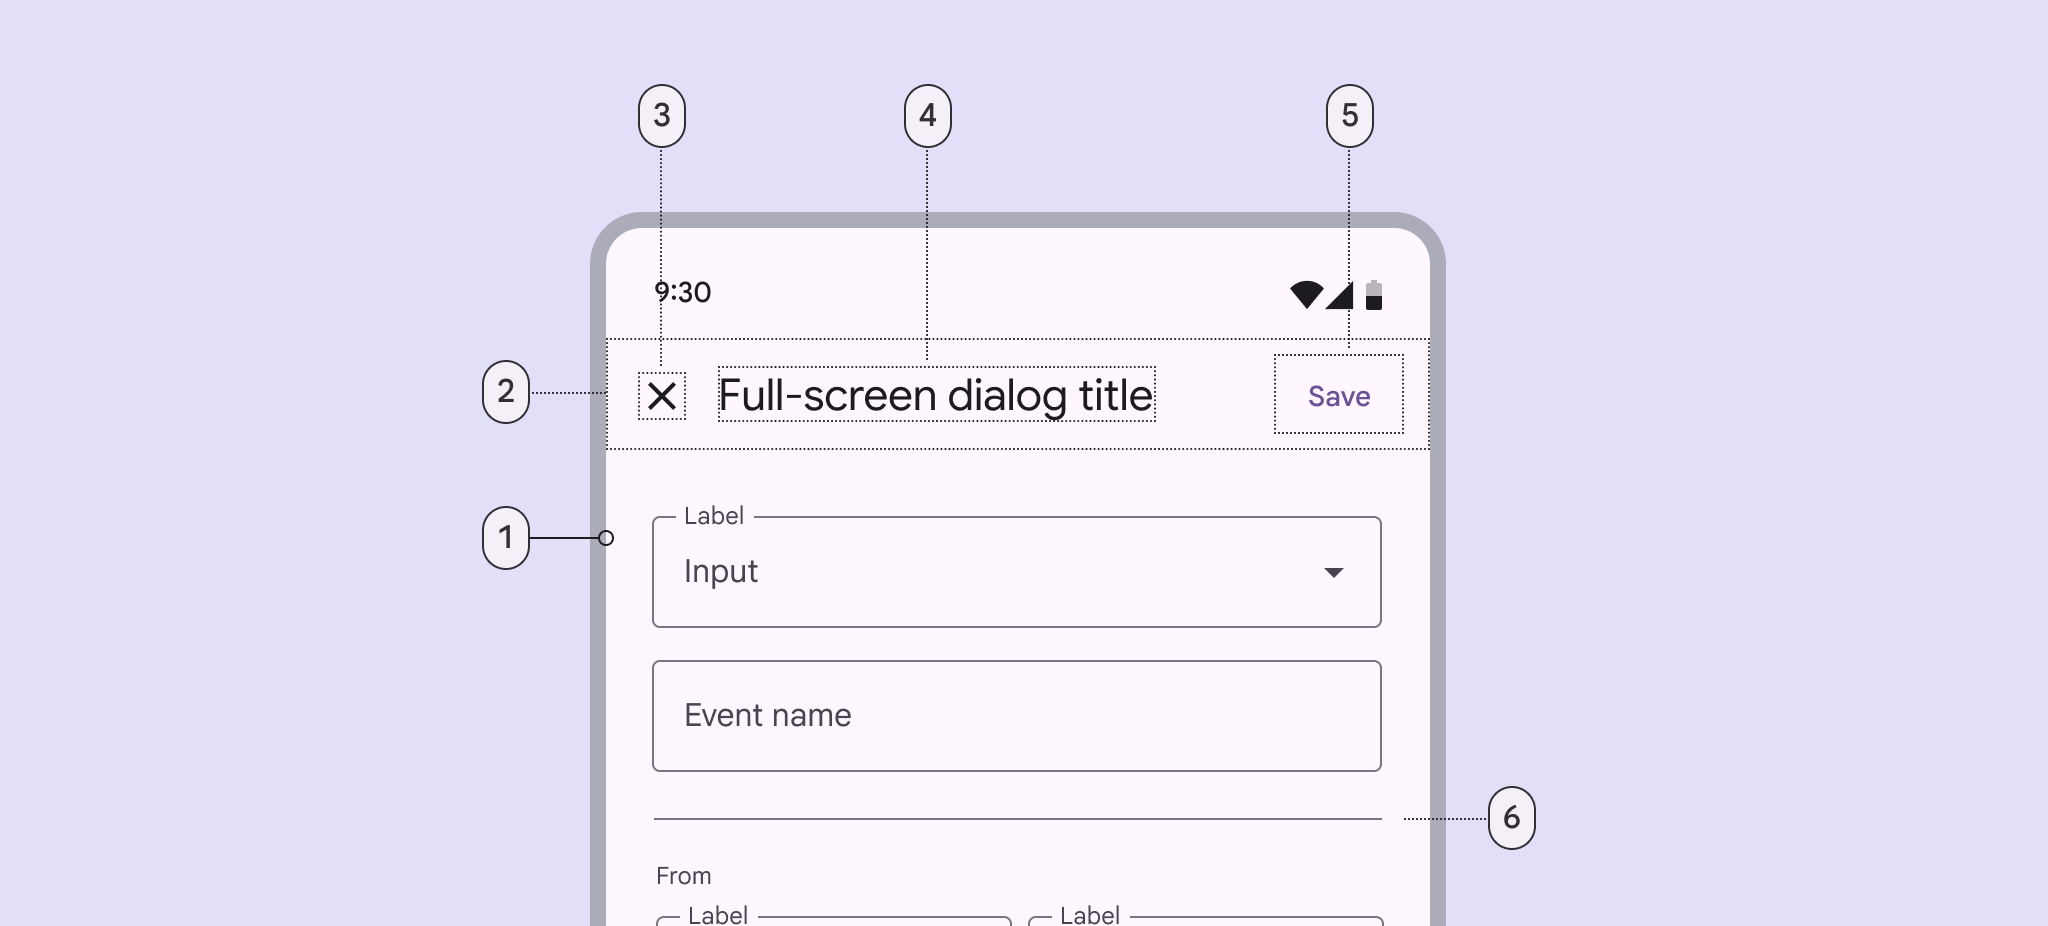
6 elements of full-screen dialog.
  1. Container
  2. Header region
  3. Icon (close affordance)
  4. Headline (optional)
  5. Button label text
  6. Divider (optional)

Container and scrim

Dialog containers appear above other screen elements and hold the dialog’s headline, text, buttonsButtons let people take action and make choices with one tap.More on buttons, and listLists are continuous, vertical indexes of text and images.More on lists items.

To focus attention on the dialog, surfaces behind the container are scrimmed with a temporary overlay to make them less prominent.
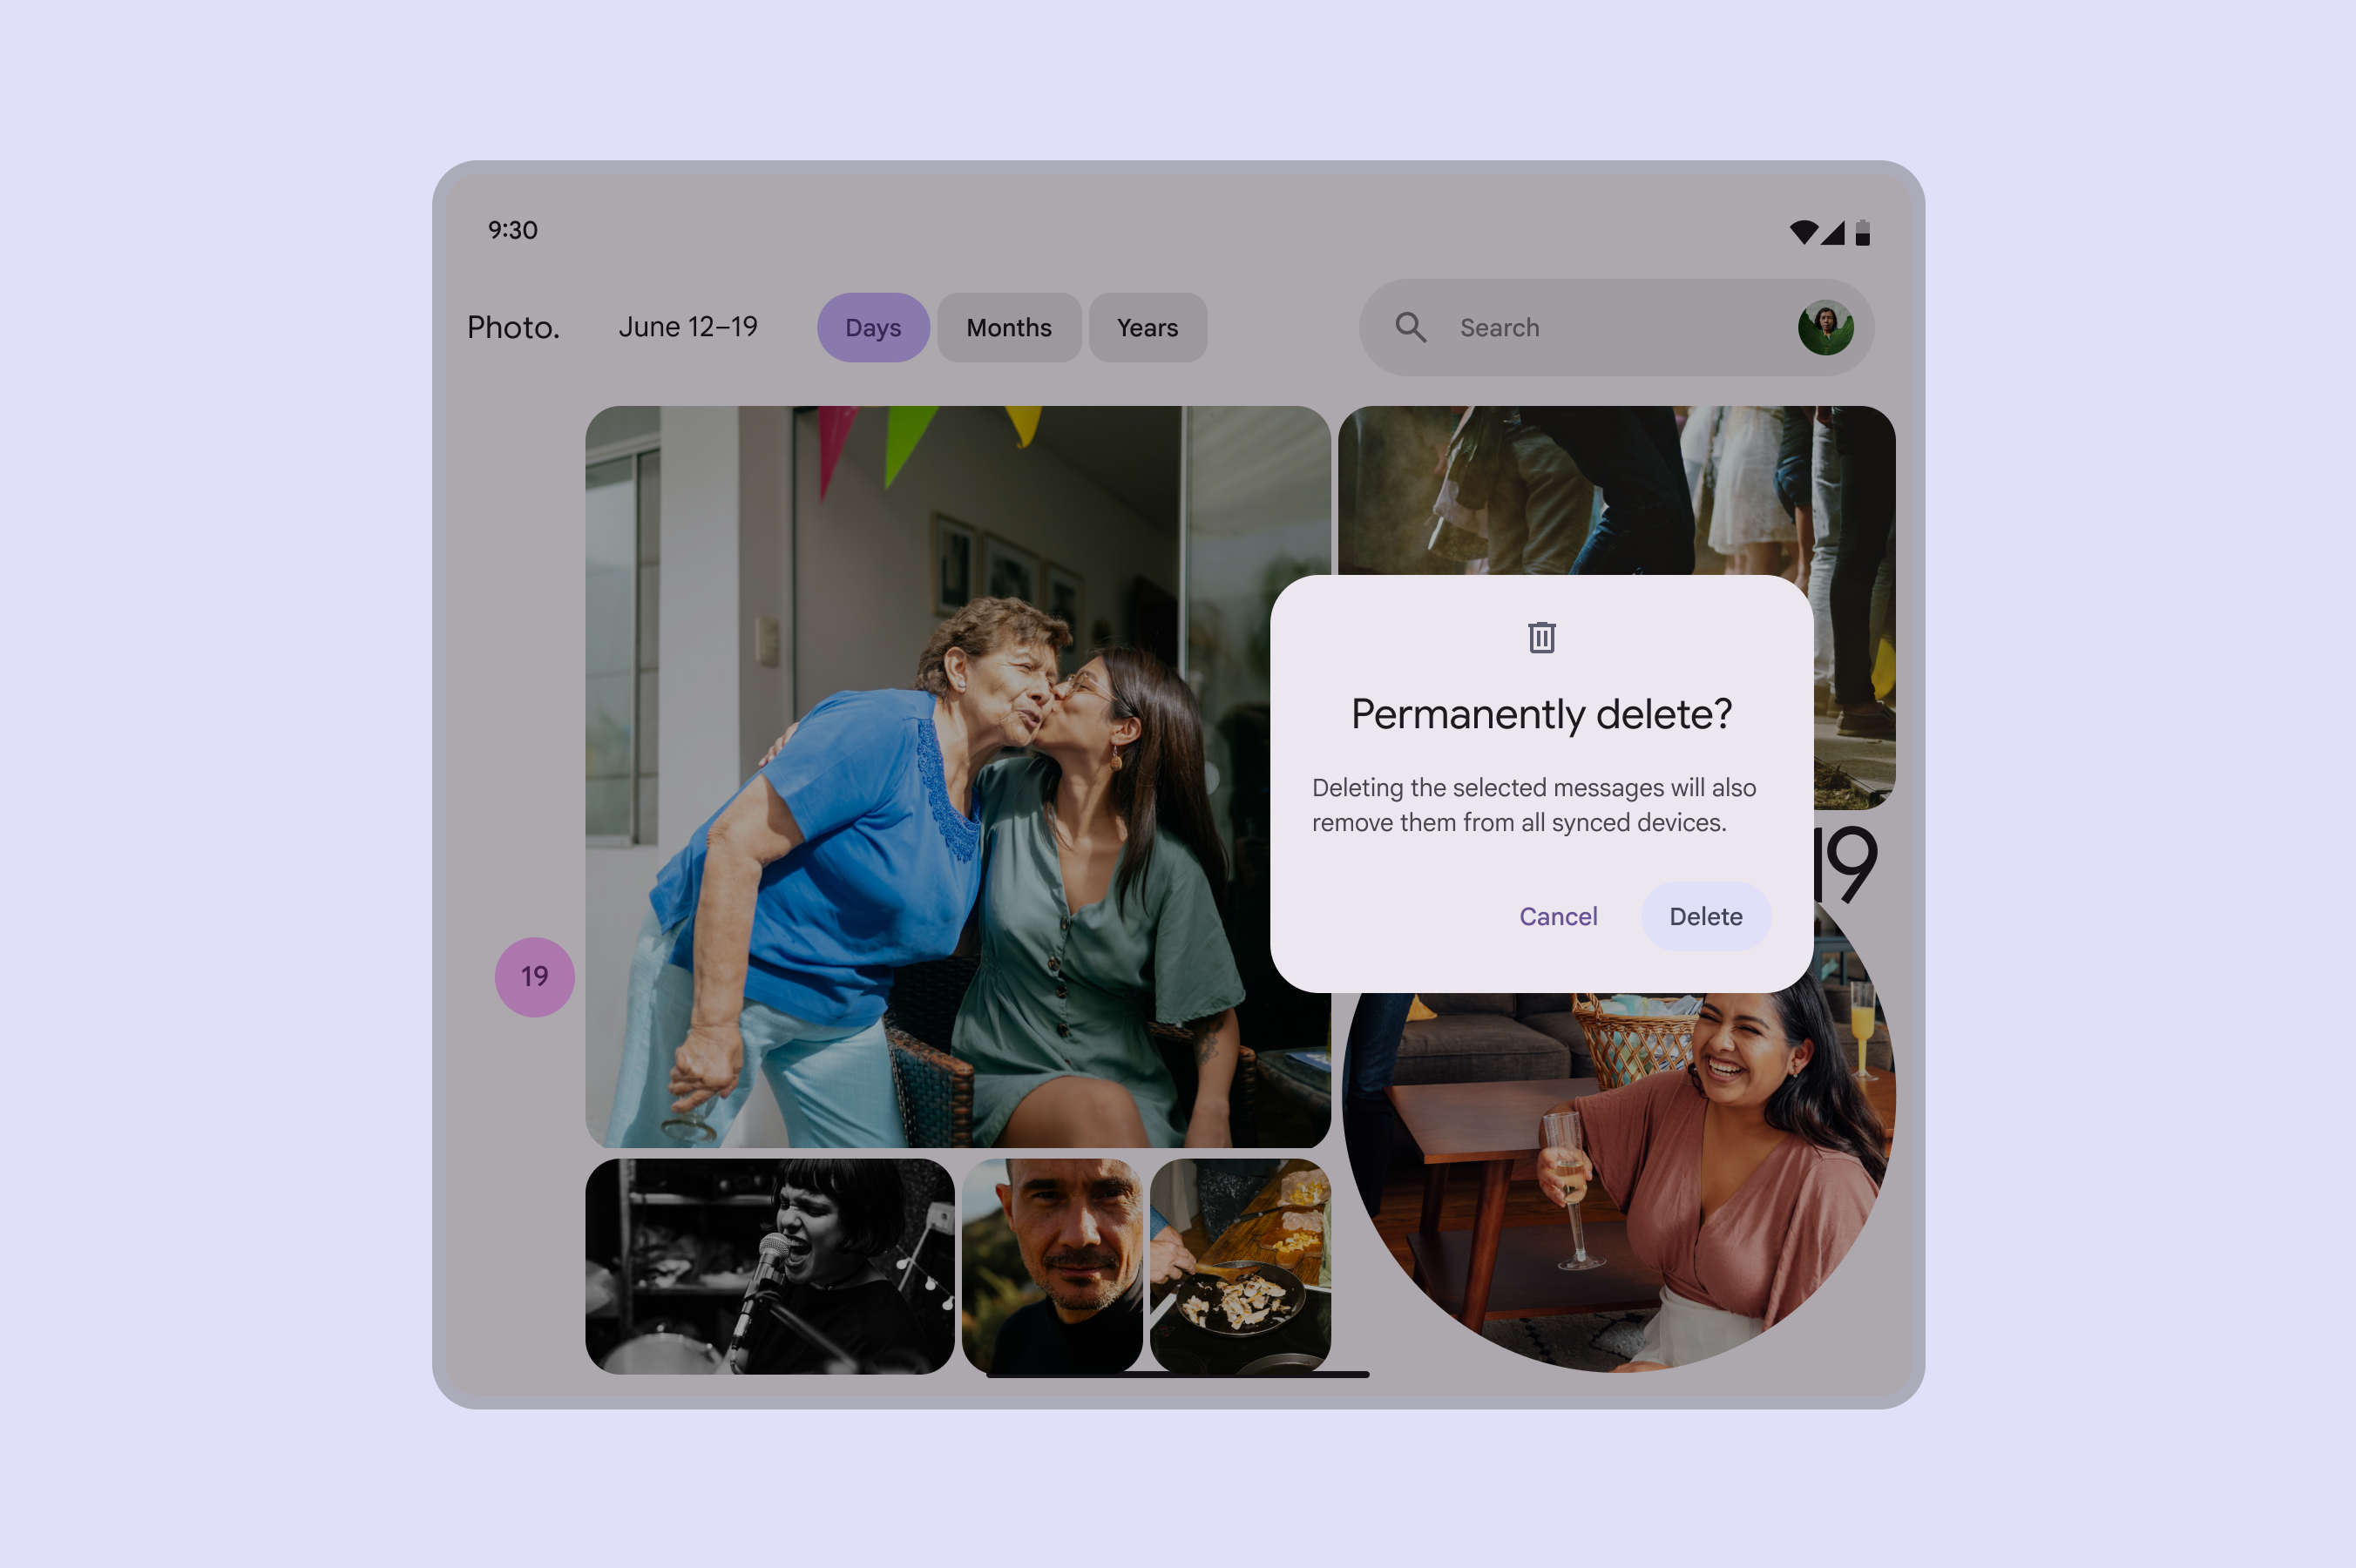
Basic dialog shown above a scrim overlay that reduces the prominence of the background elements.
Basic dialogs appear over a background scrim

Headline (optional)

A dialog’s purpose should be communicated by its headline and buttons or actionable items.

Headlines should:

  • Contain a brief, clear statement or question
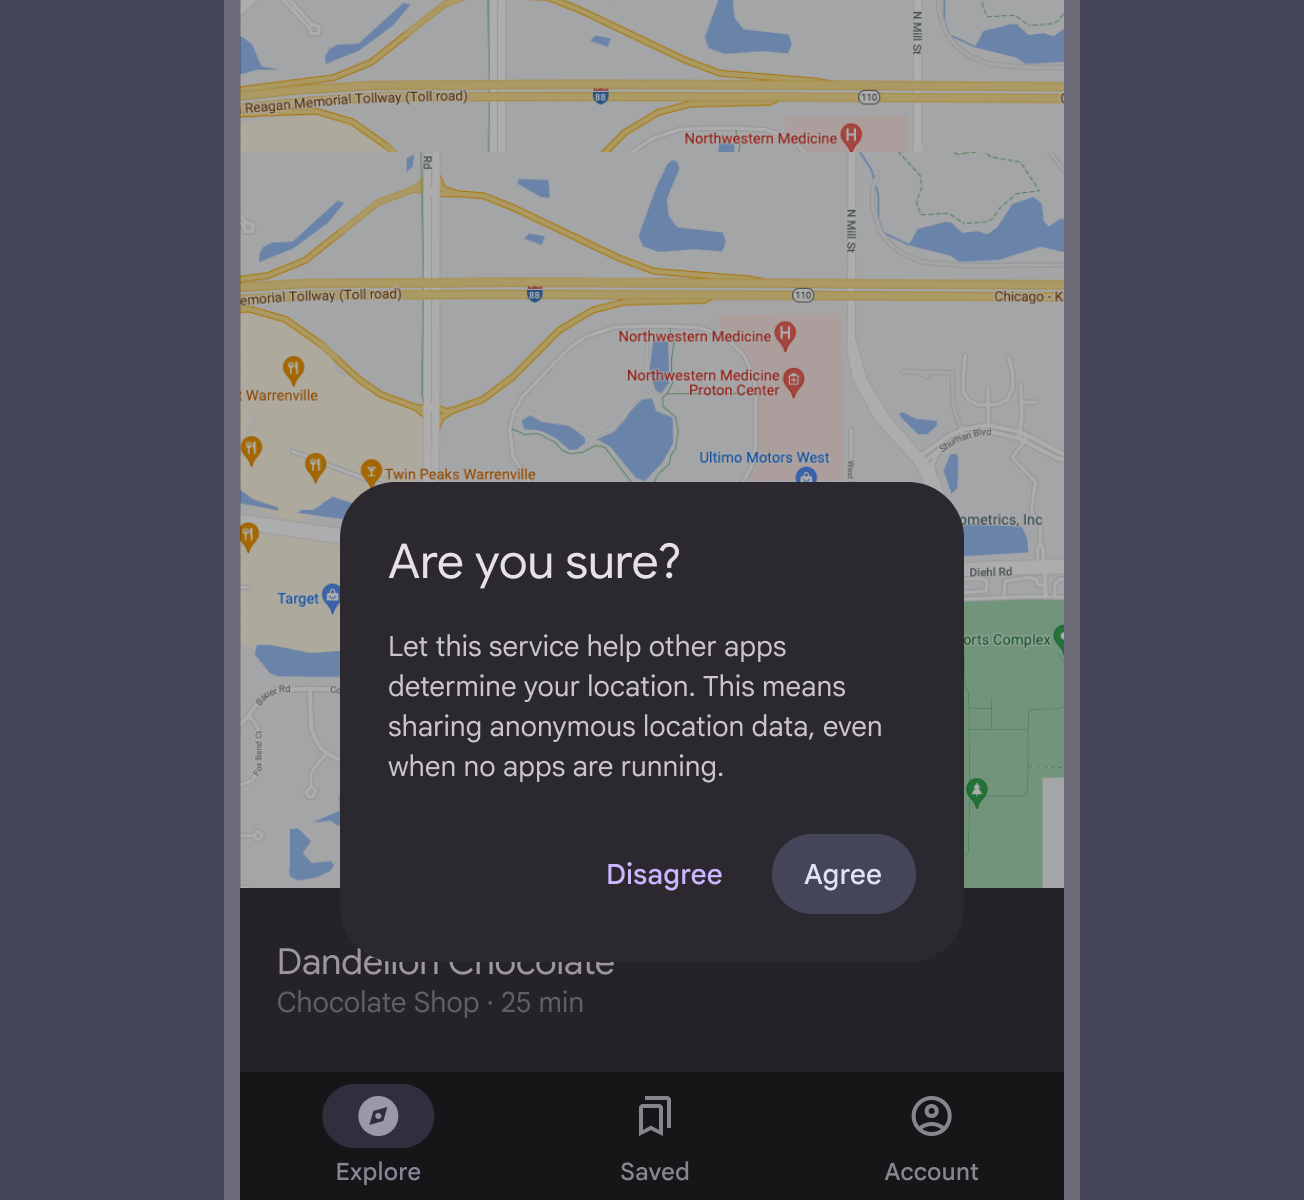
  • Avoid apologies (“Sorry for the interruption”), alarm (“Warning!”), or ambiguity (“Are you sure?”)
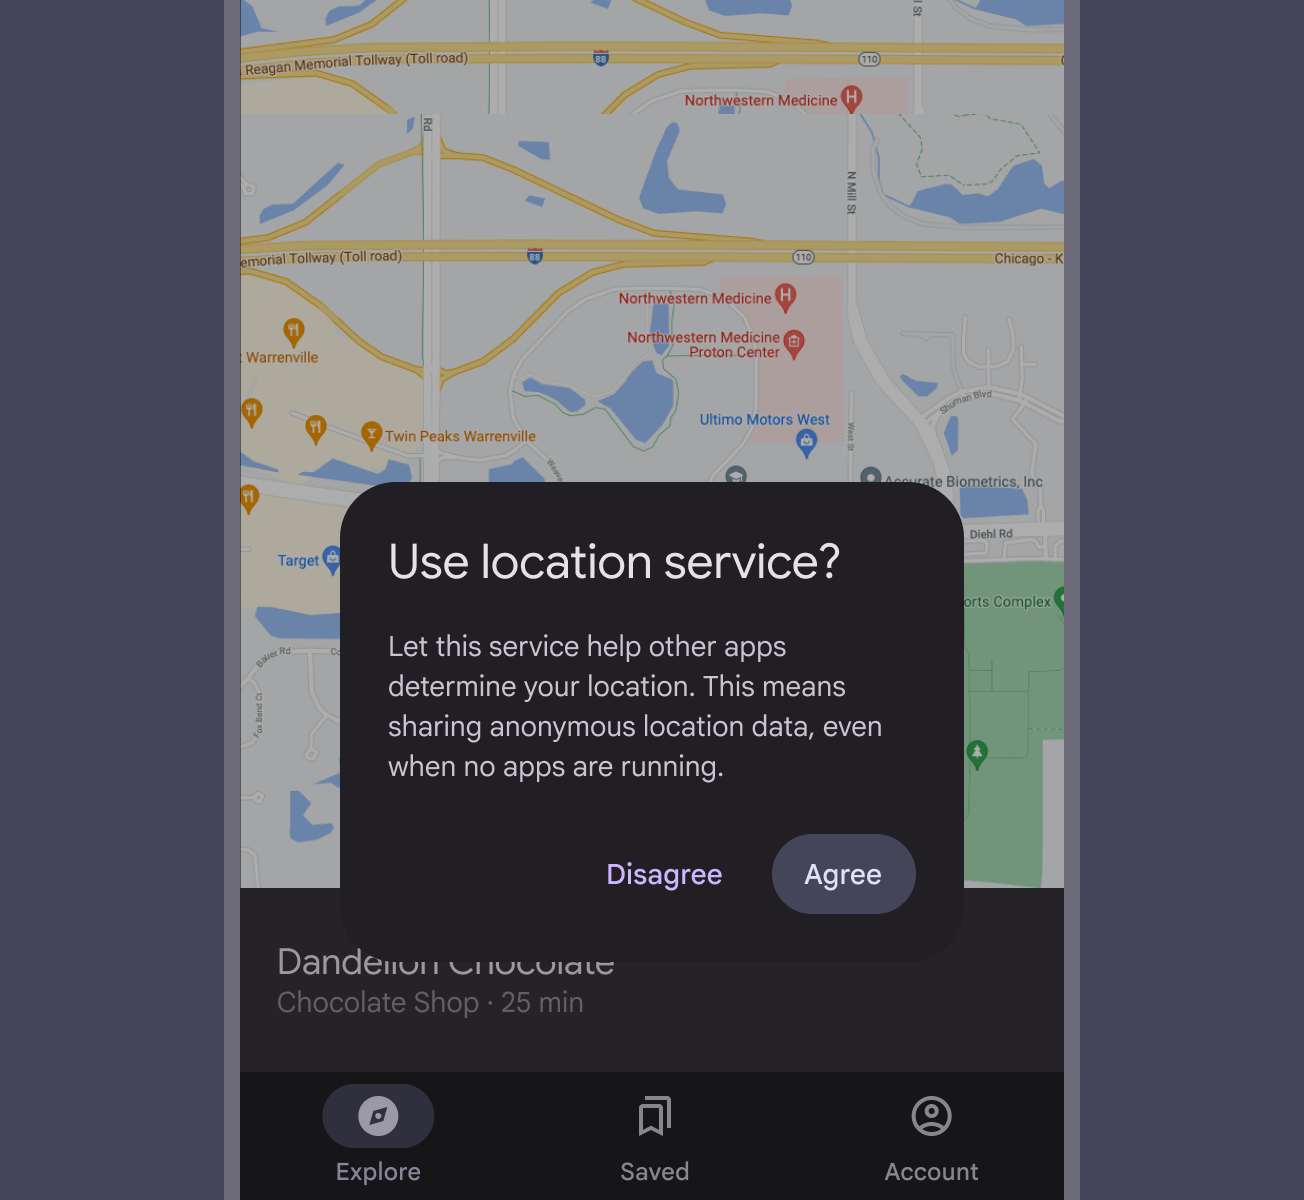
Dialog title asking “Use location service?”
Do This dialog title poses a specific question, concisely explains what’s involved in the request, and provides clear actions
Dialog title asking “Are you sure?”
Don't Don’t use dialog titles that pose an ambiguous question

Headlines should always be succinct. They can wrap to a second line if necessary, and be truncated.

In full-screen dialogs, long headlines or headlines of variable lengths (such as translations), can be placed in the content area instead of the app bar.
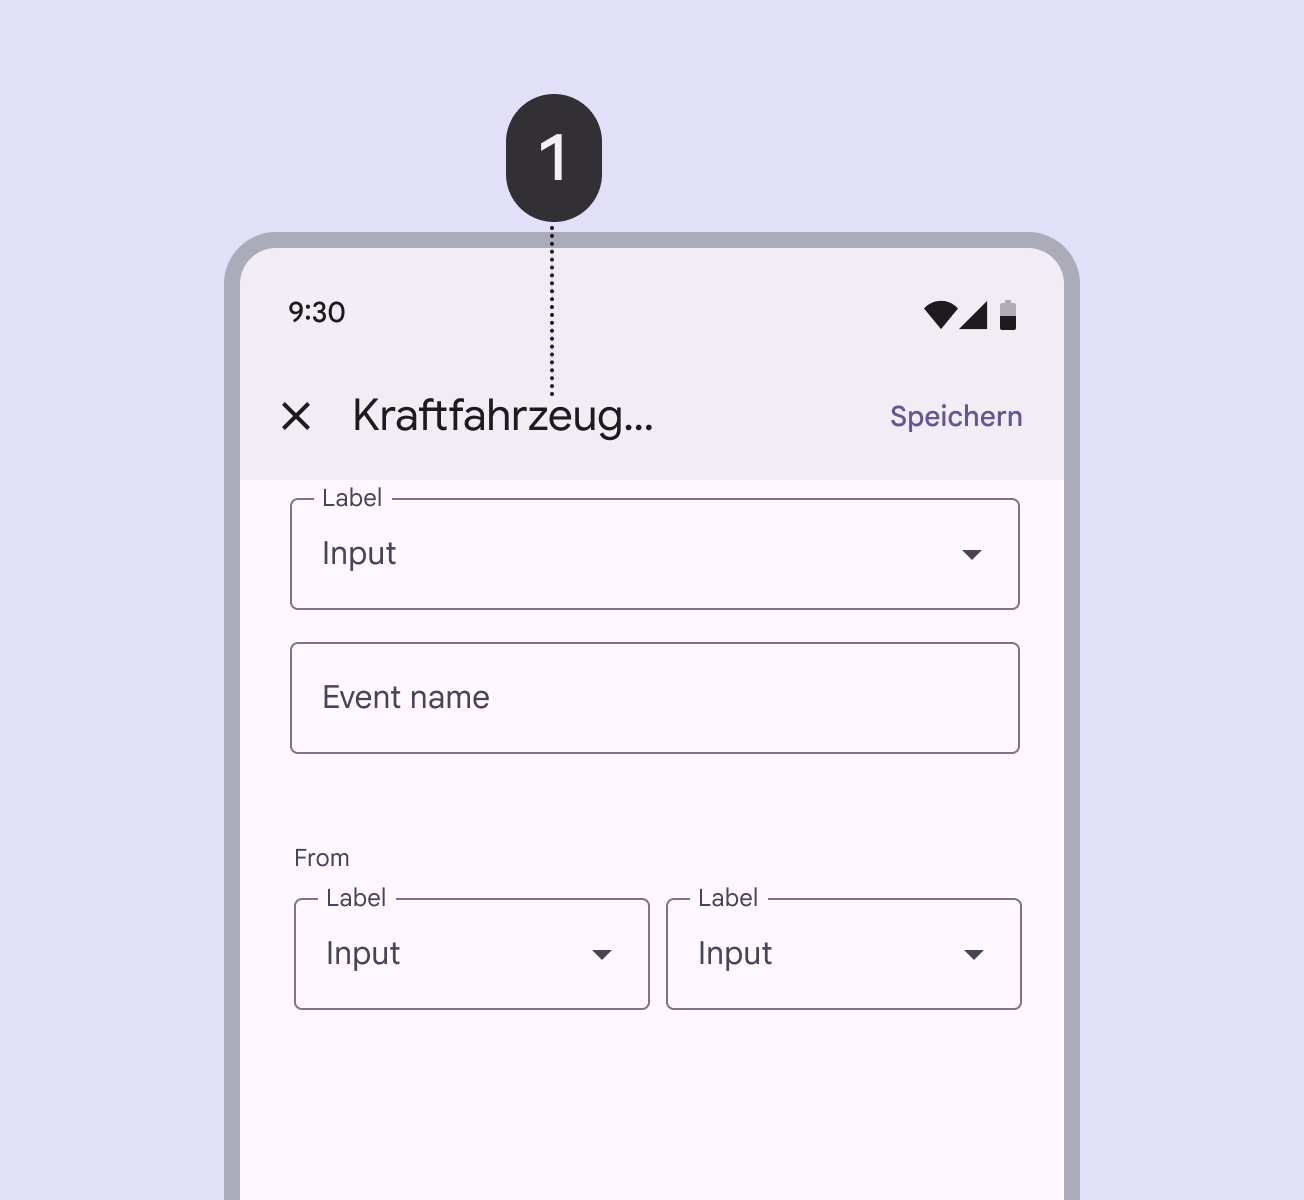
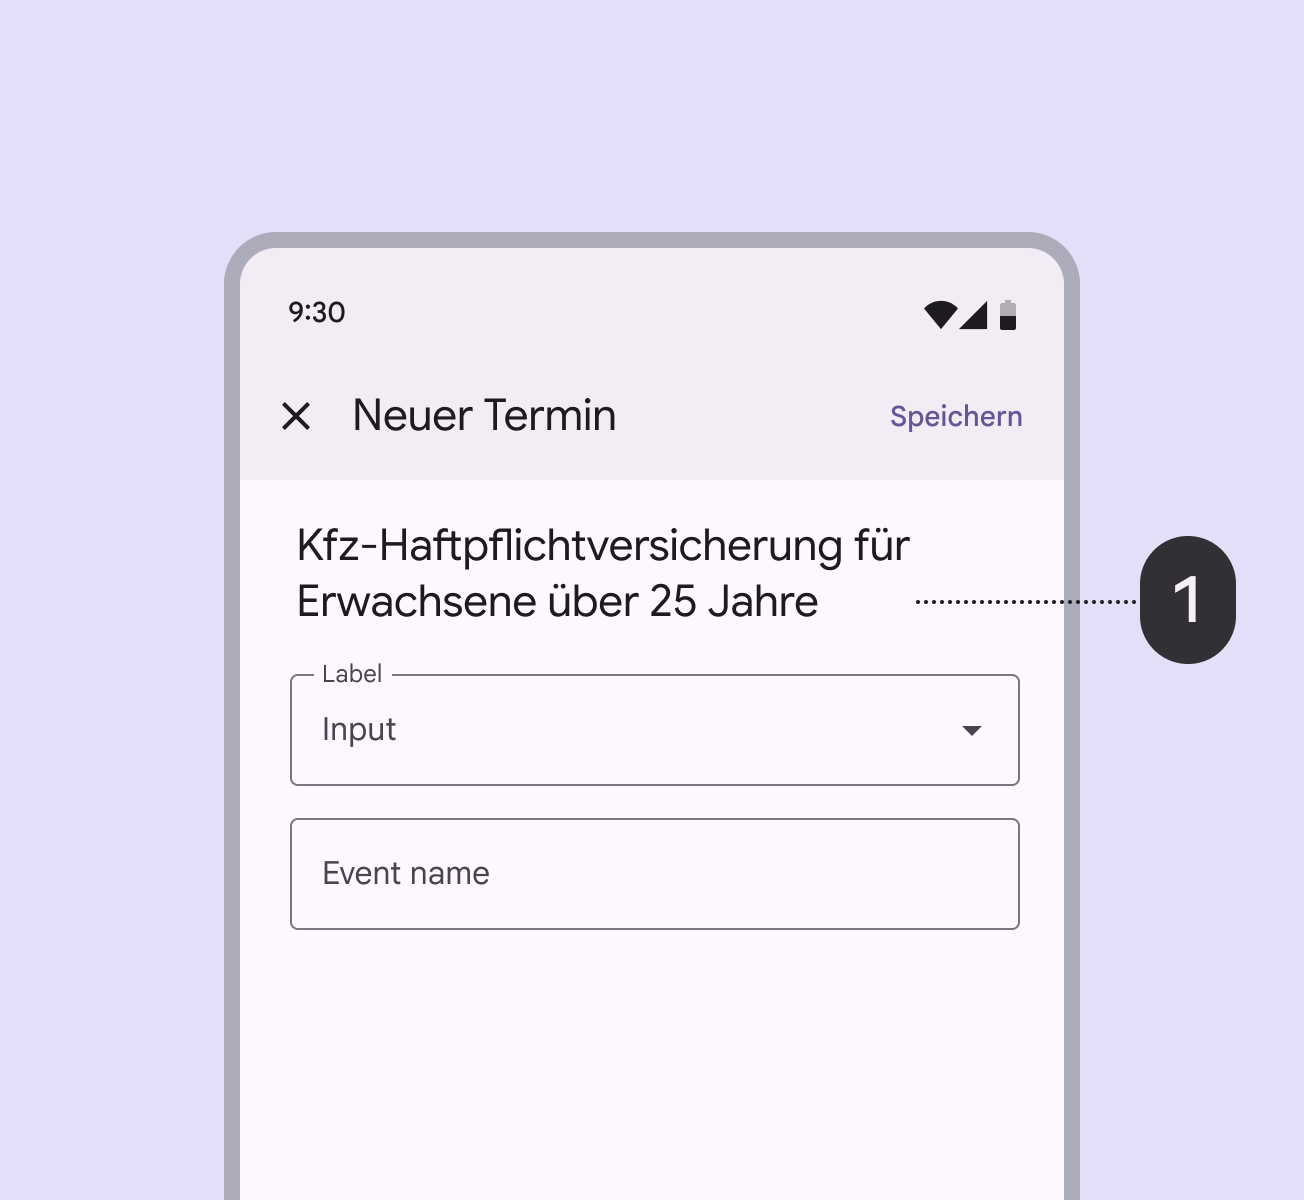
Example full-screen dialog with truncated long headline.
Caution Avoid placing long headlines in a full-screen dialog’s app bar (1), as the truncated text may lead to misunderstanding
Example full-screen dialog with short headline, and longer text in content area.
Do Find ways to shorten app bar text, and place longer headlines into the content area (1) of a full-screen dialog

Buttons

Dialog actions are most often represented as buttonsButtons let people take action and make choices with one tap.More on buttons and allow users to confirm, dismiss, or acknowledge something.

Buttons are aligned to the trailing edge of the dialog for easier interaction. The confirmation button is always closest to the edge.

Button alignment responds automatically for right-to-left languages, where the confirmation button is aligned to the left edge.
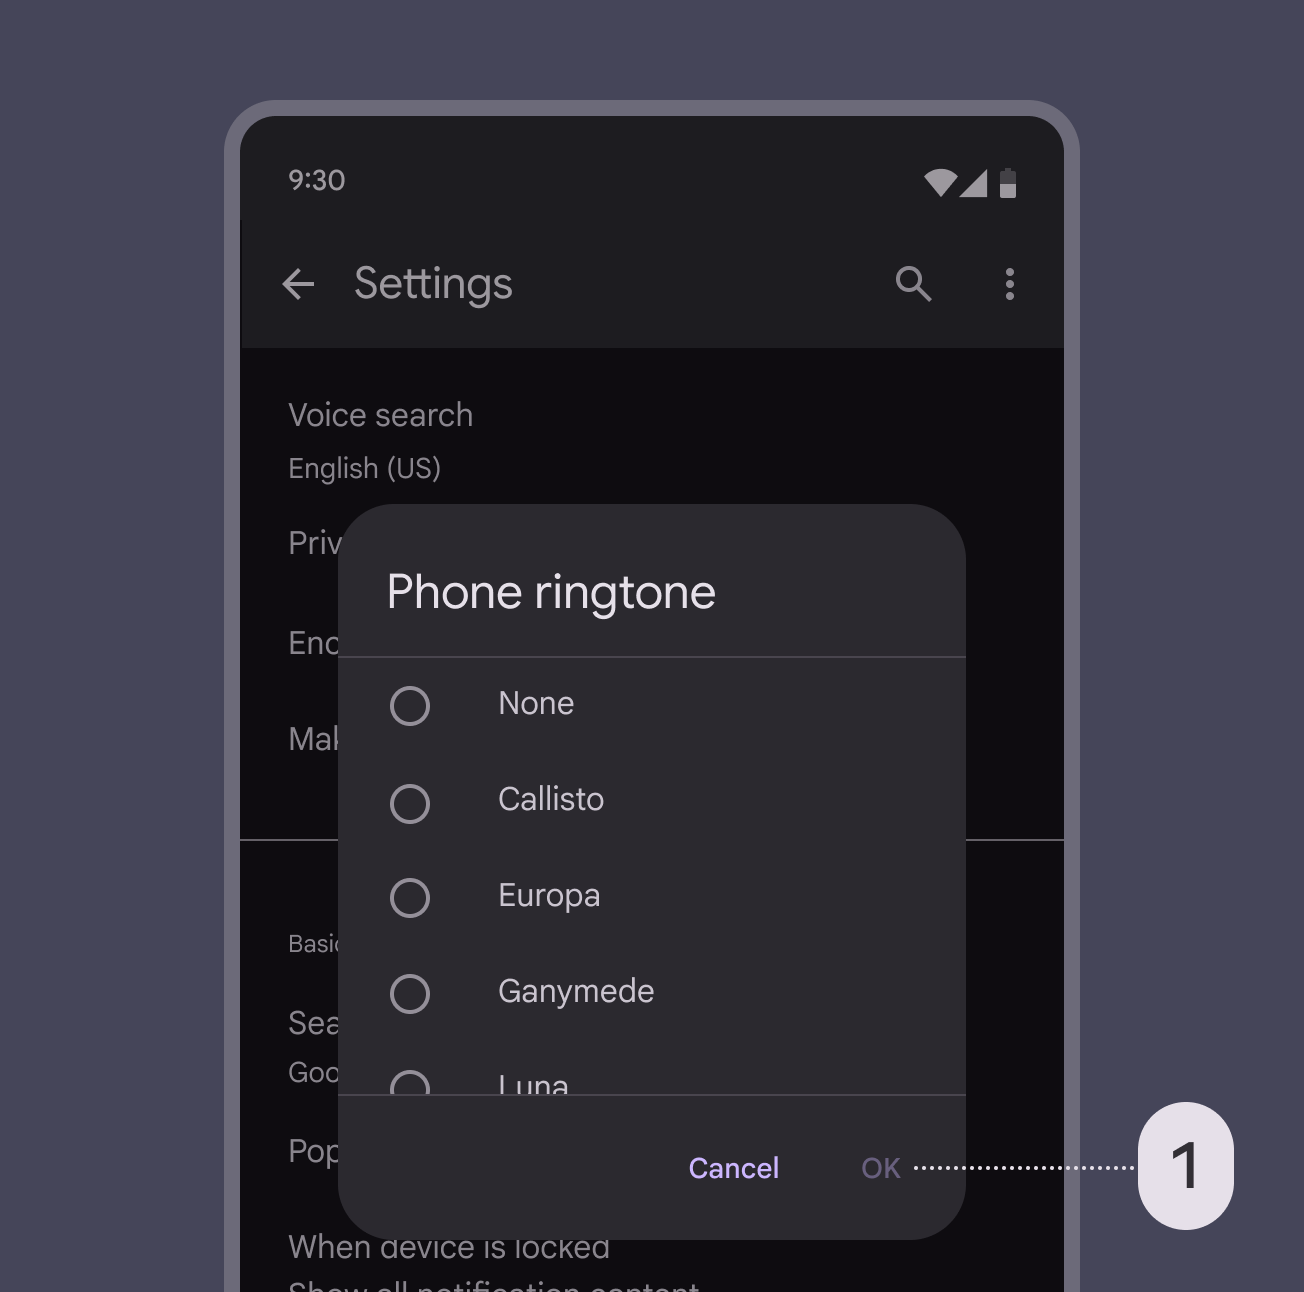
Dialog with the confirmation button disabled because a required radio selection is missing.
Do Disable confirming actions (1) until a choice is made. Dismissive actions are never disabled.
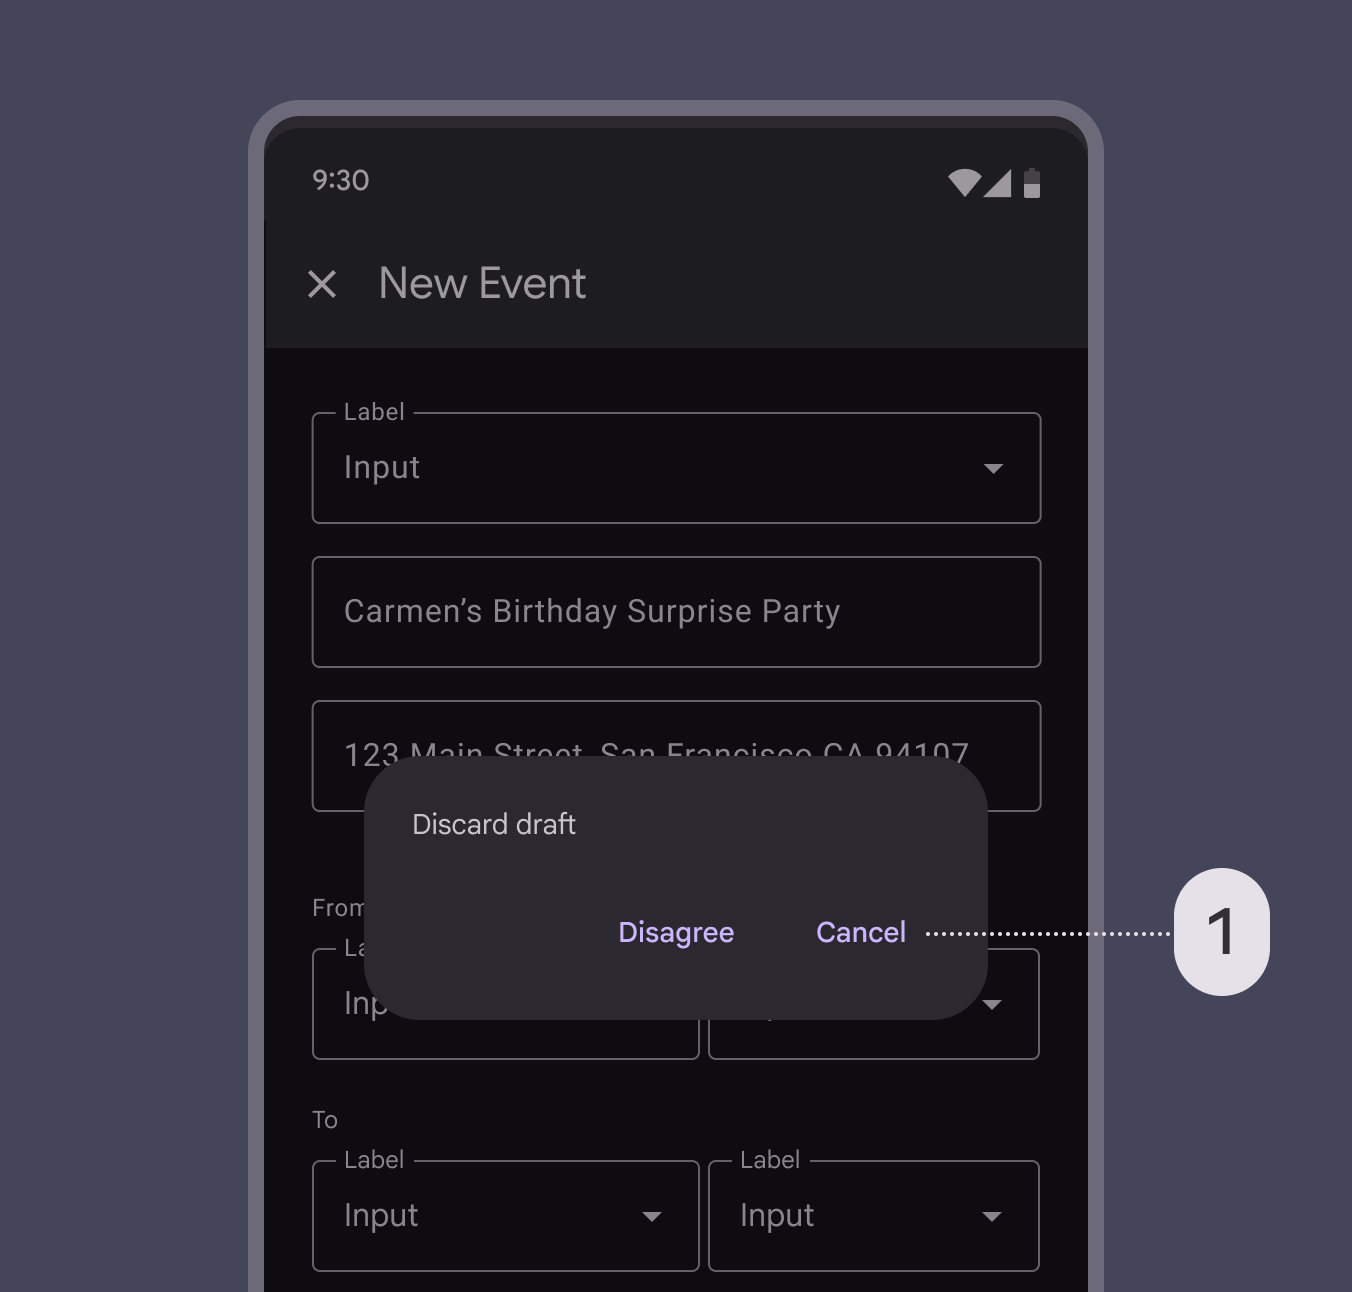
Dialog with the dismissing action "Cancel" on the right of the 2 buttons.
Don't Don’t place dismissive actions (1) to the right of confirming actions. Instead, place them to the left of confirming actions.
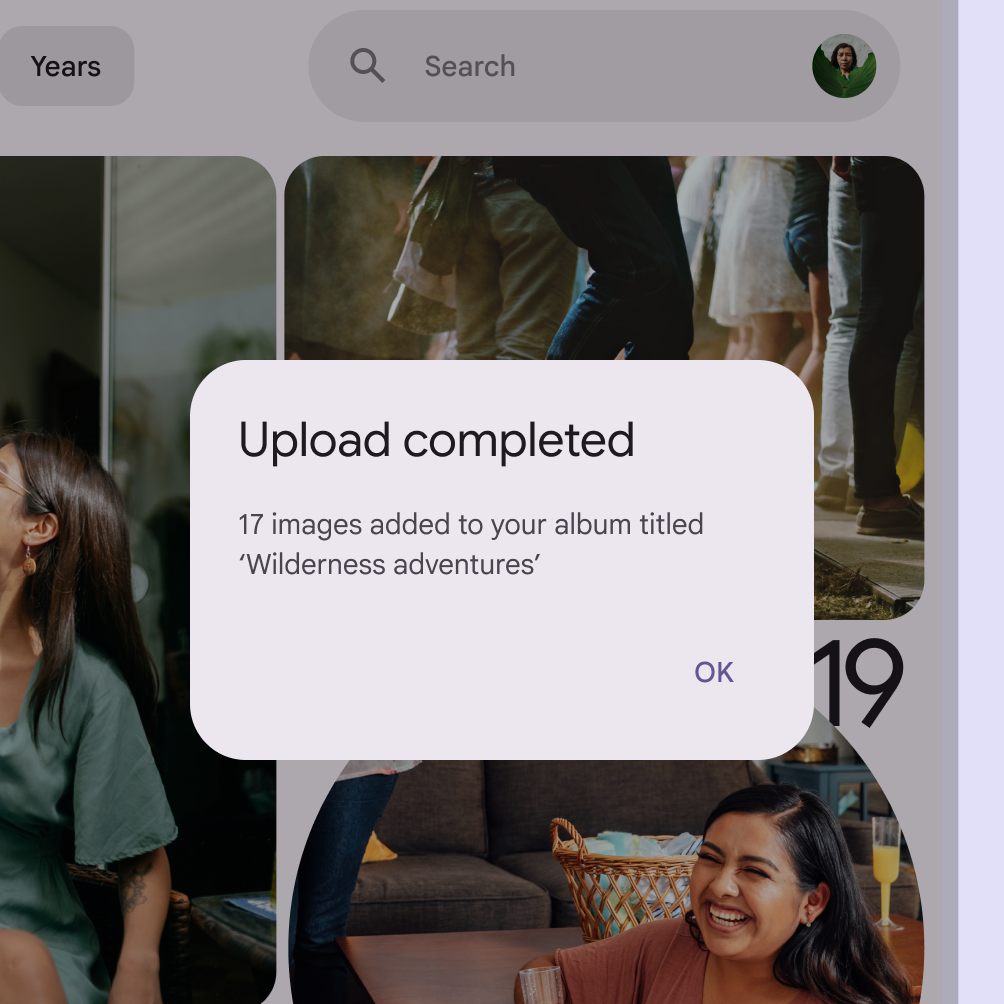
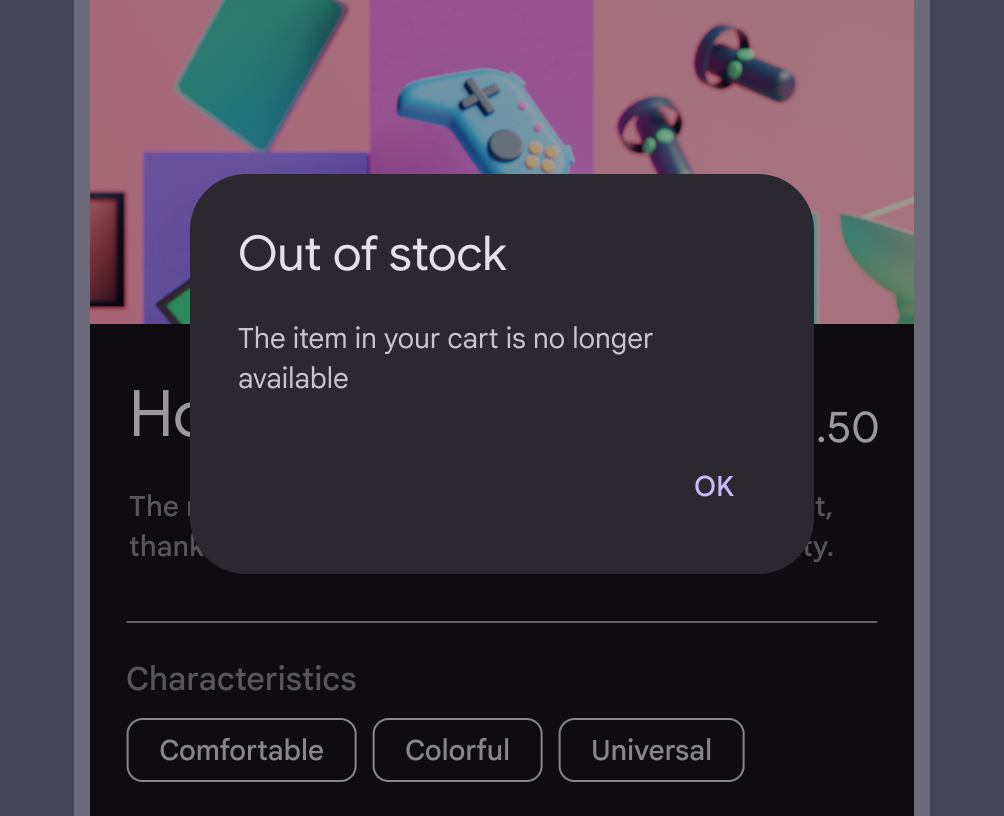
Dialog with a single-action button: “OK”.
Do A single action may be provided only if it’s an acknowledgement
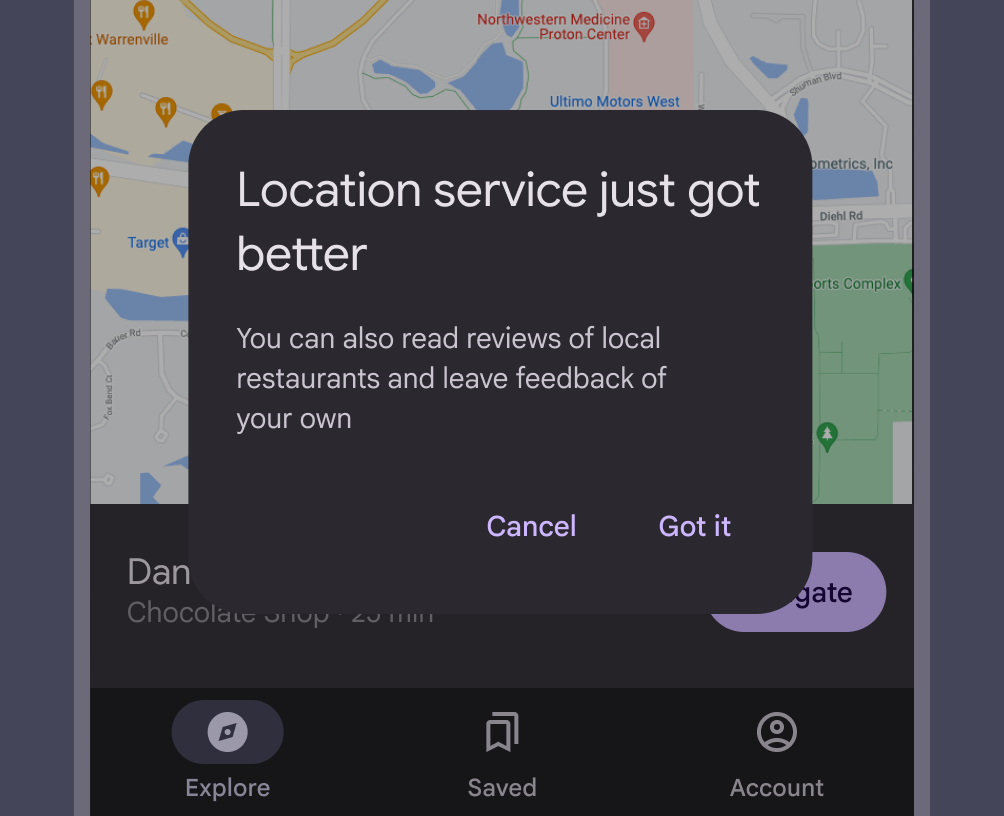
Dialog with 2 button choices: “Cancel”, “Got it”.
Don't Avoid presenting people with unclear choices. Cancel doesn't make sense here because no clear action is proposed.

Dialogs should contain a maximum of two actions.

  • If a single action is provided, it must be an acknowledgement action
  • If two actions are provided, one must be a confirming action, and the other a dismissing action
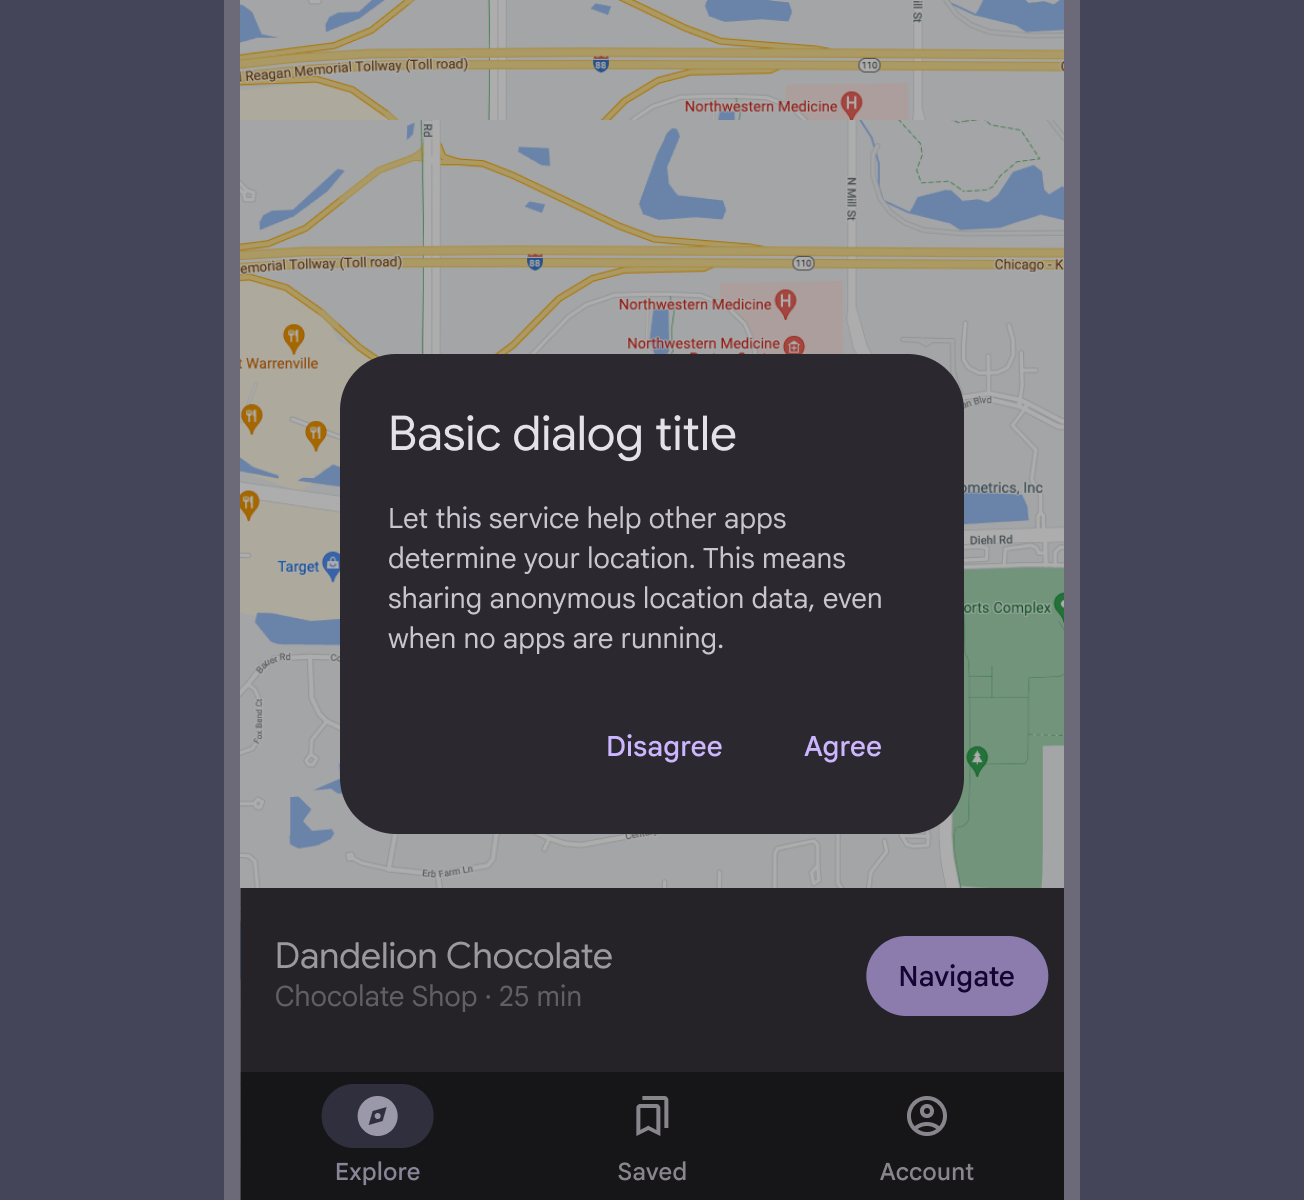
Dialog with 2 buttons side-by-side: “Disagree”, “Agree”.
Do Display two text buttons next to one another
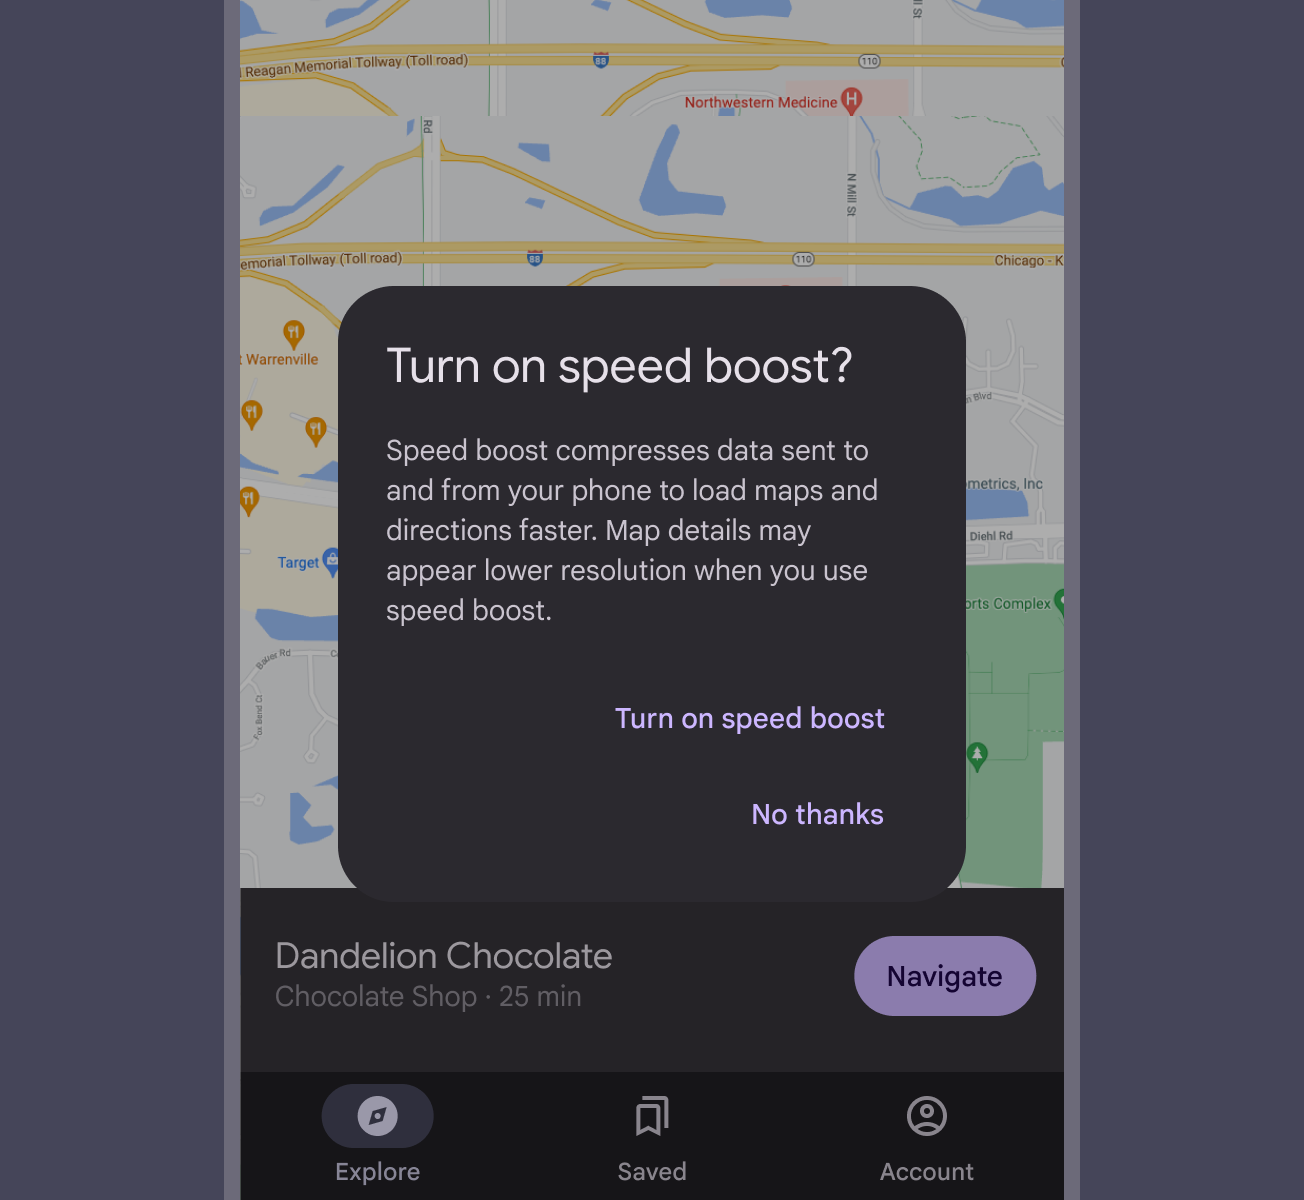
Dialog with 2 stacked buttons: “Turn on speed boost”, “No thanks”.
Caution Stacked buttons accommodate longer button text, but take up more room. Confirming actions appear above dismissive actions.

Providing a third action, such as Learn more, is not recommended as it navigates the user away from the dialog, leaving the dialog task unfinished.

Rather than adding a third action, an inline expansion can display more information. If more extensive information is needed, provide it prior to entering the dialog.
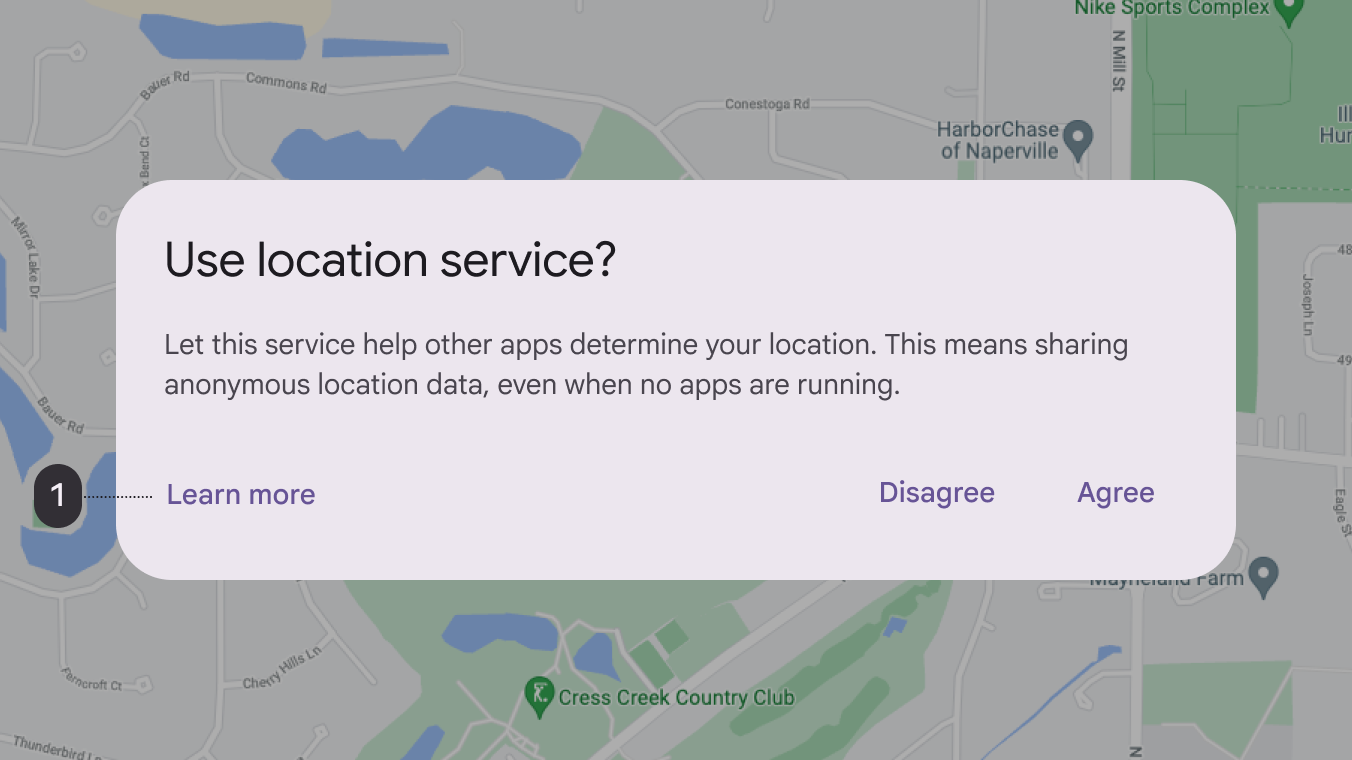
Dialog with 3 text buttons: Learn more, Disagree, Agree.
Caution The Learn more action (1) navigates away from this dialog, potentially leaving it in an indeterminate state

Basic dialog ​

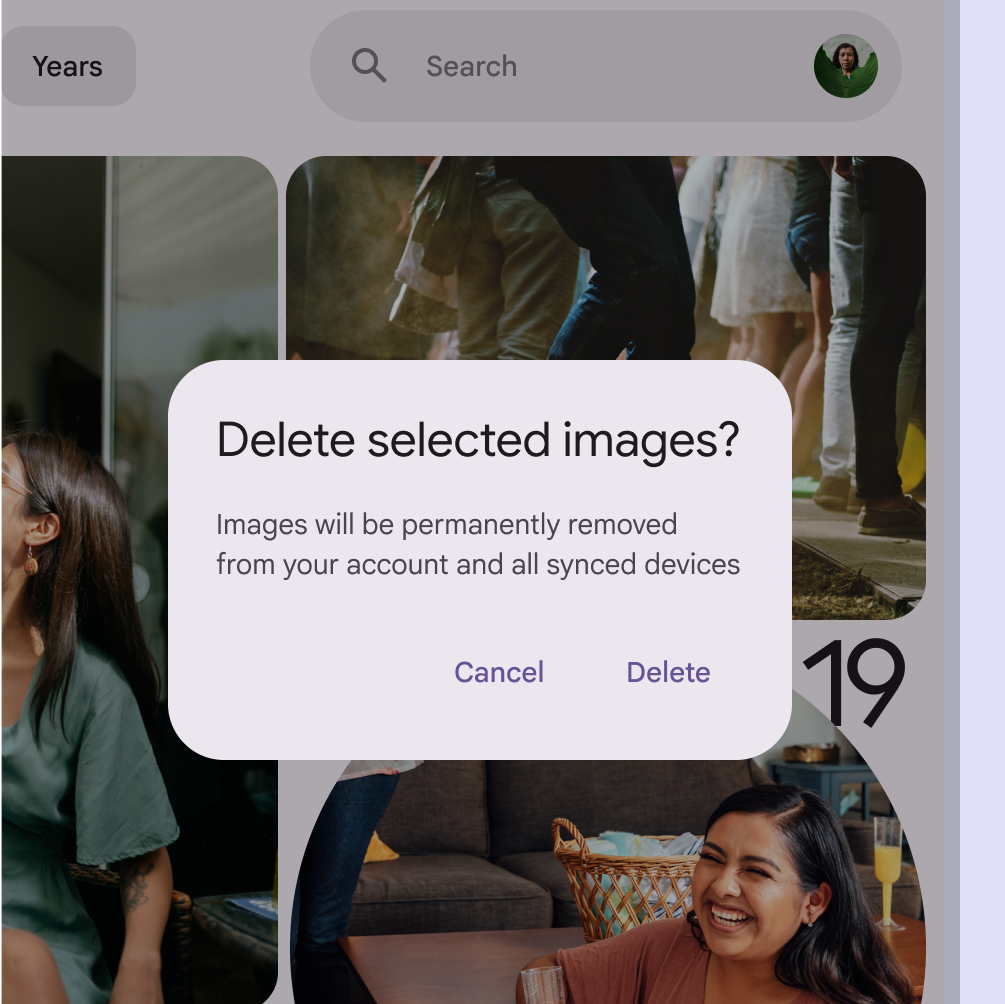
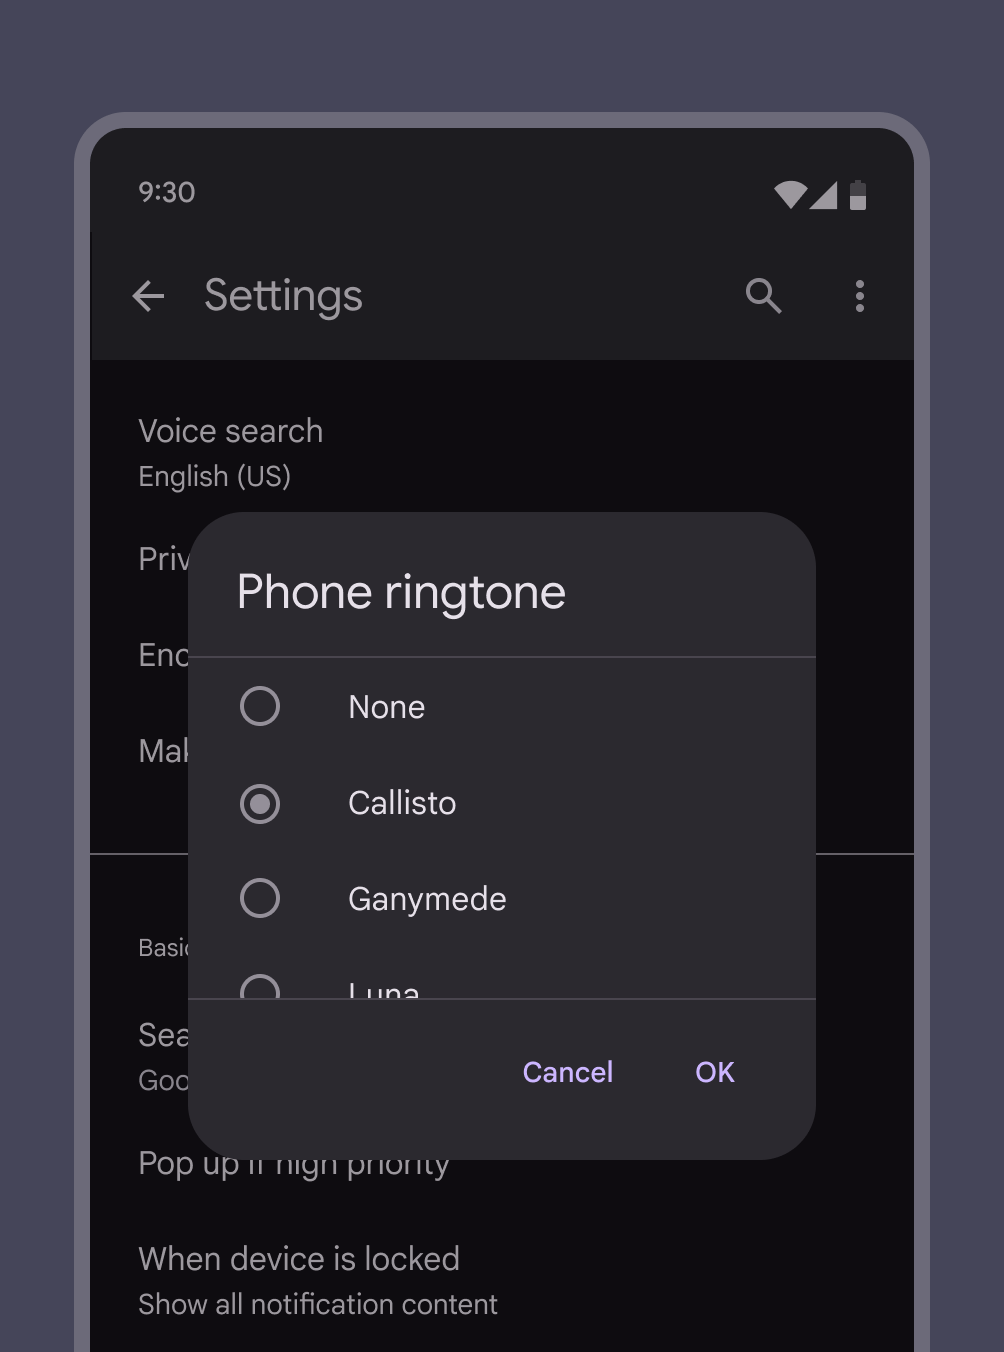
Basic dialogs interrupt users with urgent information, details, or actions. Common use cases for basic dialogs include alerts, quick selectionSelection lets users choose specific items to act on.More on selection, and confirmation.

Example of basic dialog action request.
Basic dialogs require a person to take action before it will close
Example of basic dialog confirmation.
Basic dialogs can give people the ability to provide confirmation of a choice before committing to it

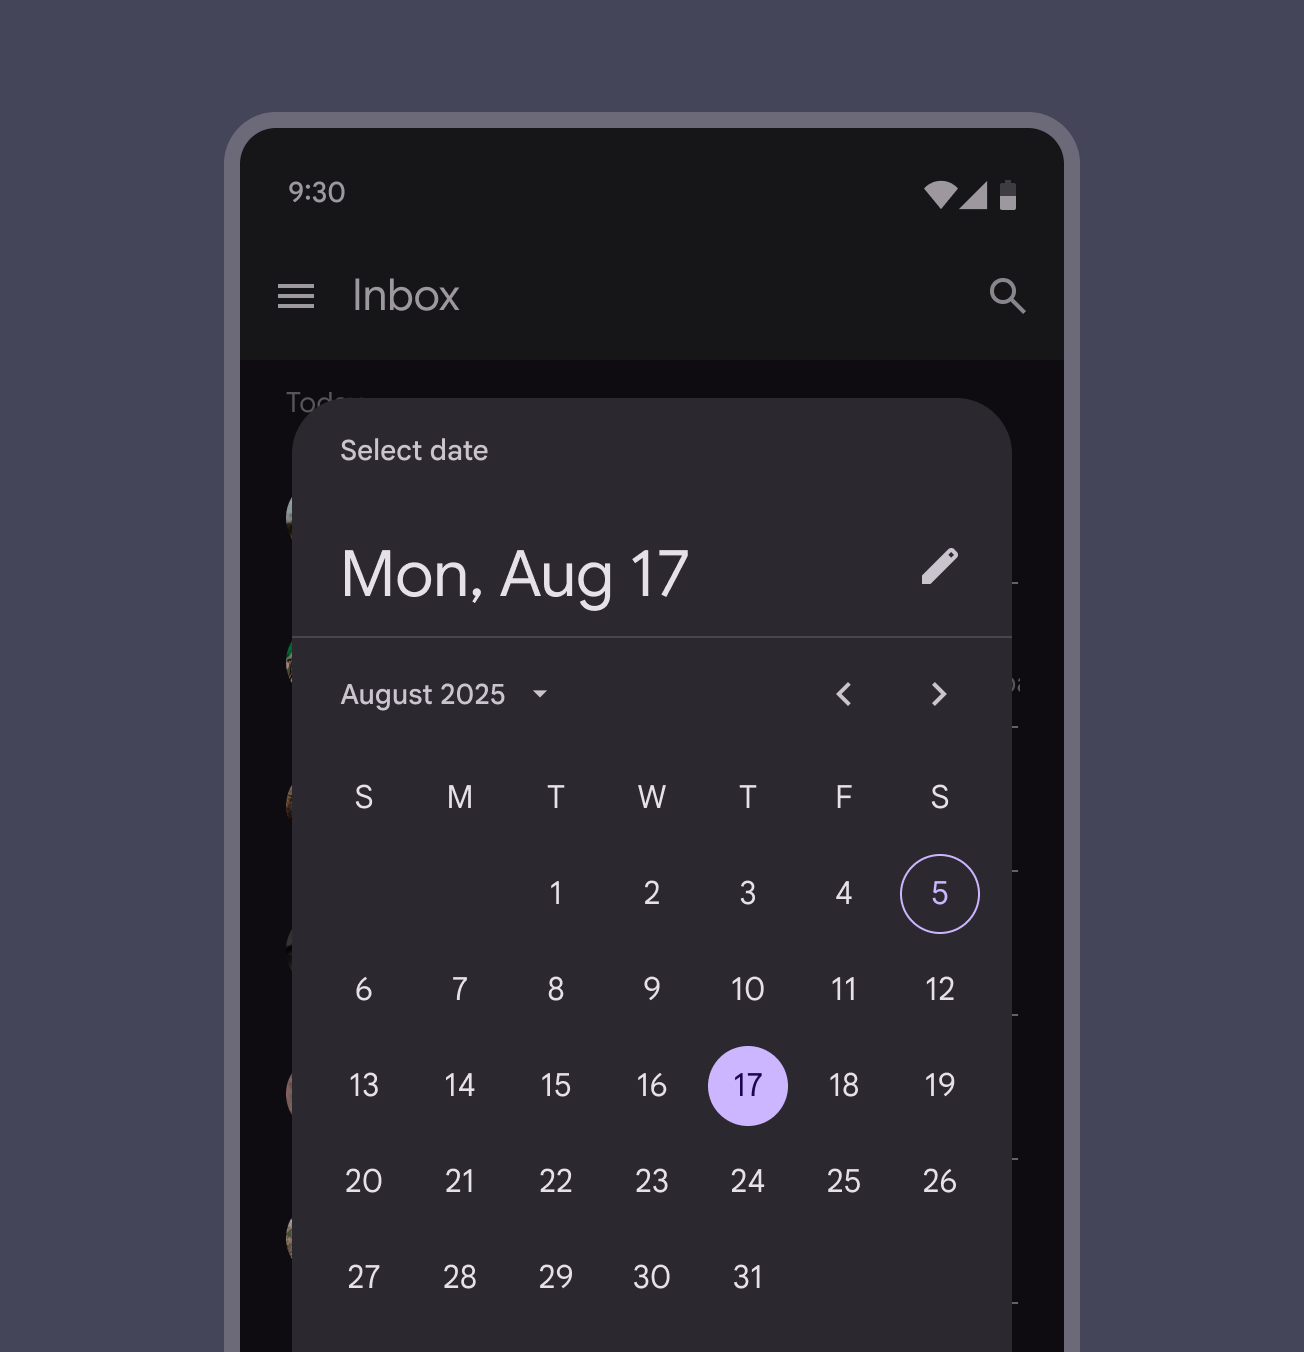
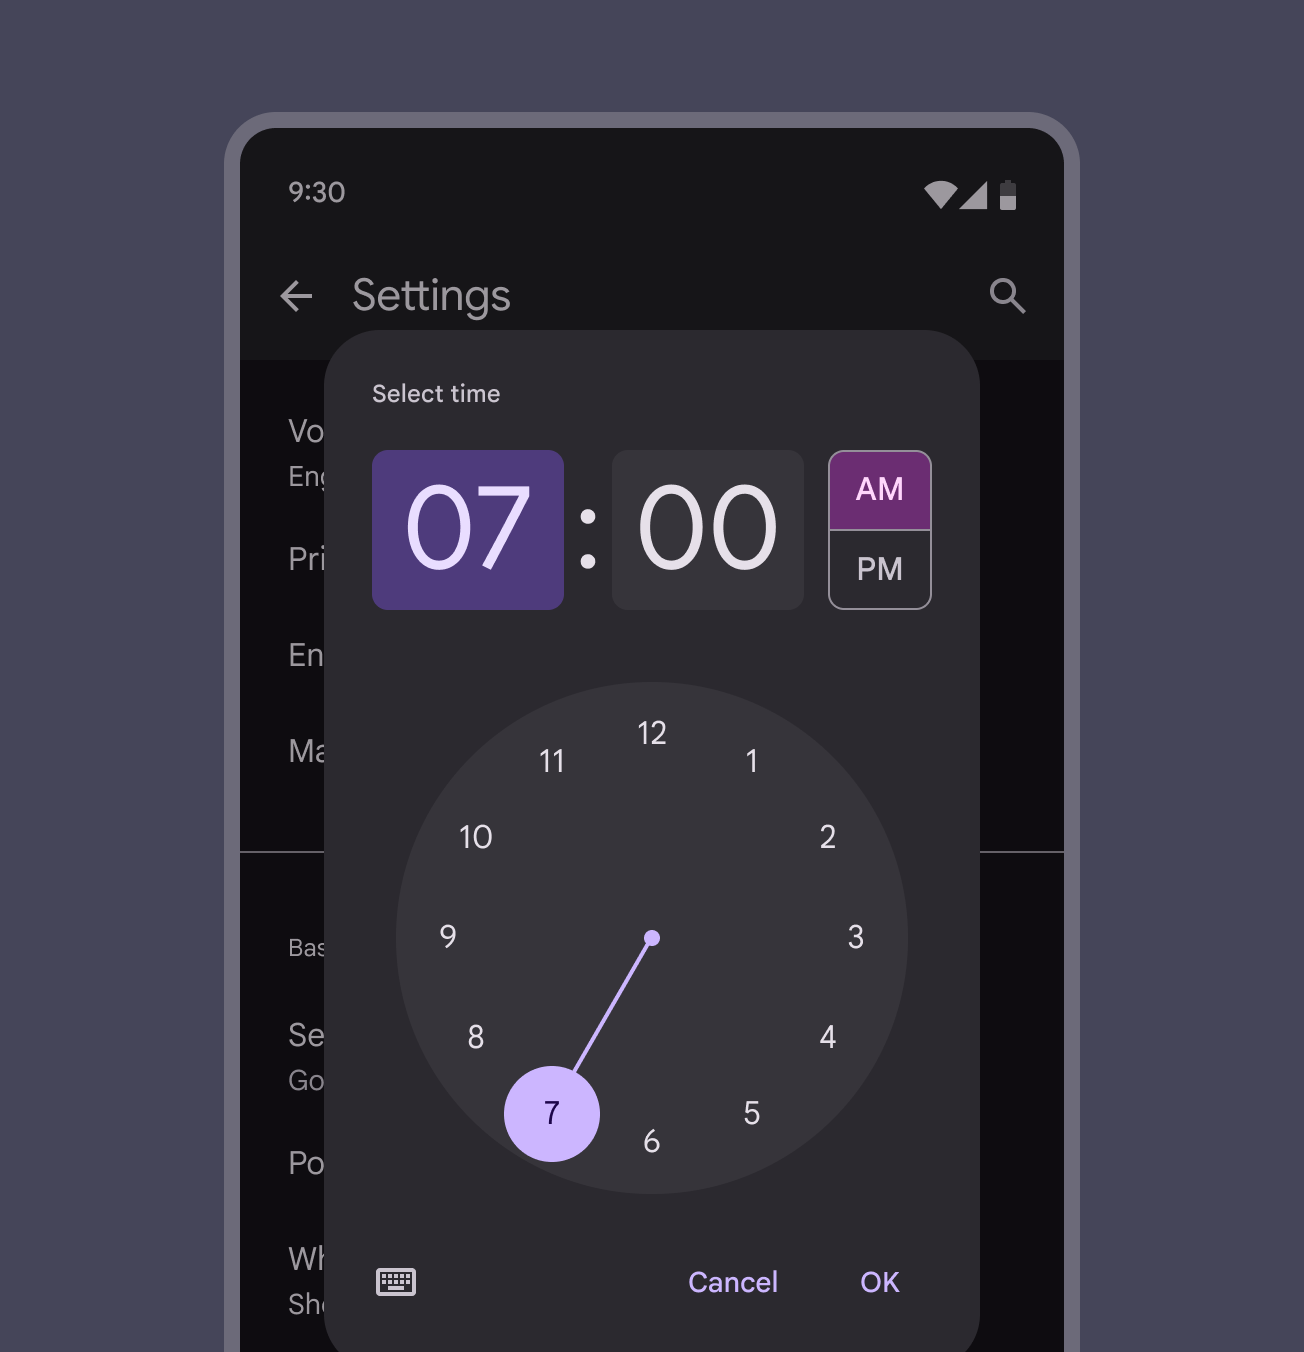
Basic dialogs most often appear as alerts or listsLists are continuous, vertical indexes of text and images.More on lists, but can have a variety of layoutsLayout is the visual arrangement of elements on the screen.More on layout and component combinations, including lists, date pickersDate pickers let people select a date, or a range of dates.More on date pickers, and time pickersTime pickers help users select and set a specific time.More on time pickers.

Date picker dialog.
Date picker dialogs allow people to tap a date, then confirm it by tapping OK
Time picker dialog.
Time picker dialogs allow people to move the clock hand and then confirm by tapping OK

Full-screen dialog ​

Full-screen dialogs fill the entire screen, containing actions that require a series of tasks to complete. One example is creating a calendar entry with the event title, date, location, and time.

Because they take up the entire screen, full-screen dialogs are the only dialogs over which other dialogs can appear.

Use a container transform pattern to transition a FABFloating action buttons (FABs) help people take primary actions.More on FABs into a full-screen dialog.

Full-screen dialogs contain actions that require a series of tasks to complete

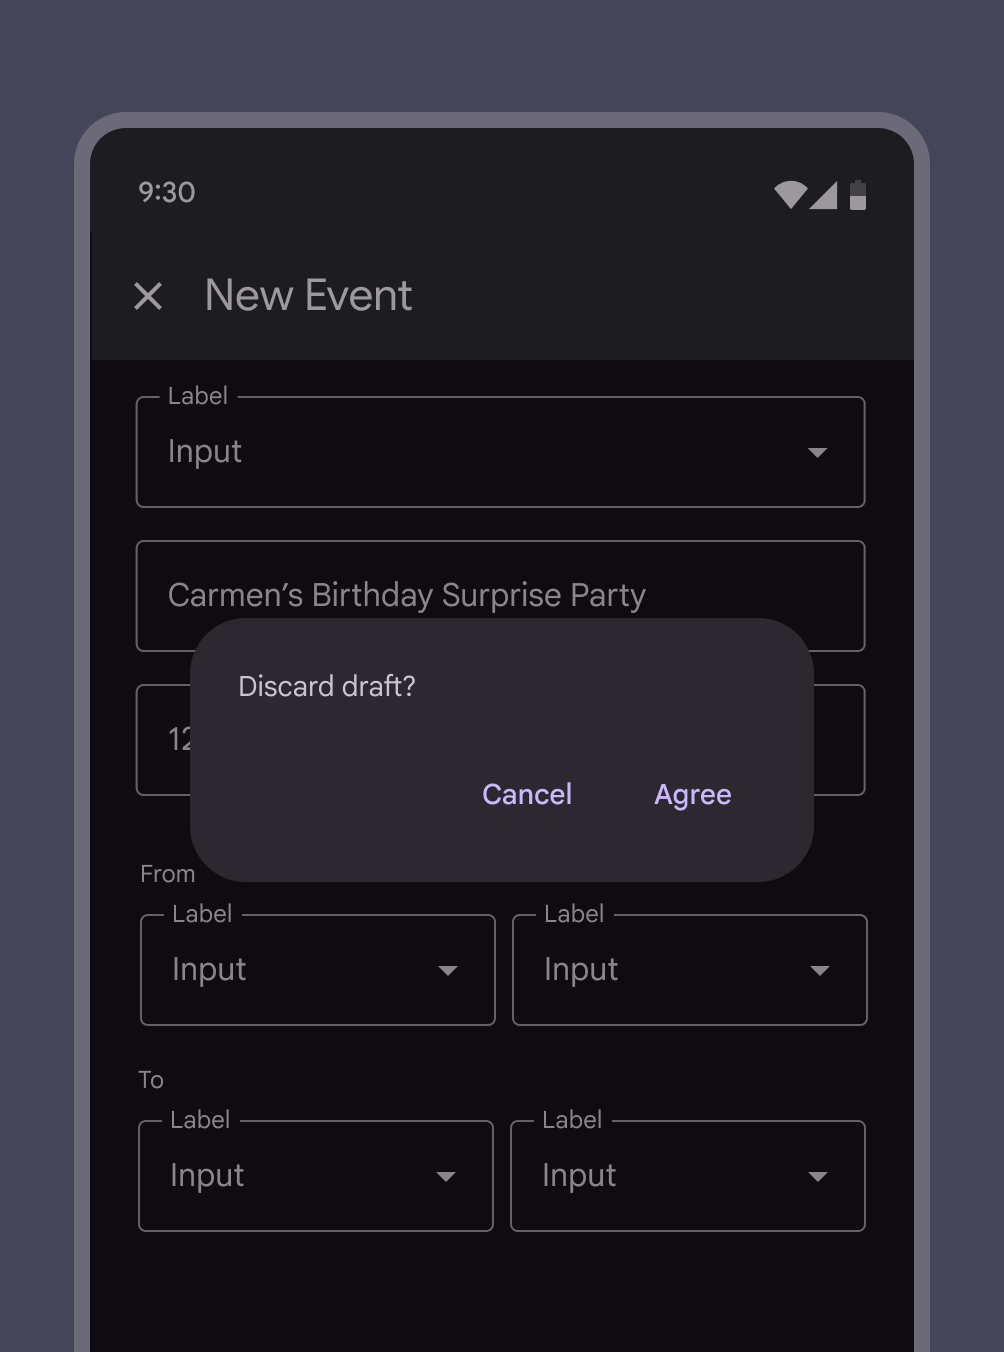
When a full-screen dialog is closed without being saved, a basic dialog appears in front of it to confirm selectionsSelection lets users choose specific items to act on.More on selection should be discarded without saving changes.

A basic modal dialog appears when a full-screen dialog is closed without being saved

Full-screen dialogs may be used for content or tasks that meet any of these criteria:

  • Dialogs that include components which require keyboard inputInputs are devices that provide interactive control of an app. Common inputs are a mouse, keyboard, and touchpad., such as form fields
  • When changes aren’t saved instantly
  • When components within the dialog open additional dialogs

Full-screen dialogs are for compact breakpointsWindow widths smaller than 600dp, such as a phone in portrait orientation.More on compact breakpoints only, like mobile devices. For medium and expanded breakpointsWindow widths 840dp to 1199dp, such as a tablet or foldable in landscape orientation, or desktop.More on expanded breakpoints, use a basic dialog.

Saving selections ​

To save a selection in a full-screen dialog, use Save. The close icon or dismissive action, such as Cancel or Back, should close the dialog.

Confirmation ​

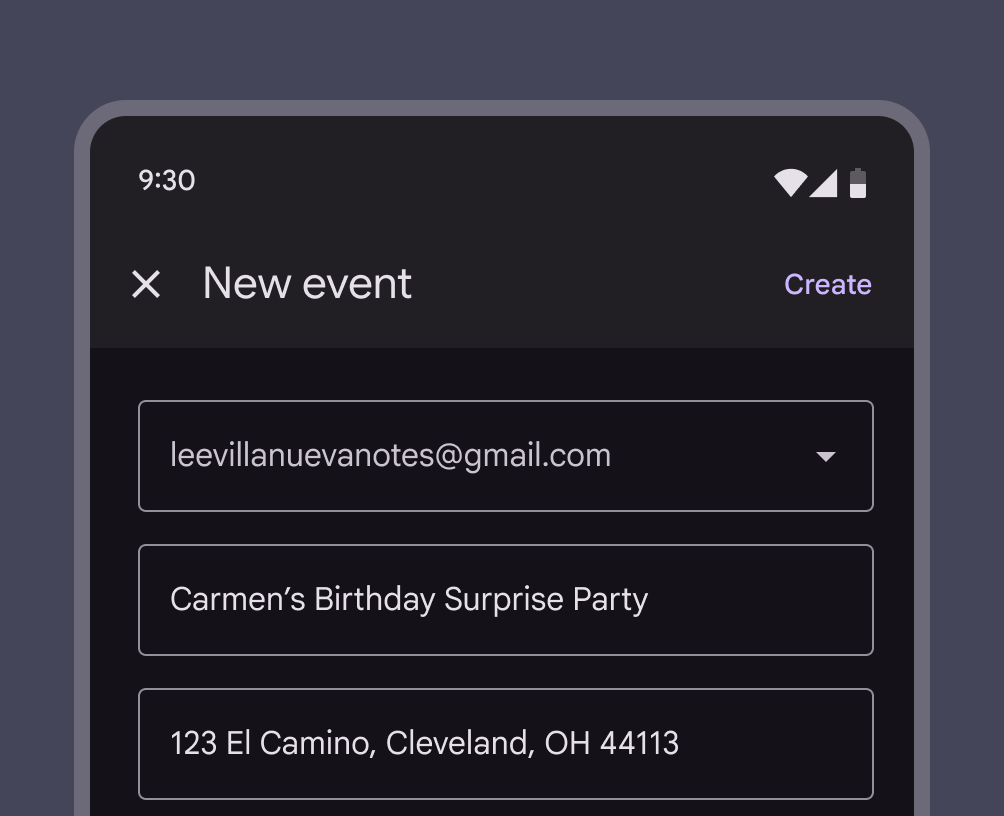
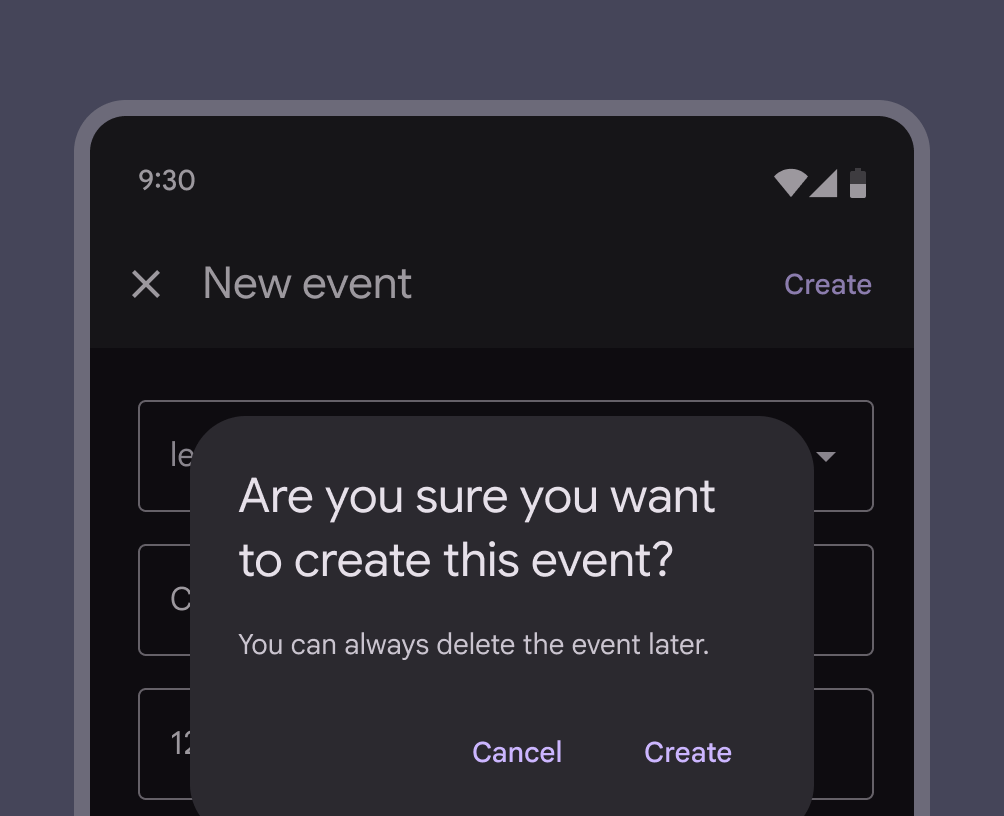
The confirmation action should be clear about what happens next, like Send or Create. Avoid using vague terms like Done, OK, or Close. Only trigger an additional basic dialog if the action fails. Don’t disableA disabled state communicates an inoperable component or element.More on disabled state the confirmation button.

Full-screen dialog with create button as confirmation action.
Do A Create button is clear that the event will be created
Full-screen dialog with an additional basic dialog asking if you want to create this event.
Don't Don’t trigger a basic dialog when the confirming action is selected

Dismissing ​

When someone dismisses a full-screen dialog, a basic dialog should appear to confirm that they want to discard the unsaved changes.
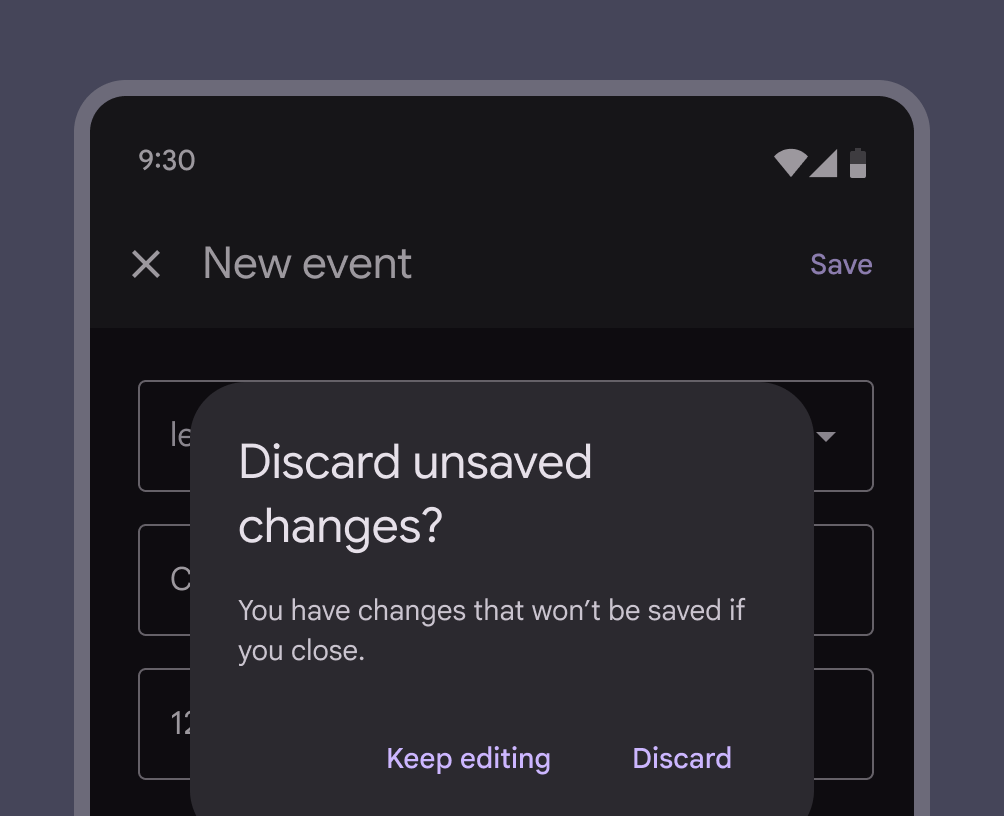
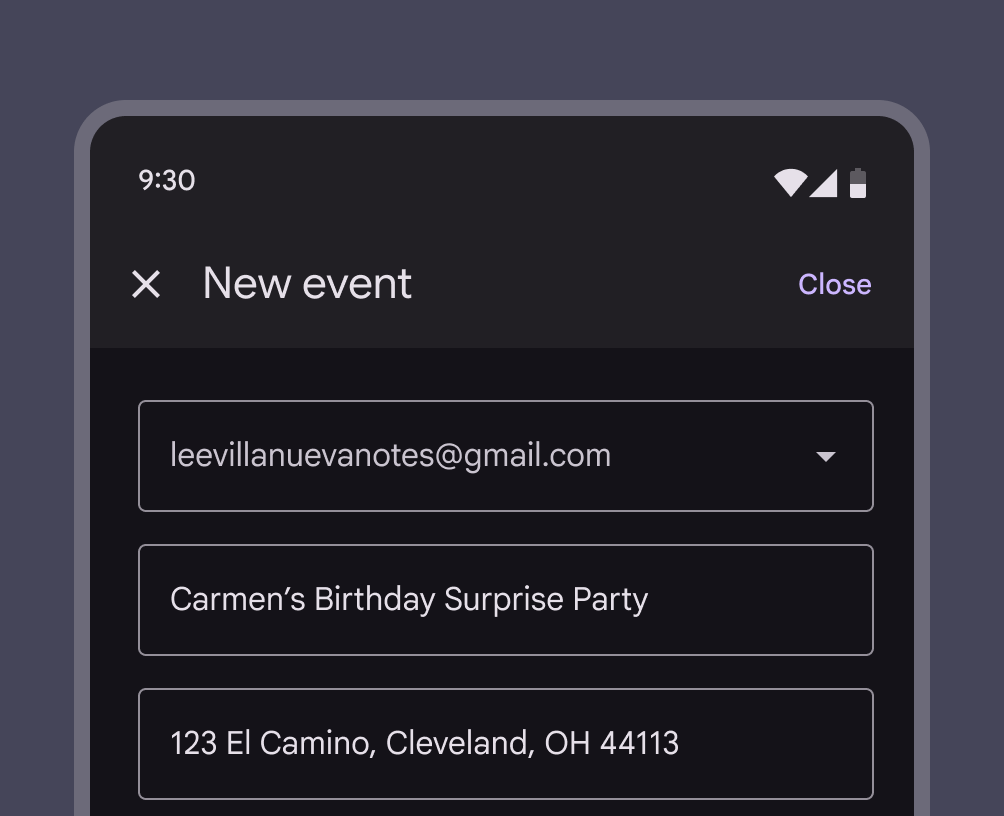
A basic dialog with options to either keep editing or discard unsaved changes.
Do Use a basic dialog to confirm that the user wants to discard unsaved changes
A full-screen dialog with a Close button as the confirming action.
Don't Don’t use the confirming action to dismiss the full-screen dialog

Error messages ​

Errors about the dialog fields should always appear inline where they occur. Some components like text fieldsText fields let users enter text into a UI.More on text fields have built-in error messaging, while others like checkboxesCheckboxes let users select one or more items from a list, or turn an item on or off.More on checkboxes and radio buttonsRadio buttons let people select one option from a set of options.More on radio buttons need error messages to be added next to the fields.

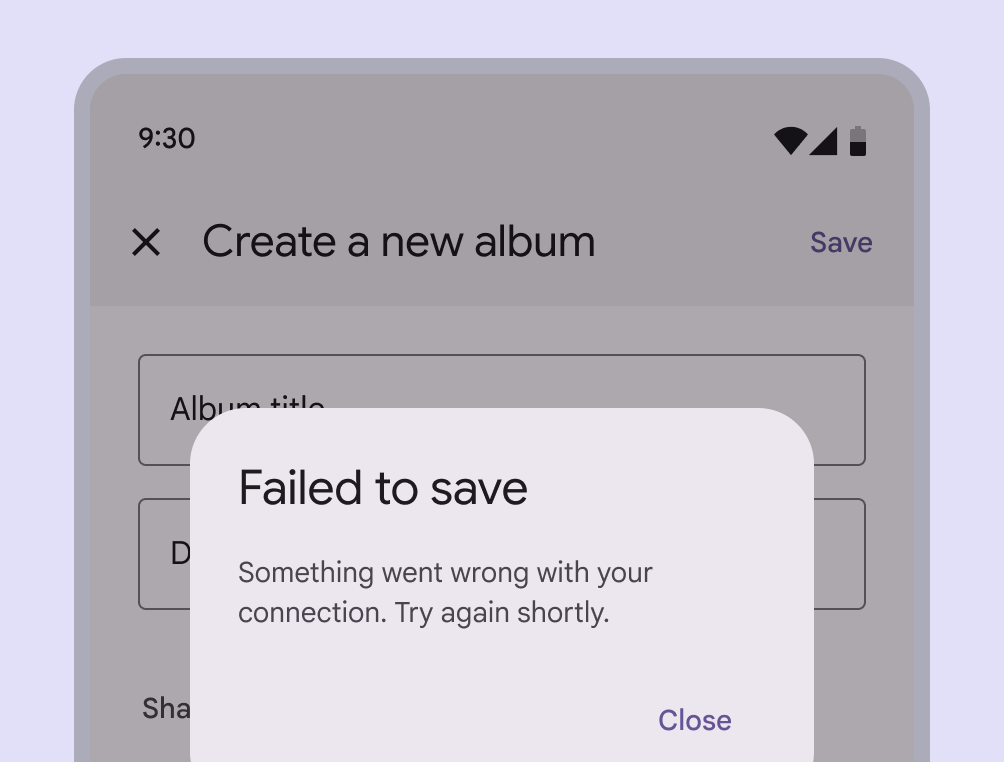
General errors such as network issues preventing saving or submitting should appear in a basic dialog when the confirming action fails.

Error messages should clearly but briefly explain the source of the error and how to fix it. Show all errors on the page at once so people can fix everything before trying again.
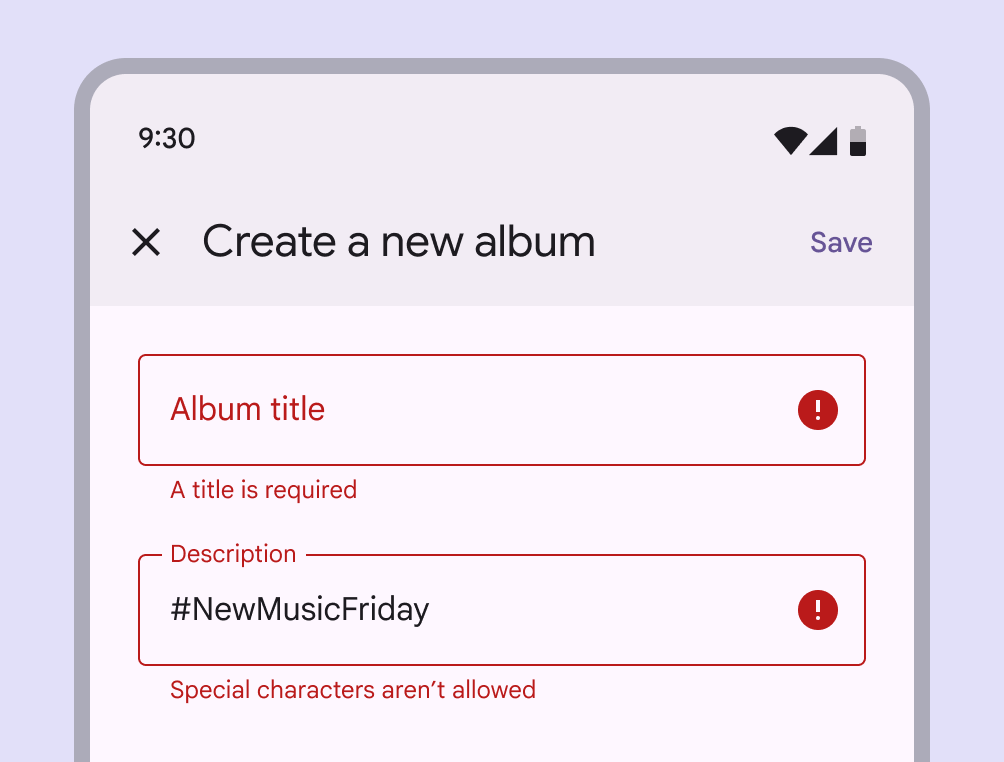
A full-screen dialog with inline error messages for text fields.
Do Error messages related to the fields should be displayed inline
A basic dialog mentioning that entries were not saved due to a connection issue.
Caution Errors unrelated to the fields can be displayed in a basic dialog

Dialog windows ​

Launching a full-screen dialog temporarily resets the app’s perceived elevation, allowing simple menusMenus display a list of choices on a temporary surface.More on menus or dialogs to appear above the full-screen dialog. They cover the screen and don’t appear as a floating modal window.

Navigation ​

Because full-screen dialogs can only be completed, dismissed, or closed, the close “X” icon button should be the only navigation option in the app barApp bars display information and actions at the top of a screen.More on app bars.

Adaptive design ​

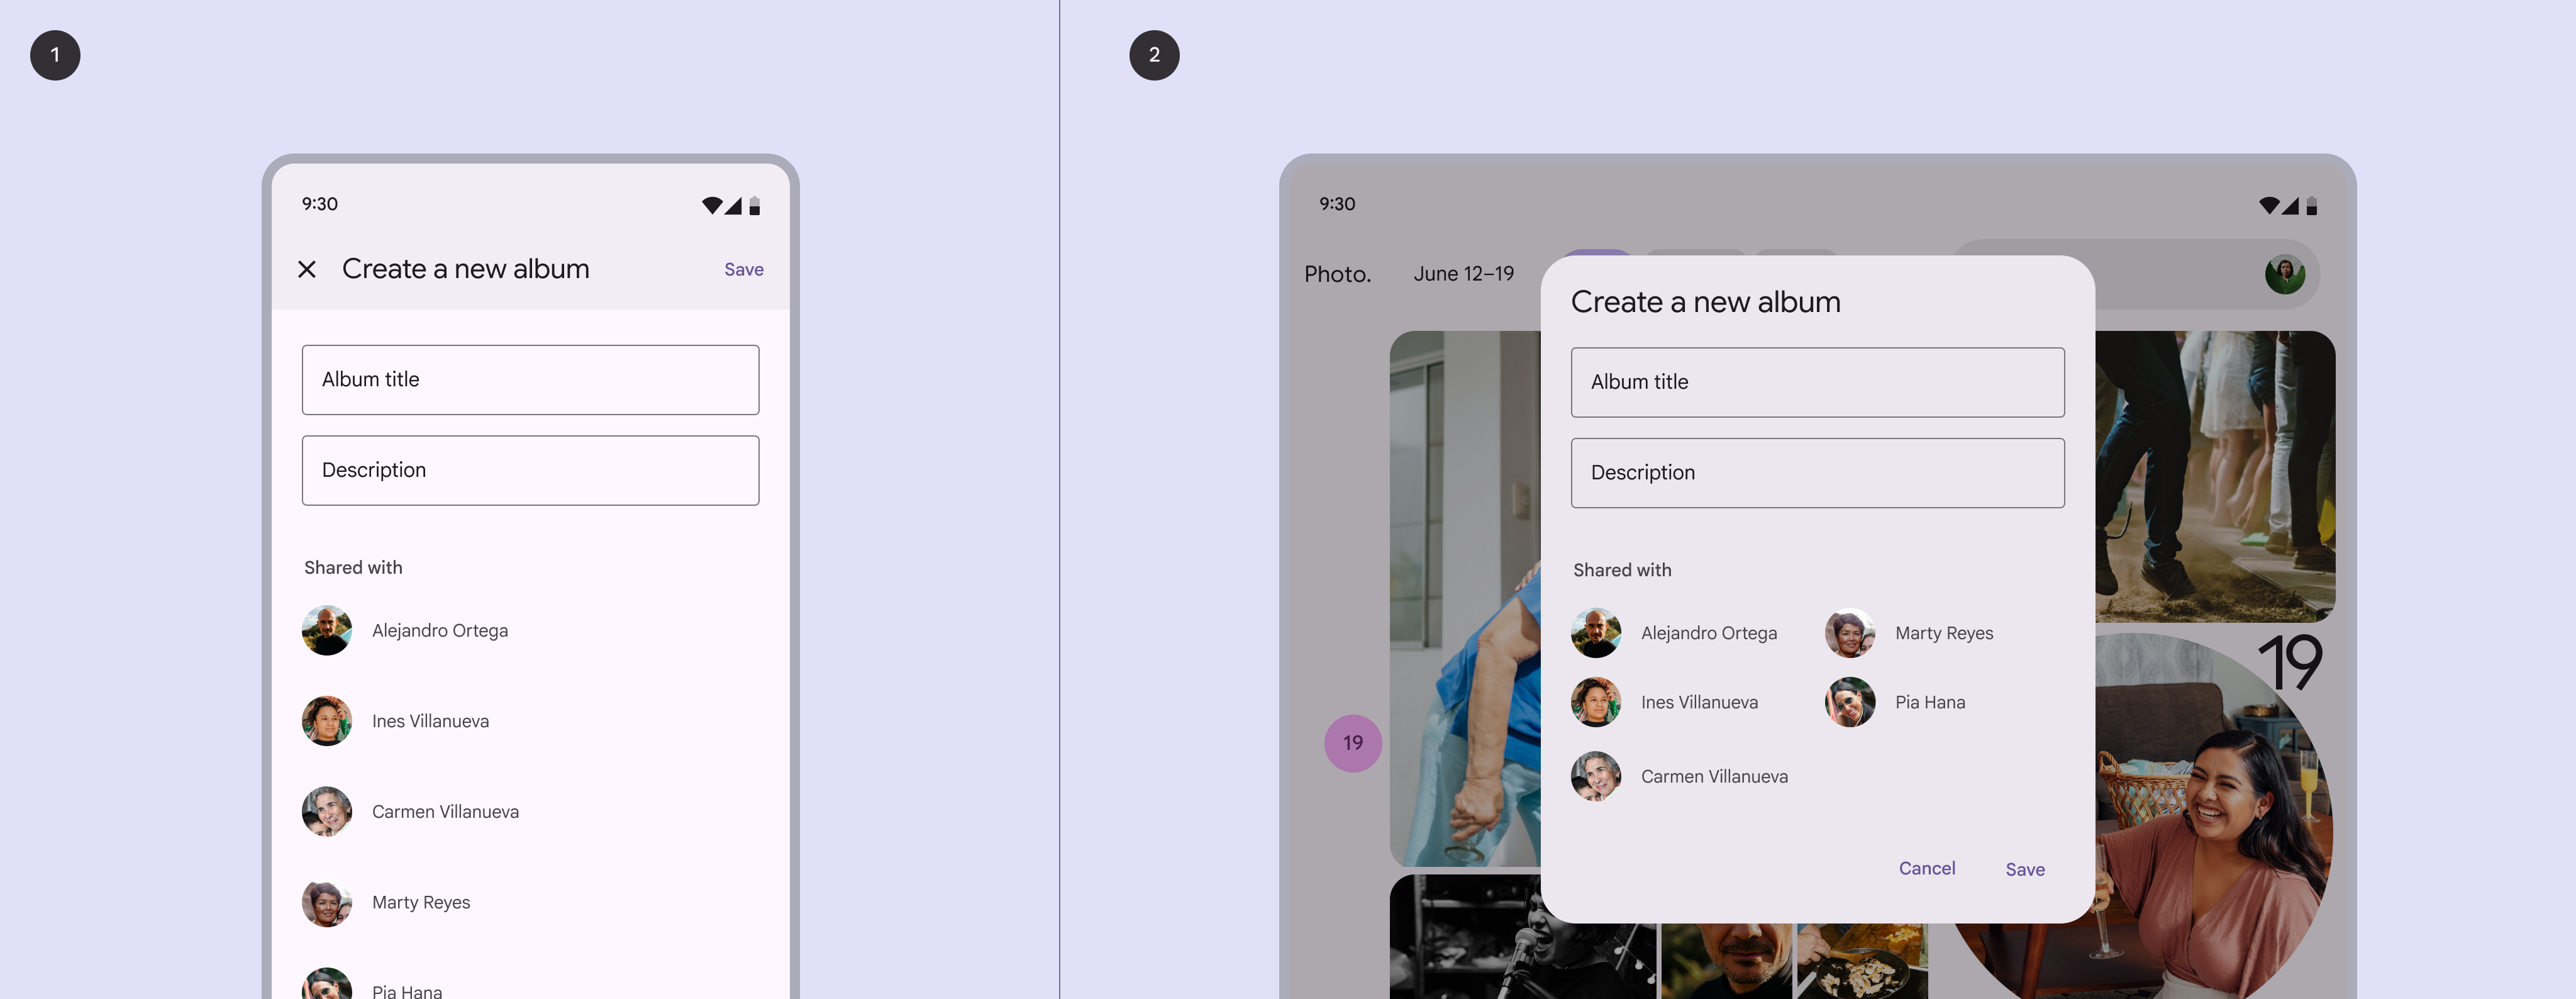
Dialogs can swap variants as the breakpointBreakpoints are opinionated window sizes where a layout changes to match available space, device conventions, and ergonomics (previously window size classes).More on breakpoints changes. For example, a full-screen dialogFull-screen dialogs fill the entire screen, displaying actions that require a series of tasks to complete. They're often used for creating a calendar entry.More on full-screen dialogs can change into a basic dialogBasic dialogs interrupt users with urgent information, details, or actions. They're often used for alerts, quick selection, or confirmation.More on basic dialogs at larger breakpoints.

Example of full-screen dialog on left, simple dialog on right
  1. Full-screen dialog on mobile
  2. Dialog on a tablet

Medium breakpoint

Basic dialogs appear in a center position by default. Their position can be overridden to provide a more ergonomic experience.
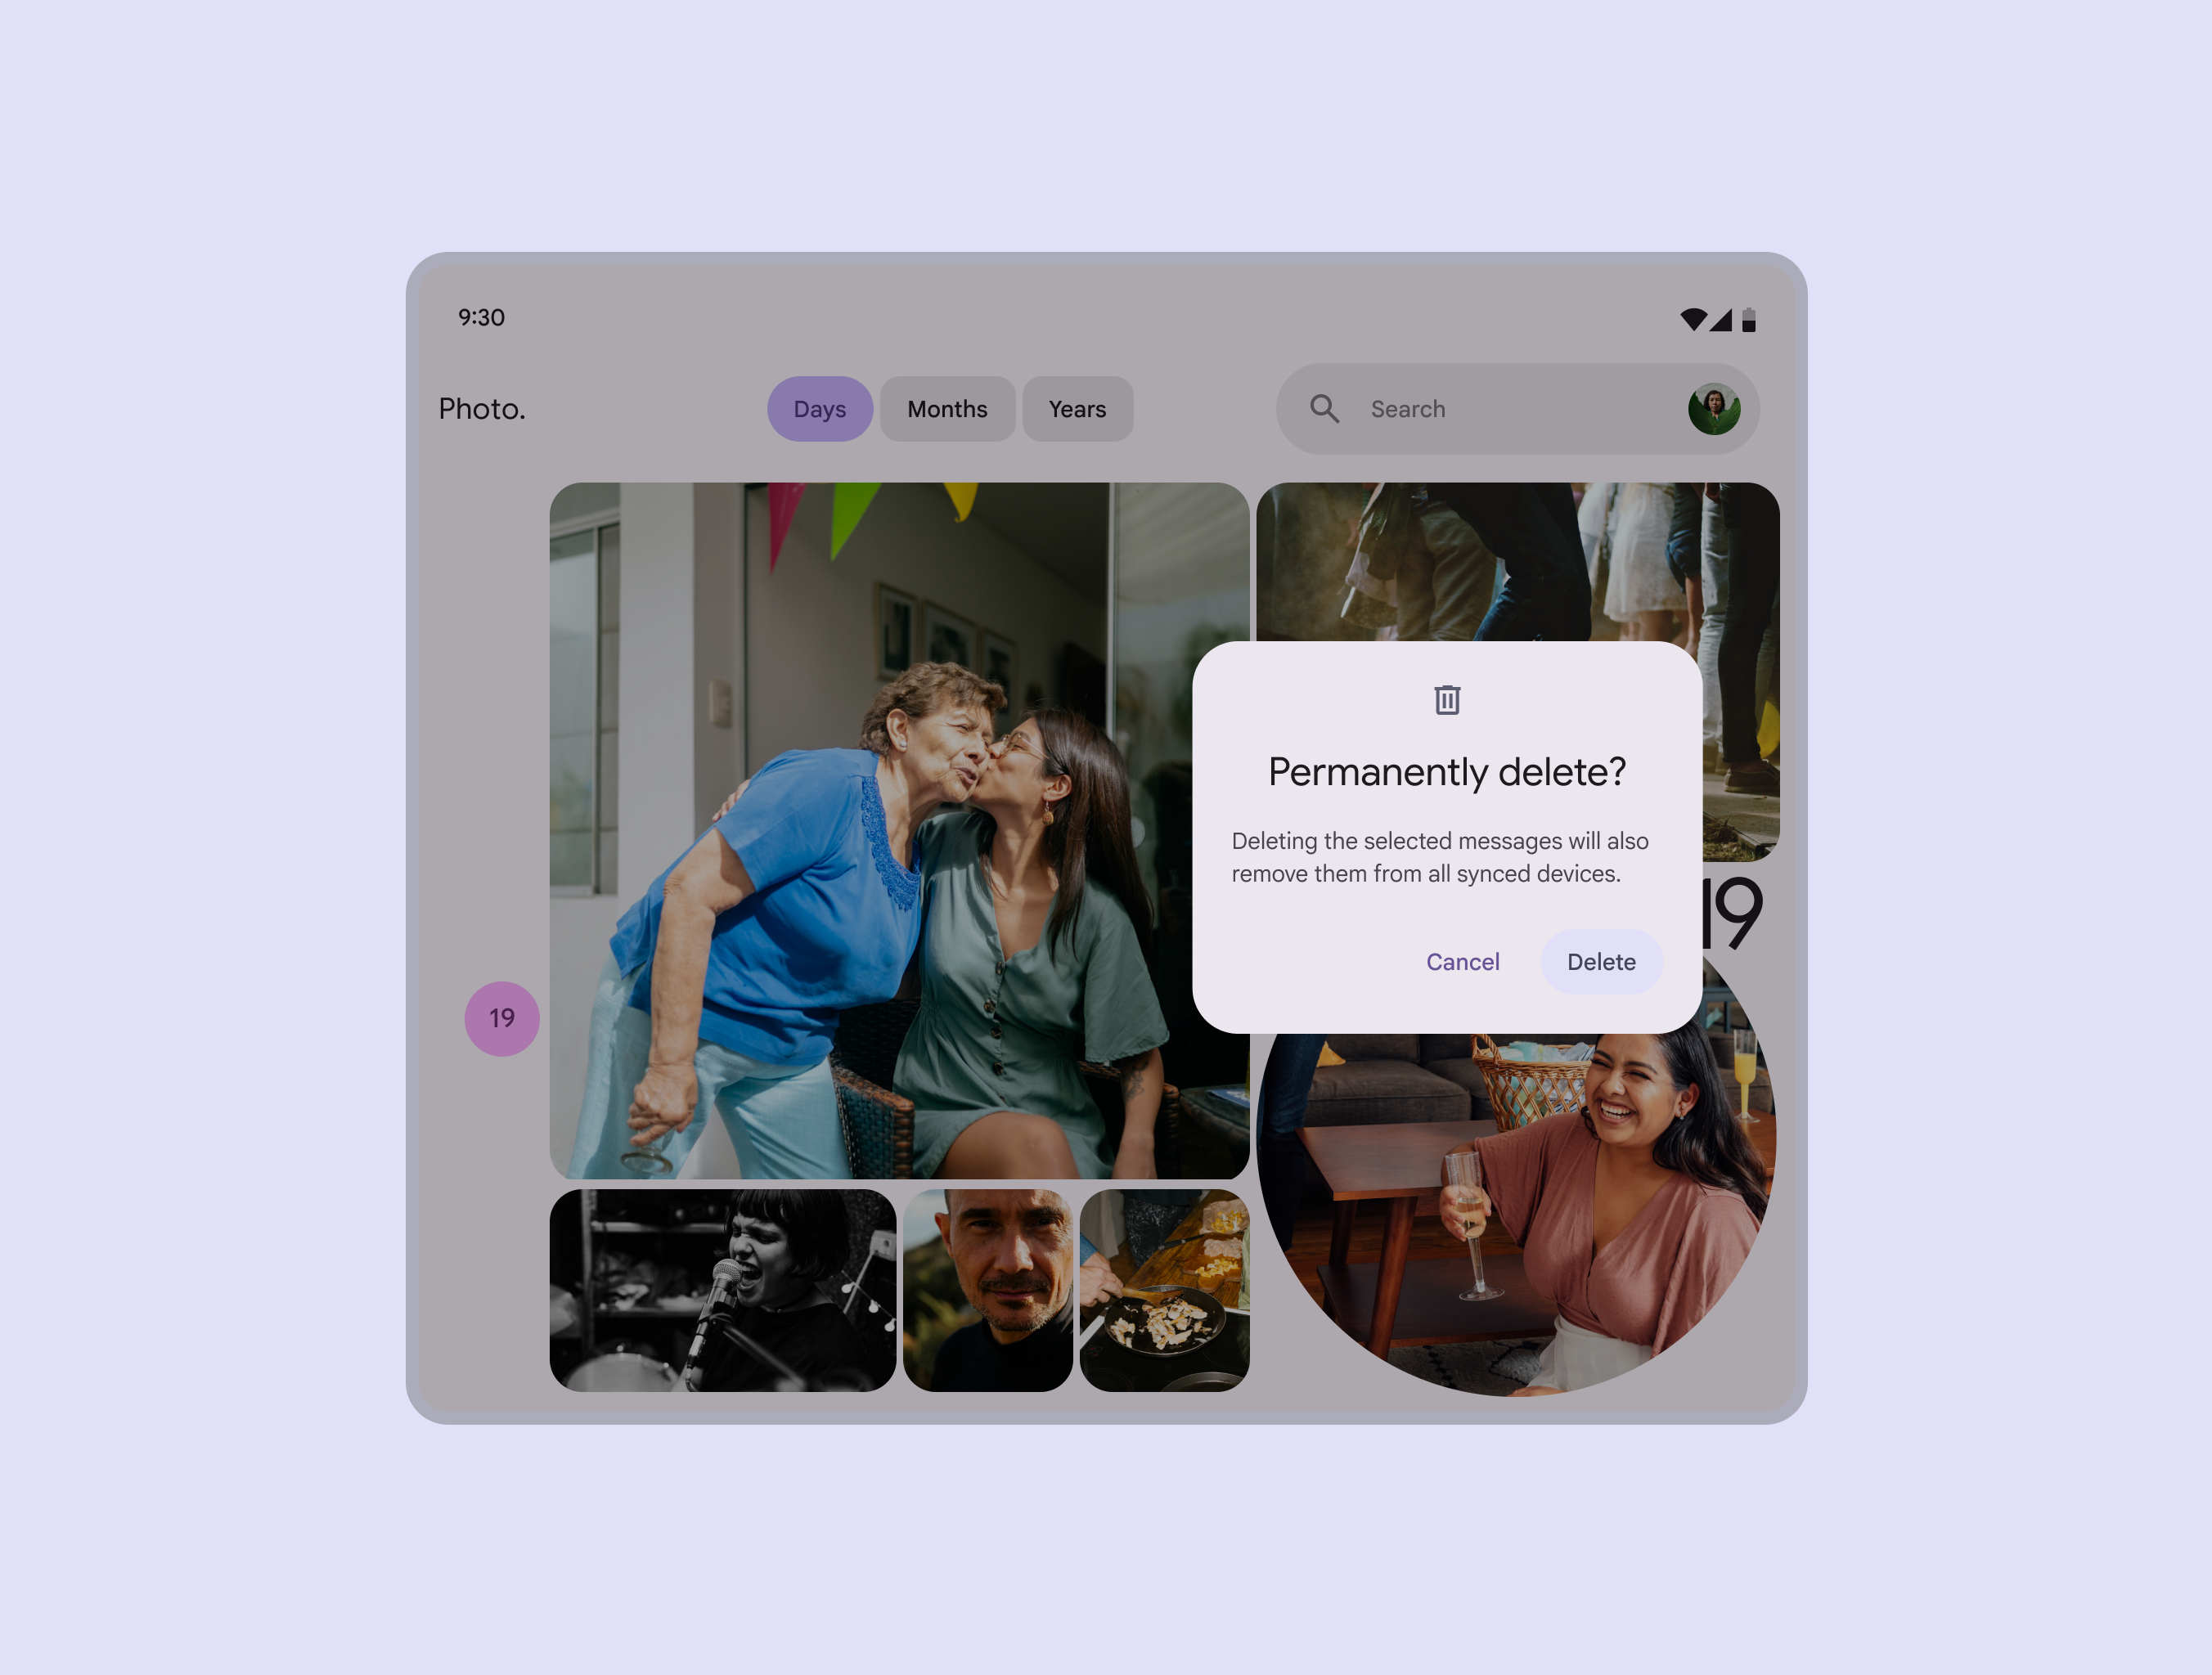
Basic dialog on tablet photos app.
Dialog custom positioned on the right side of the screen

Expanded breakpoint

Dialogs on expanded breakpointsWindow widths 840dp to 1199dp, such as a tablet or foldable in landscape orientation, or desktop.More on expanded breakpoints, like desktop, are modal windows above a scrim. This puts the dialog at the forefront of a person's view, calling attention to the action prompted in the dialog.
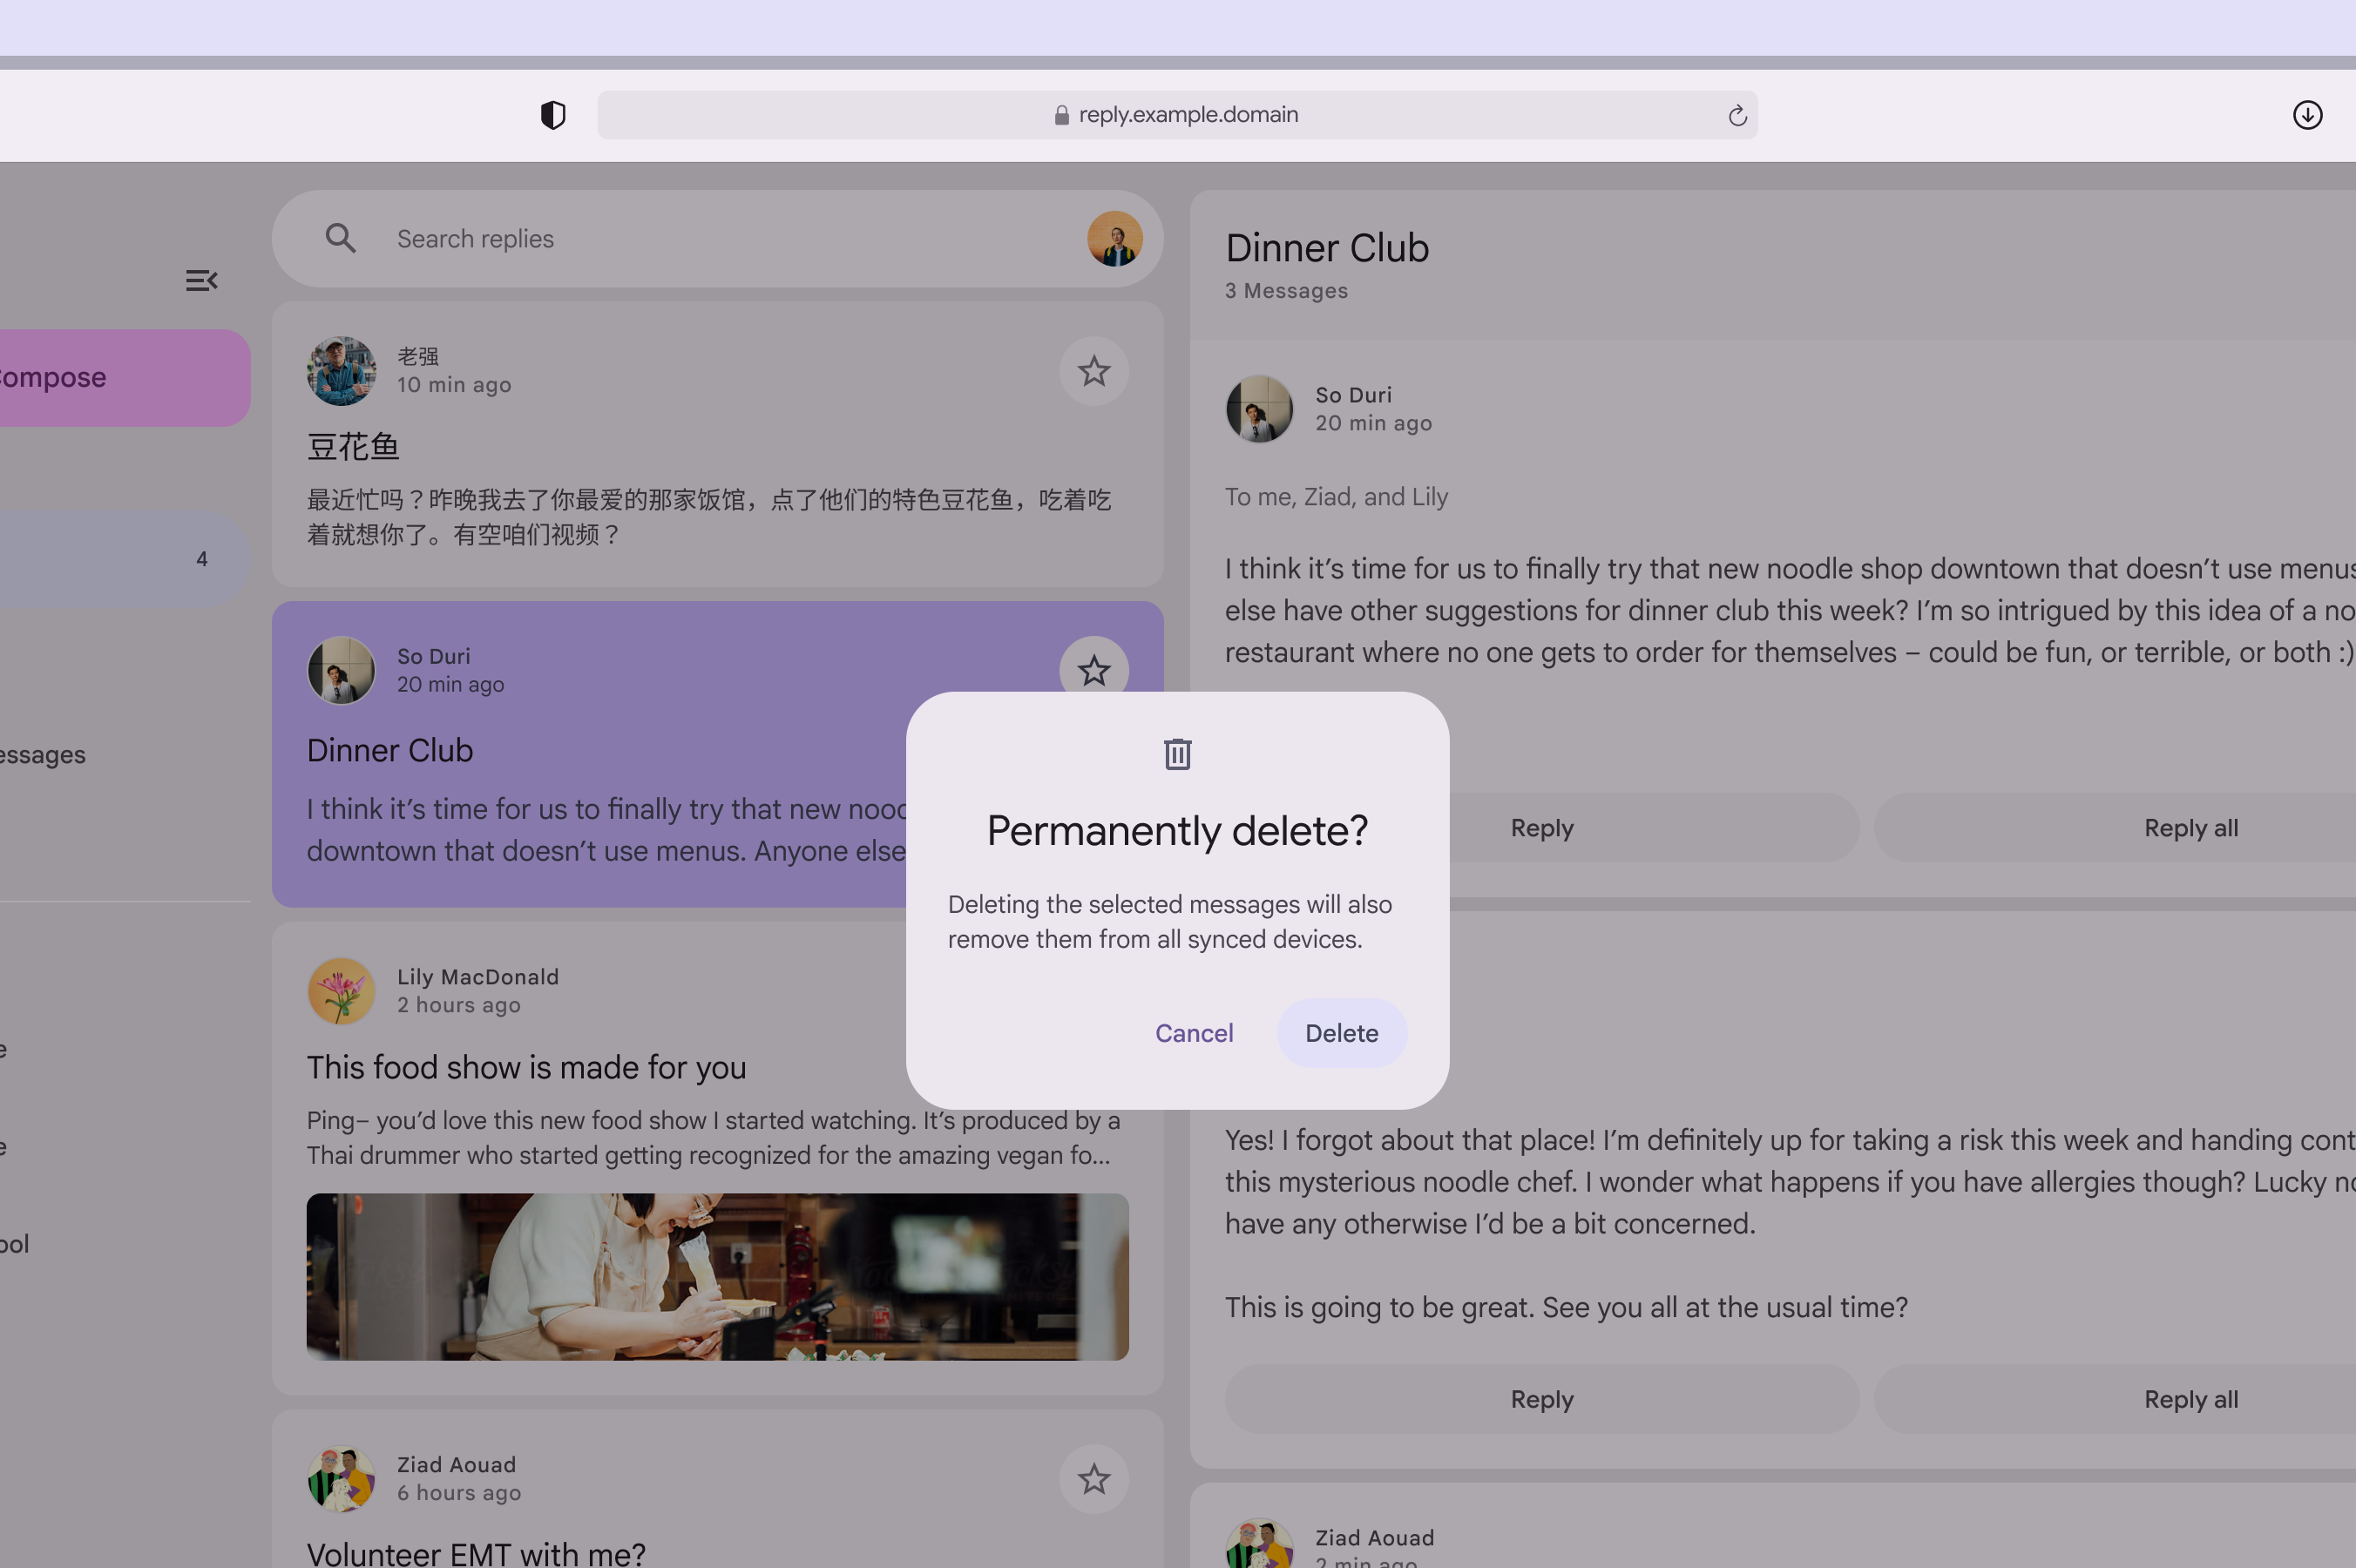
Example of desktop dialog.
Desktop dialogs call attention to the required action

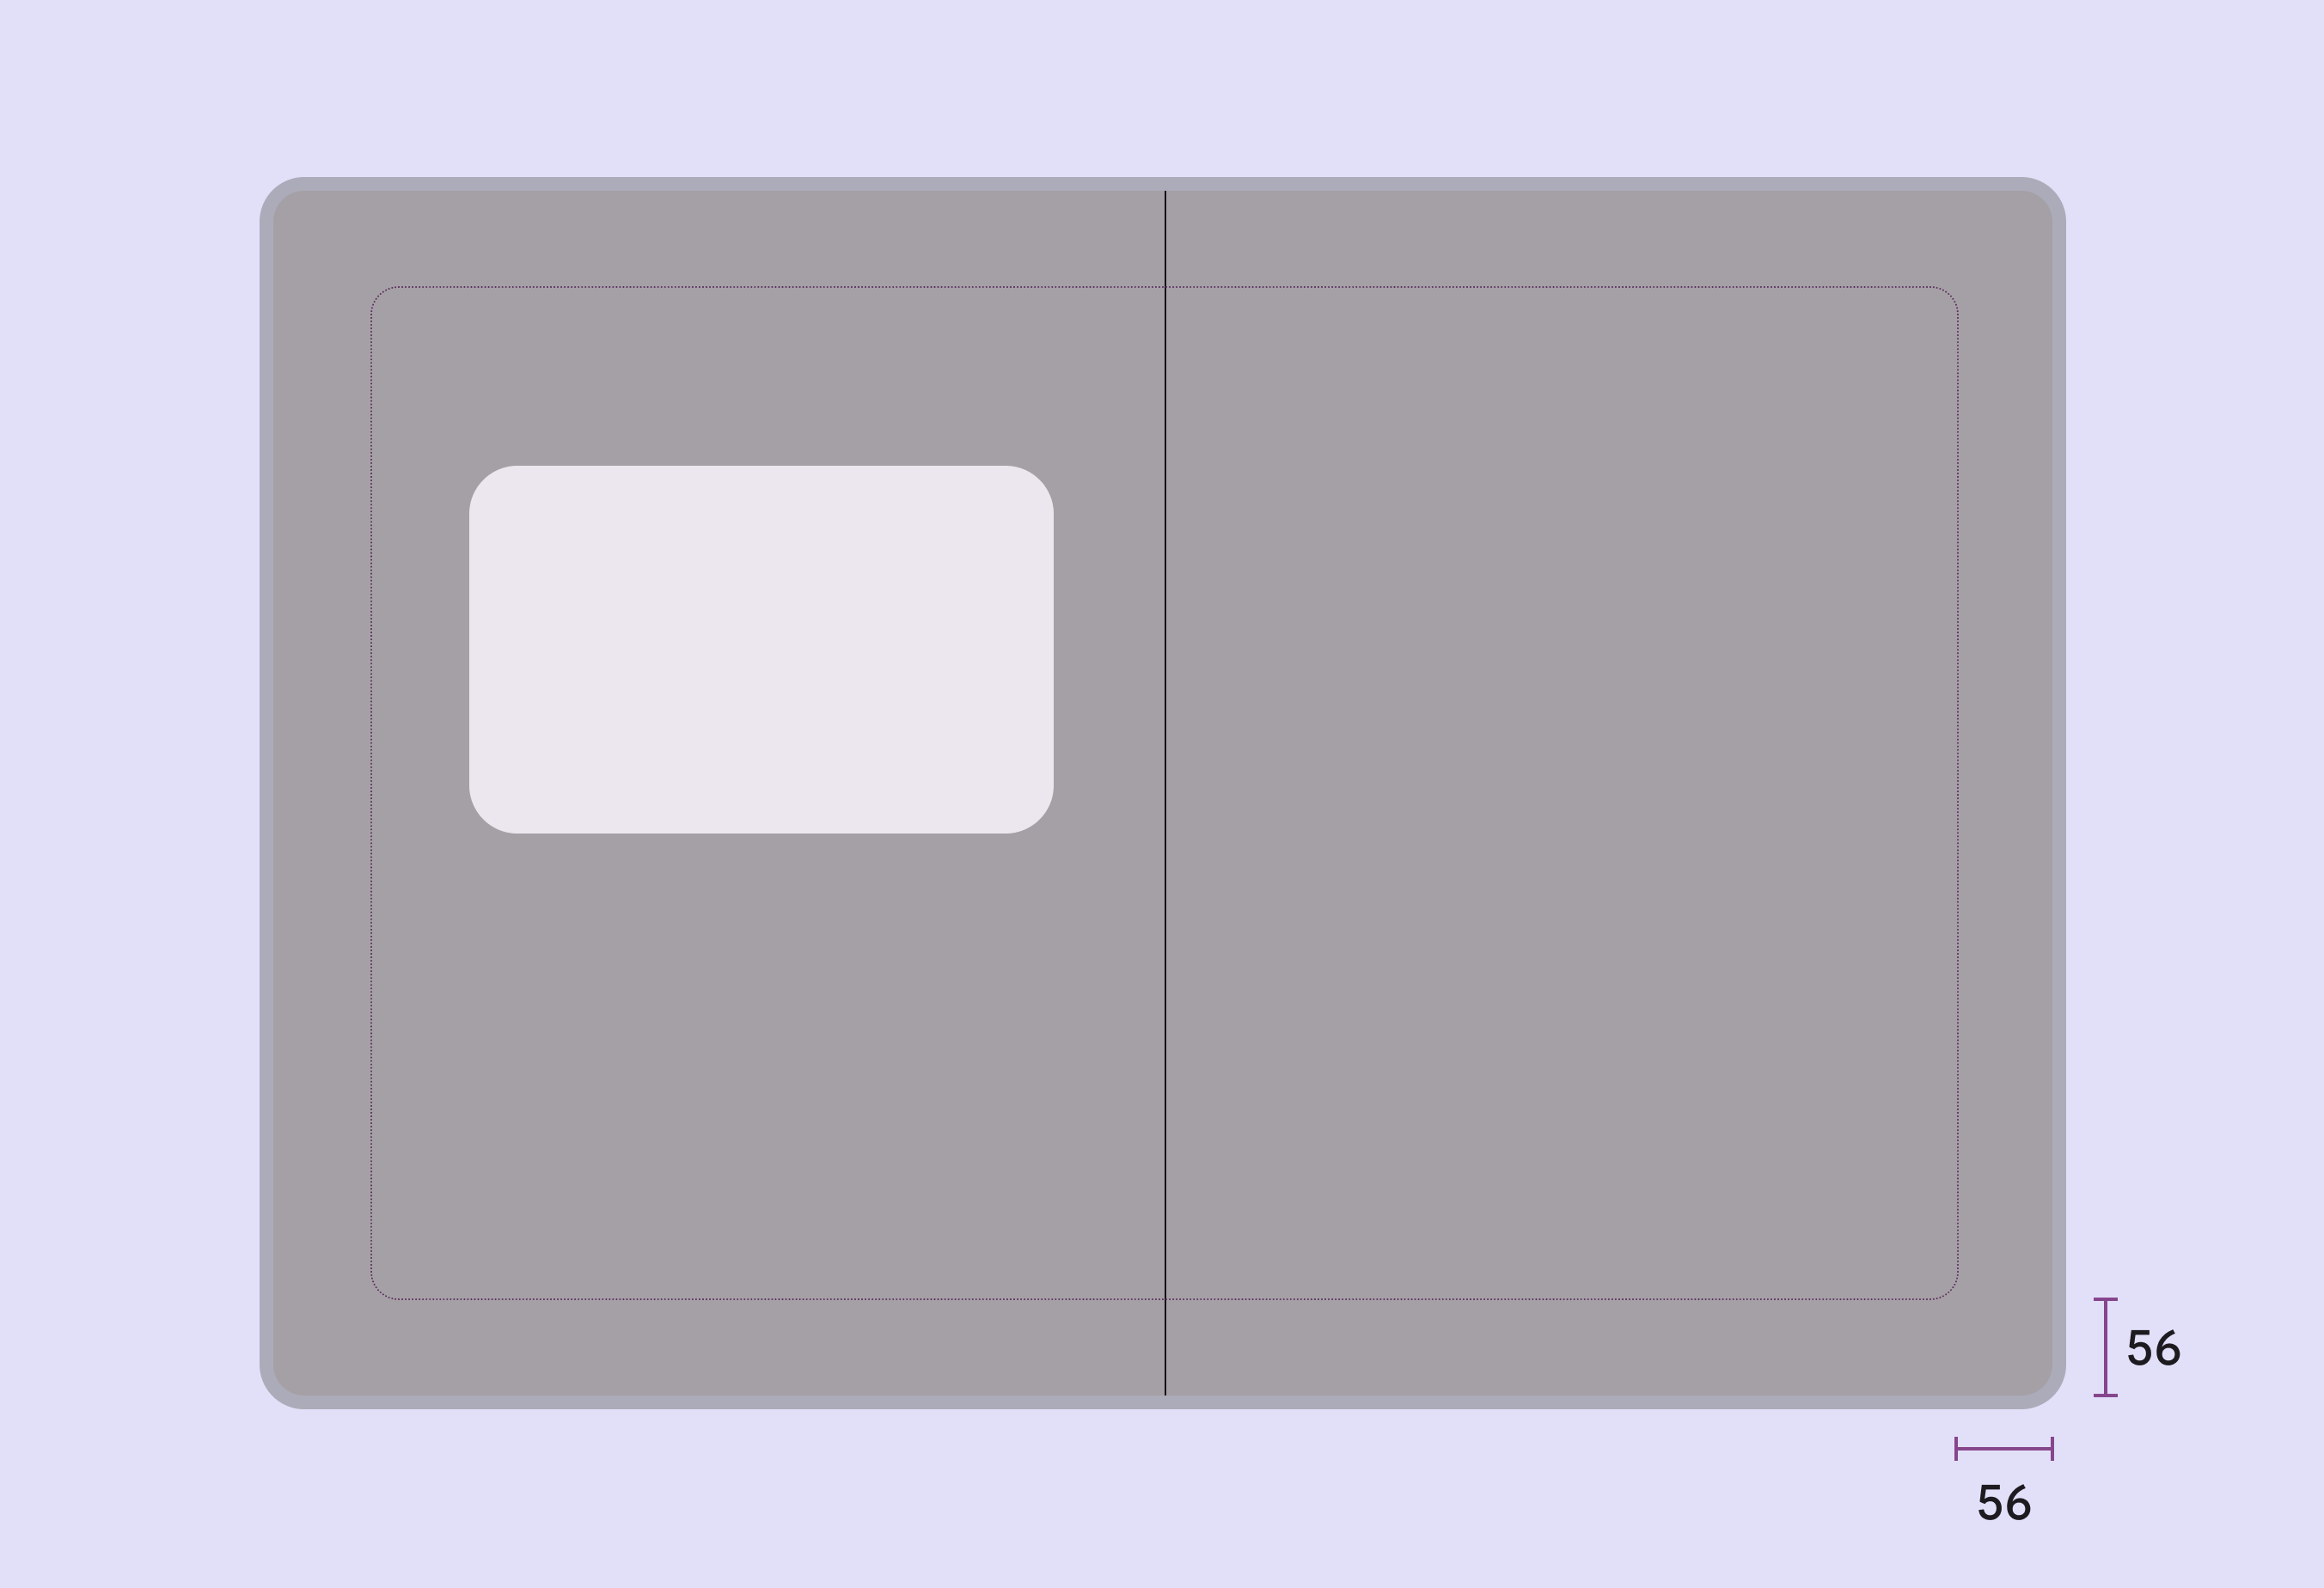
Basic dialogs can be custom-positioned anywhere on larger screens, respecting marginsMargins are the spaces between the edge of a nested element and its parent element, such as the space between a button's label text and the edge of its container.More on margins to prevent edge collision.

Basic dialog position diagram.
Custom placement area for basic dialogs that respects a 56dp margin from the edges of the screen

Behavior ​

Appearing

Dialogs appear without warning, requiring users to stop their current task. They should be used sparingly, as not every choice or setting warrants interruption.

Dialogs use an enter and exit transition pattern to appear on screen.

A dialog appears with an enter and exit transition

Position

Dialogs retain focus until dismissed or an action has been taken, such as choosing a setting. They shouldn’t be obscured by other elements or appear partially on screen, with the exception of full-screen dialogs.
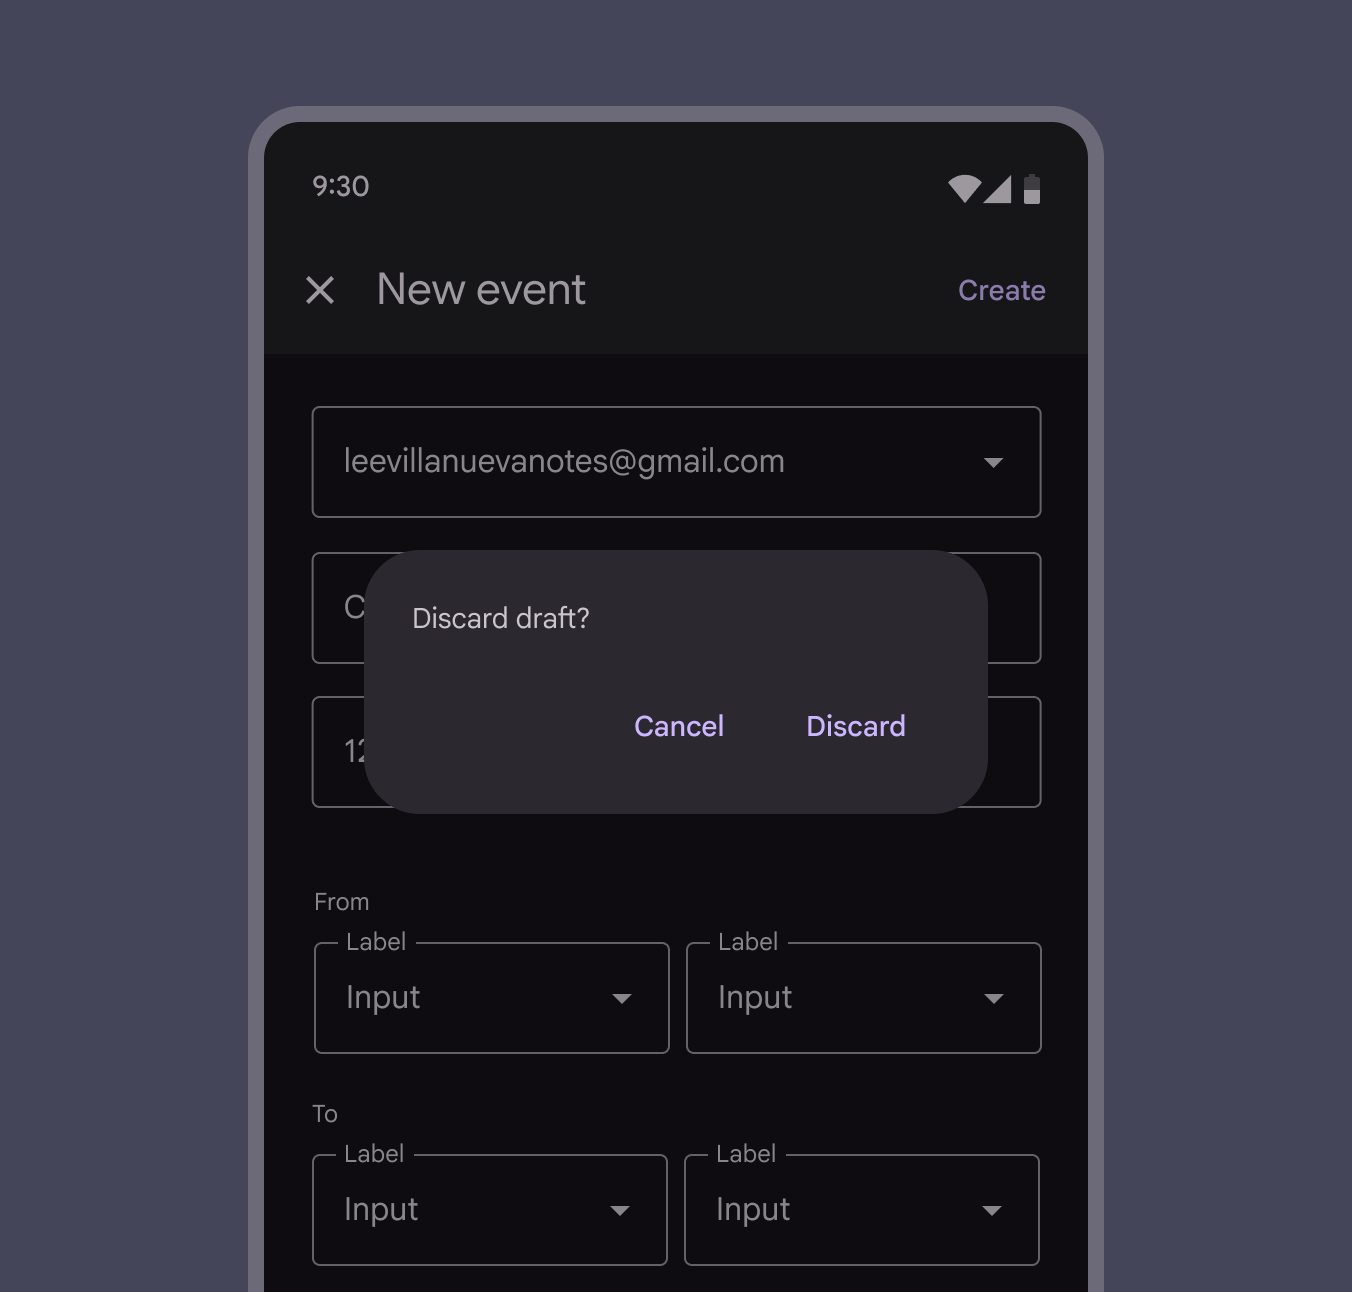
A basic dialog covering a full-screen dialog.
Dialogs shouldn’t be obscured by other elements except for full-screen dialogs

Scrolling

Most dialog content should avoid scrolling. Even when scrolling is required, the dialog title is pinned at the top, with buttonsButtons let people take action and make choices with one tap.More on buttons pinned at the bottom. This ensures selected content remains visible alongside the title and buttons, even upon scroll.

Dialogs don’t scroll with elements outside of the dialog, such as the background.

When viewing a scrollable list of options, the dialog title and buttons remain fixed
Pager
Previous pageDialogs: Specs
Next pageDialogs: Accessibility

Released under the Apache 2.0 or CC BY 4.0

Copyright © 2018-Present Google

https://m3.material.io/components/dialogs/guidelines

Released under the Apache 2.0 or CC BY 4.0

Copyright © 2018-Present Google